


31
Now mount the robot board with the four 15 mm spacers.
The threaded side of each spacer is inserted into the top plate and fastened with an M3 nut.
Do not tighten the M3 nuts too tightly as this will allow you to readjust them easily to mount the PCB without tension. Only when the board has been
fixed to the spacers with four screws M3 x 6 mm (small head diameter 5 mm), tighten the M3 nuts. In this way you can align the board cleanly.
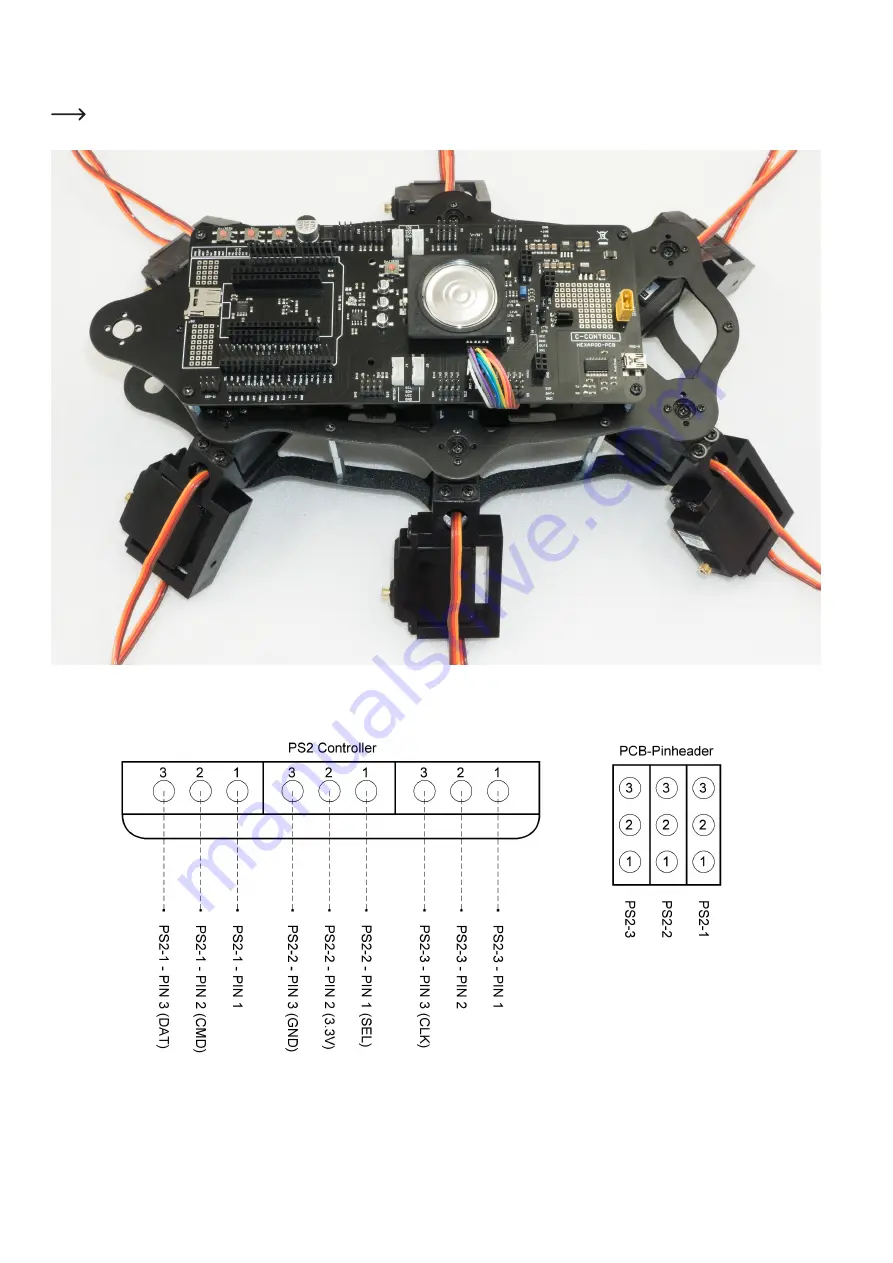
Figure 46
Figure 47 shows the pin assignment of the receiver (left) and the pin assignment of the robot board (right).
Figure 47
Содержание MF-4992453
Страница 1: ...Operating Instructions Hexapod Robobug Complete Set Item no 1664151...
Страница 23: ...23 The femur servo mount must be mounted a total of 6 times Figure 31 Figure 32...
Страница 26: ...26 Figure 37...
Страница 36: ...36 Figure 58 Figure 59...
Страница 37: ...37 Figure 60 Illustration_61 Figure 61...
Страница 38: ...38 Figure 62...
Страница 66: ...66...
Страница 67: ...67...