


29
g) Mounting the Receiver and Hexapod Robot Board
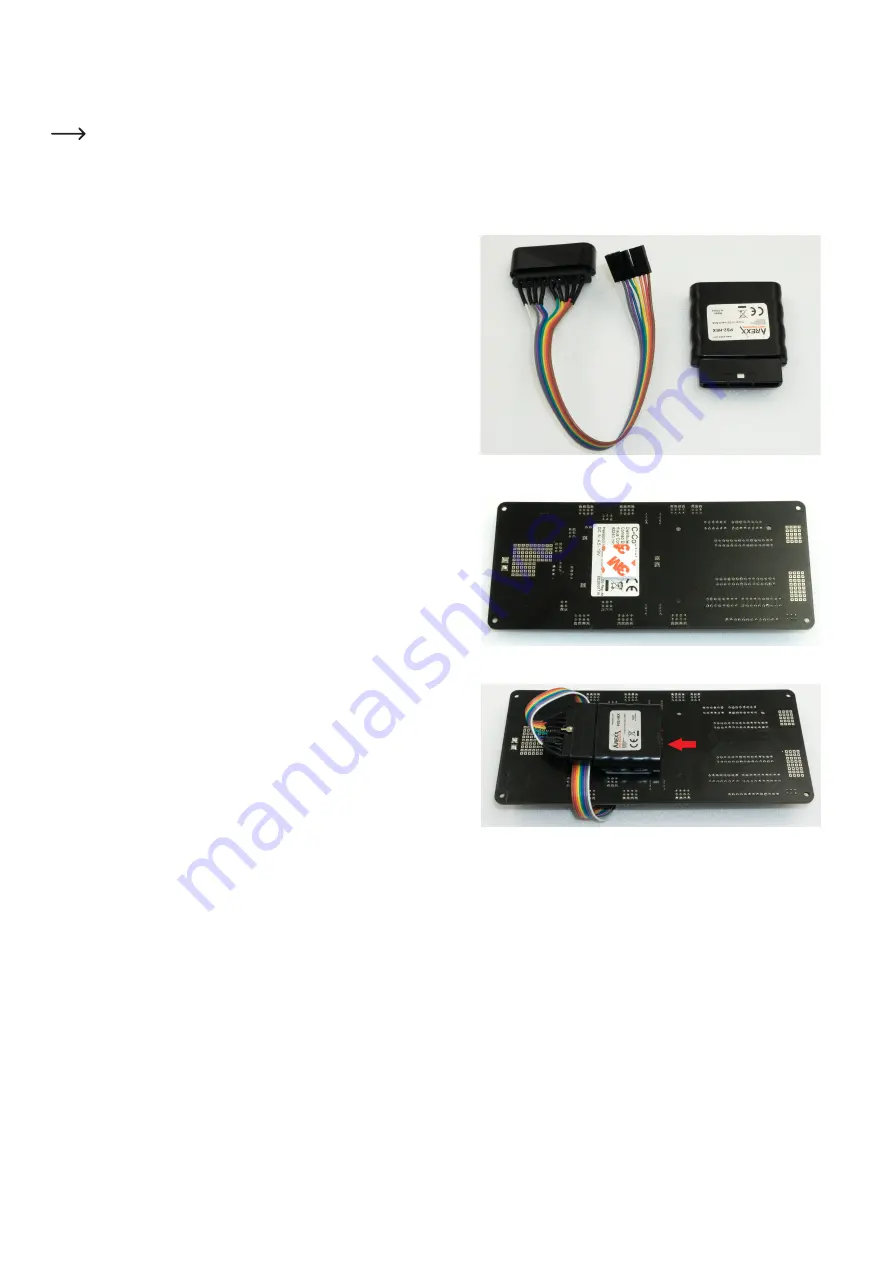
Now the radio receiver for the gamepad is connected to the robot board and mounted. The receiver is fixed to the underside of the robot board with the supplied
double-sided adhesive tape.
The receiver and the connection cable must first be connected to each other. Connect the wide receiver plug to the receiver. When connecting the
receiver to the robot board, make sure that the polarity of the connectors is correct.
Required tool:
Scissors
PH2 Phillips screwdriver
Open-end wrench SW 5.5 mm
Plug the cable into the receiver as shown in Figure 42.
The "POWER" and "RX" labels point upwards in the illustration. Use the same colour
sequence as shown in the illustration.
Shorten the double-sided adhesive tape to approx. 25 mm using scissors.
Then peel off one side of the protective film of the adhesive tape and stick this side
onto the robot board.
Now peel off the other side of the protective film and affix the receiver.
Make sure that the housing side with the two red LEDs locks with the "thick" contacts
(see arrow in the illustration) of the loudspeaker.
If the housing protrudes too far into the contacts of the loudspeaker, the housing will
press against the contacts of the loudspeaker when mounting the circuit board.
Figure 42
Figure 43
Figure 44
Содержание MF-4992453
Страница 1: ...Operating Instructions Hexapod Robobug Complete Set Item no 1664151...
Страница 23: ...23 The femur servo mount must be mounted a total of 6 times Figure 31 Figure 32...
Страница 26: ...26 Figure 37...
Страница 36: ...36 Figure 58 Figure 59...
Страница 37: ...37 Figure 60 Illustration_61 Figure 61...
Страница 38: ...38 Figure 62...
Страница 66: ...66...
Страница 67: ...67...