


56, chemin de la Flambère · 31300 Toulouse · FRANCE · T é l . 3 3 ( 0 ) 5 6 1 3 1 8 6 8 7
F a x 3 3 ( 0 ) 5 6 1 3 1 8 7 7 3 · [email protected] · www.majorcom.fr
56, chemin de la Flambère · 31300 Toulouse · FRANCE · T é l . 3 3 ( 0 ) 5 6 1 3 1 8 6 8 7
F a x 3 3 ( 0 ) 5 6 1 3 1 8 7 7 3 · [email protected] · www.majorcom.fr
4
5
AV-WALL
AV-WALL
Usermanual V1.1
Usermanual V1.1
2. AV-WALL Quick Start
2.1 Power to Start-up
To start your AV-WALL, connect the RJ45 port to an active POE device using a CAT5E/6 cable
(100Mb/s connection).
When powered, the 6 White led lights on the AV-WALL’s front face will flash and then the lights
will flash alternatively until the device is switched on.
2.2 Connect the AV-WALL to an IP/Dante network
The connection of your AV-WALL to the IP/Dante network is done via the same Ethernet
CAT5e/6/7 cable used for the power supply.
AV-WALL has a unique IP network addresses and a unique name to control Dante and AV-
WALL settings:
1. The IP address is preset by default at the factory to be set automatically using a DHCP
server or using APIPA address (169.254.xxx.xxx/16) if no DHCP server is detected by the
device. The IP address can be fixed using the Dante controller.
2. The AV-WALL name is preset at factory at “
AV-WALL
” where # is its serial number.
The Dante name of an AV-WALL can be changed by the Dante Controller.
-> AV-WALL serial number 145 has Dante name “
AV-WALL-145
” as factory preset.
3. The AV-WALL setting can be done locally via the front face rotative button of the AV- WALL
or via AVSMonitor (Software downloadable on www.auvitran.com)
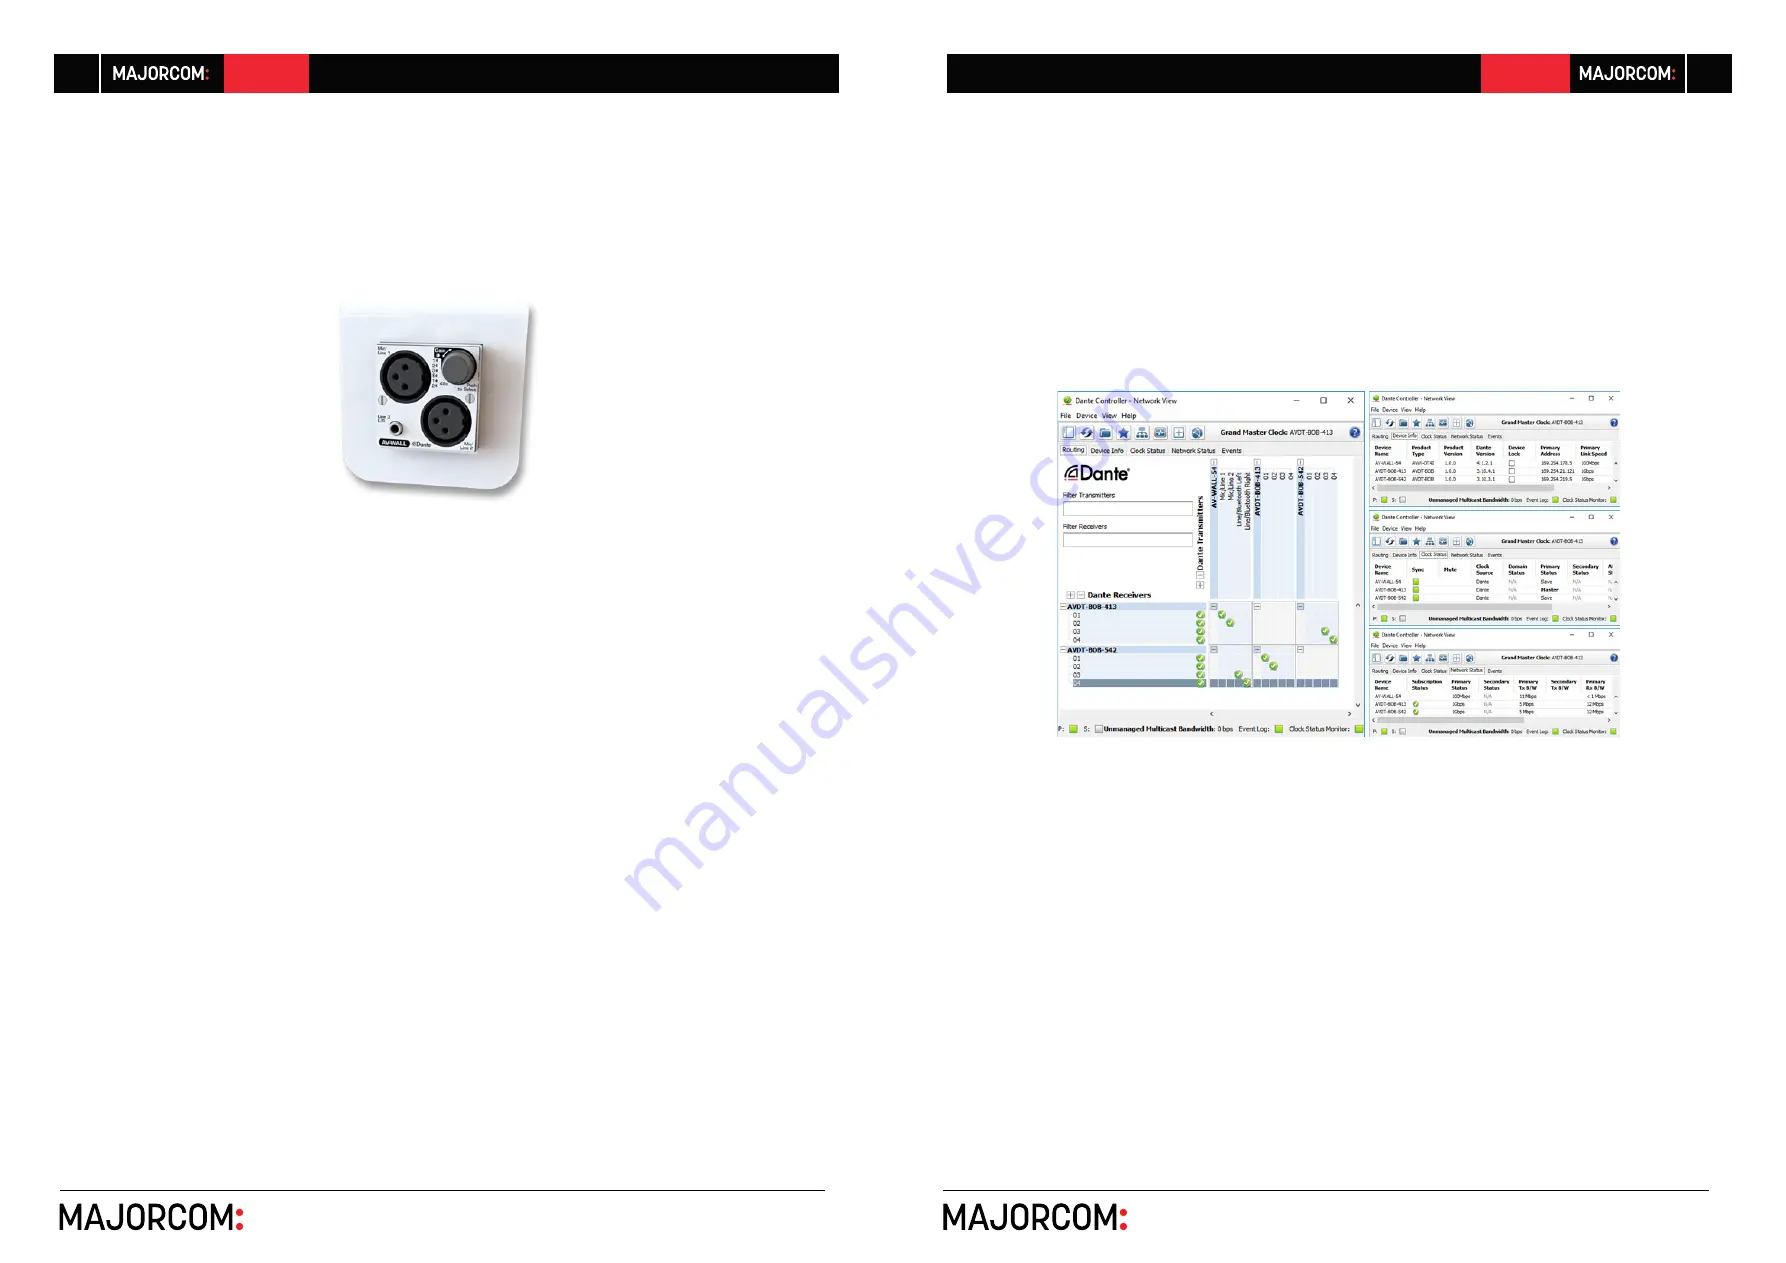
2.3 AV-WALL’s Dante settings
The AV-WALL Dante settings are done via the standard Audinate Dante Controller.
1. Download Dante Controller on the Audinate web site at the following web address:
https://www.audinate.com/products/software/dante-controller
2. Install Dante Controller by double clicking on the download file.
3. Start Dante Controller to detect your AV-WALL Dante devices and control settings.
4. To change AV-WALL name, Double click on the device label
5. Select “
Device Config
” tab in the new windows and modify the “
Rename Device
” field


