background image

3.2   REC
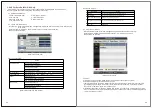
   This section is for recording flow.
   3.2.1    REC
     1. Information
         a) Input MPEG2 TS,NIM,ISO/IEC 13818-2,H.264; 
             Output MPEG2 PS packet,only contain Video and Audio PID,no Teletext,Subtitle,
             EPG etc,the output Video file format is “.MPG” and Audio file format is “.MP3”,the 
             output files can be played by other players which supports MPEG2 PS;TS packet,
             contain Video and Audio PID,Teletext,Subtitle etc,the output Video file format is “.TSV” ,
             the output files can be played by other players which supports TS
         b) The save direction for the output files: the inserted storage device (USB/Card). If user 
             wants change the output direction, he can open the partition list by pressing the button
             “Device” and make the choice. It supports 4 partitions at most;
         c) The rules of naming the output files: Program name + (REC date_time(h/m/s),eg BBC 
             ONE(20111023_123456).MPG. If a long-time recorded file takes more than 3.9GB, it 
             cuts and makes a new file named by adding an extra sequence number. eg: BBC ONE
            (20111023_123456)001.MPG.
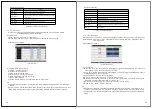
     2. Recording Flow
         a) Set up the working partition(default partition): (This step is adapt to Timeshift also)
            1) There is a Partition list shows the partitions connected to the system in Partition List 
                menu, Press KEY_GREEN to set the focus partition as default;
            2) System will set the partition which is recognized firstly as default partition before 
                record if user does not set before; 
            3) Recorded files will be stored in the default partition.
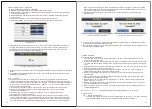
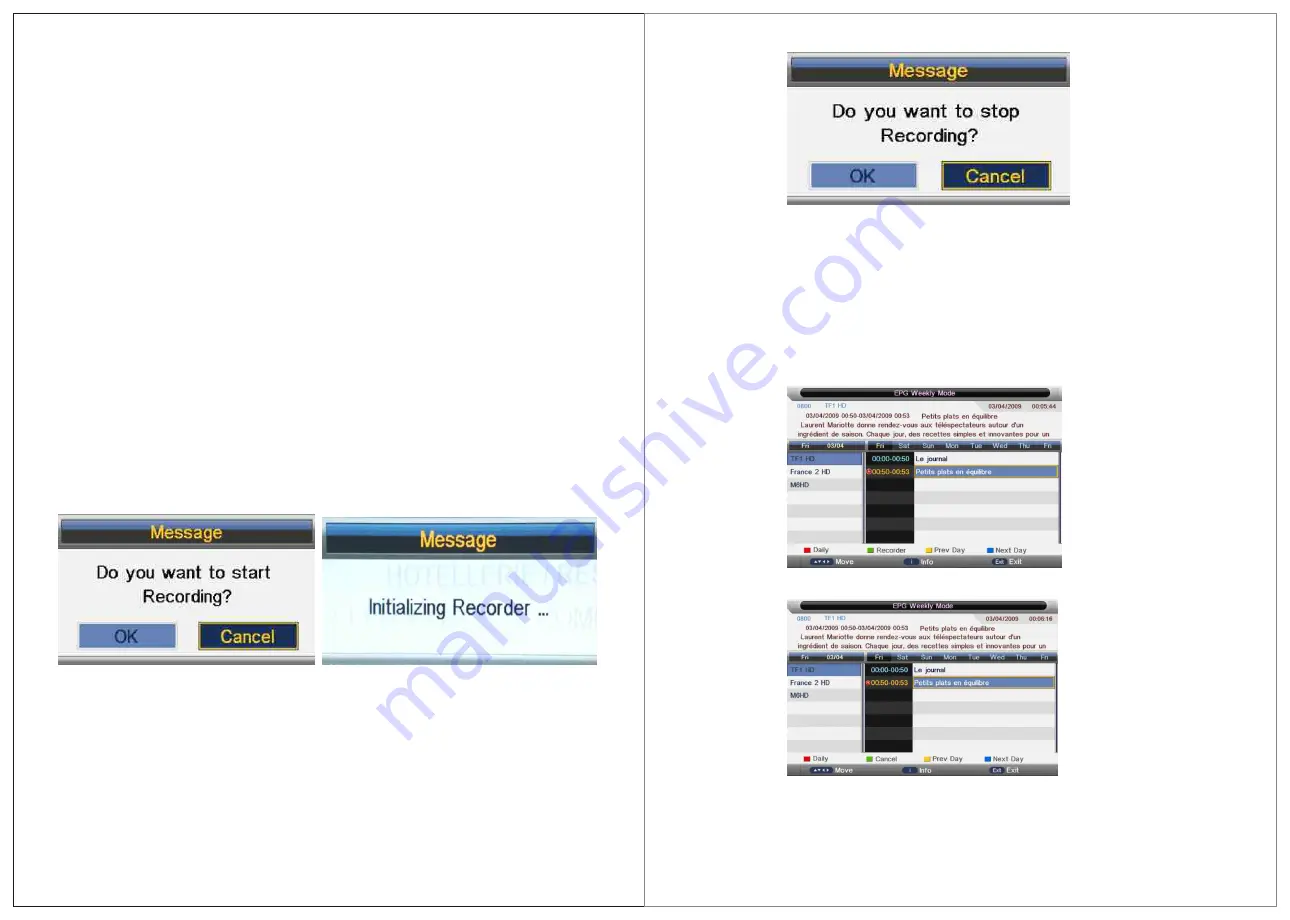
         b) Press KEY_REC to start recording, when there is a program playing, it will pop up a 
            message “Do you want to start Recording?”. After confirm, the system will read the 
            speed of the storage device. If the speed is too low for recording, there is a message 
            “Device speed not enough, RECORD anyway?” if user choose Yes, it will record 
            constrainedly. In addition, the speed is high enough, it initializes in the first instance 
            and starts to record later.

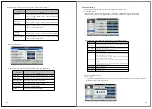
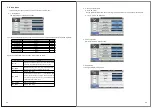
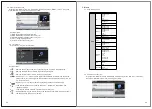
(Confirm record window)

(Initializing recorder window)

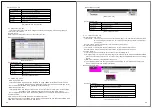
c)  As the initialization successfully ends, a REC input info menu appears on the right top 
    corner of the picture and it starts to record while the program is playing in the background;
d)  Press KEY_DISPLAY to get the current recording information from the Info Banner, such 
     as current recording time and the recording progress. The recording time depends on 
     how much of the program has been recorded actually;
e)  If the signal is not stable there may be some pause;
f )  The recording progress will stop when the device has no more free spaces if there is no 
     setting about when to end before. A warning massage pops up, the recording process 
     stops and it will keep on the normal playback process. Otherwise the progress ends 
     naturally when the timer is timeout. Also user could press KEY_STOP to end recording
     manually;
g)  System will prompt user error message and try to continue recording if there are some 
    bad tracks in disk.

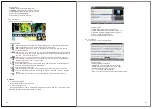
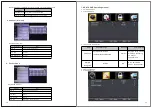
(REC info and stop recording window)

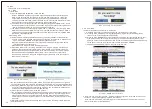
3.2.2   Timer REC
  There are two methods to set a timer. As follows:
    1.   In the EPG menu user can preengage programs for watching or recording;
       a)   Pressing KEY_GREEN once is to preengage the program only for watching(when 
            timeout, it jumps to the program and only play.
       b)   Pressing KEY_GREEN twice is to preengage the program for recording (when timeout,
            it jumps to the program and starts recording). if it is timeout in standby mode, it will 
            power on 2 minutes in advance and starts to record under background without powering 
            on the panel. To watch the program, user need to press KEY_POWER;
       c)   The preengaged programs can be checked in Timer menu.

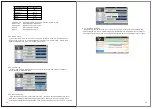
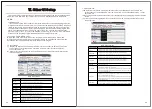
(Press KEY_GREEN once for reminder)

(Press KEY_GREEN twice for recorder)

2.   In Timer menu, user can increase

delete preengage programs; In Timer Edit menu, user 

    could set

modify preengaged programs’ information;

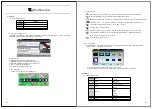
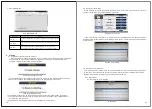
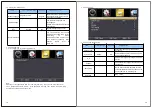
     In Timer menu: press KEY_YELLOW to get into Timer Edit menu to add a timer .Then set 
    timer’s information in Timer Edit menu.

71

70

Содержание LED222GS

Страница 1: ...USER S MANUAL LED TV INSTRUCTION MANUAL Model LED222GS ...

Страница 2: ... is required when the apparatus has been damaged in any way such as power supply cord or plug is damaged liquid has been spilled or objects have fallen into the apparatus has been exposed to rain or moisture does not operate normally or has been dropped CAUTION These servicing instructions are for use by qualified service personnel only To reduce the risk of electric shock do not perform any servi...

Страница 3: ...eep all people away from the antenna cable during electrical storms Important Safety Precautions Please immediately pull out the AC power plug from adapter if there is an abnormal sound or smell or the LED TV has sound but no picture and contact after sales support The LED TV should be kept free from rain moisture and dust to prevent electrical shock and short circuits Do not cover the ventilation...

Страница 4: ...Analog Manual Search 3 2 7 Satellite System 4 Feature menu 4 1 Feature menu 4 2 Function description 4 2 1 Lock 4 2 2 Language 4 2 3 Clock 4 2 4 Sleep Timer 4 2 5 Auto Power Off 4 2 6 Hearing impared 4 2 7 CI Info 4 2 8 PVR Timeshift 5 Setup menu 5 1 Setup menu 5 2 Function description 5 2 1 OSD Timer 5 2 2 Auto SCART 5 2 3 PC Setup 5 2 4 Blue Screen 5 2 5 Home Mode 5 2 6 Reset to Setting 5 2 7 So...

Страница 5: ...3 3 PVR For Euro DVB T2 C S2 Only 3 1 Pvr involved menus 3 1 1 PVR Timeshift menu 3 1 2 Partition List menu 3 1 3 Timer menu 3 1 4 Timer Edit menu 3 1 5 Record List menu 3 1 6 REC info menu 3 1 7 Timeshift info menu 3 2 REC 3 2 1 REC 3 2 2 Timer REC 3 2 3 Timeshift 3 3 RCE playback 3 4 Restriction 3 4 1 Device File System 3 4 2 Power Lost or Device Disconnect 4 Auto installation 5 Channel list men...

Страница 6: ...r Analog or Digital TV in ATV DTV Mode DVB T2 CATV 11 USB USB input 12 Earphone Connecting for headphone 13 MINI YPbPr Connecting for the Y Pb Pr Input in Component mode 14 MINI AV Connecting for VIDEO signal input in Composite mode 15 CI Used to insert the CI card 15 1 TV Controls 3 TV Inputs Outputs Ⅱ Important safety Instruction 2 Installation Wall mounting NOTE 9 8 DC 1 14 this button can not ...

Страница 7: ...Pr INPUT Video component input Use the SOURCE button on the remote control to select YPbPr Ⅲ Systems Connection 11 10 SCART HDMI 2 MMMI HDMI 1 ARC USA TV Satellite Euro TV CI MINI YPbPr DC Earphone VGA and PC Audio Cable not included PC Use the SOURCE button to select PC HDMI Cable Not included SCART HDMI 2 MMMI HDMI 1 ARC USA TV Satellite Euro TV CI MINI YPbPr DC Earphone SCART HDMI 2 MMMI HDMI 1...

Страница 8: ...ou to connect your Android or iOS phone or Tablet to display the mobile device on the TV Screen SCART Cable Not Included USB Memory Stick not Included HDMI Cable and Adaptor to Phone and Tablet Not Included SCART HDMI 2 MMMI HDMI 1 ARC USA TV Satellite Euro TV CI MINI YPbPr DC Earphone SCART HDMI 2 MMMI HDMI 1 ARC USA TV Satellite Euro TV CI MINI YPbPr DC Earphone SCART HDMI 2 MMMI HDMI 1 ARC USA ...

Страница 9: ...27 28 25 30 31 32 33 34 35 36 37 29 31 34 32 33 35 36 37 38 39 40 41 42 43 44 45 46 47 48 49 50 51 52 53 54 Press this button to go to desired position 18 19 17 POWER MUTE 0 9 SLEEP P MODE S MODE ASPECT DISPLAY SOURCE MENU EXIT OK R DELETE D MENU G RENAME SETUP Y MOVE B SKIP D SISP FAV EPG TEXT TIME SHIFT REC MENU SUBTITLE REVEAL Ⅳ Remote Control unit 15 14 ...

Страница 10: ...elect the input source you want to watch Press ENTER button to enter the input source INPUT Euro TV Analog ATV HDMI 1 SCART AV Euro TV Digital DTV YPbPr HDMI 2 USA TV PC Media Section P icture Men u I tem s Valu e Defau lt 1 2 1 Picture Mode Standard Mild Dynamic User Standard 1 2 2 Brightness 0 100 50 1 2 3 Contrast 0 100 50 1 2 4 Sharpness 0 100 50 1 2 5 Colour 0 100 50 1 2 6 Tint 0 100 50 1 2 7...

Страница 11: ... then back to Picture menu Exit Main Menu Key Action KEY_LEFT KEY_RIGHT KEY_OK KEY_MENU KEY_EXIT 1 2 2 Brightness 1 The overall brightness level of the picture the higher the brighter 2 Key Operation Key Stroke Action KEY_UP Enter backlight adjusting KEY_DOWN Enter contrast adjusting KEY_LEFT Decrease the value of brightness minimum value is 0 KEY_RIGHT Increase the value of brightness maximum val...

Страница 12: ...colour adjusting KEY_DOWN Enter backlight adjusting KEY_LEFT Decrease the value of tint minimum value is 0 KEY_RIGHT Increase the value of tint maximum value is 100 KEY_OK Close adjust menu and back to Picture Menu KEY_MENU Close adjust menu and back to Picture Menu KEY_EXIT Exit Main Menu 1 2 7 Colour Temperature 1 Color temperature adjusting There are three choices standard warm cool 2 Key Opera...

Страница 13: ...peration if it s off From Low Middle High noise reduction effects better but it will cause a blur on picture 2 Key Operation Key Stroke Action KEY_UP Highlight the previous sub item If it is the first button currently then highlight the last one in the list Adjust the current value and save it momentarily KEY_DOWN Highlight the next sub item If it is the last button in the list currently then high...

Страница 14: ...save it momentarily KEY_DOWN Highlight the next sub item If it is the last button in the list currently then highlight the first one Adjust the current value and save it momentarily KEY_LEFT The current focused value will be selected and popup menu will be cleaned then back to Sound menu KEY_RIGHT The current focused value will be selected and popup menu will be cleaned then back to Sound menu KEY...

Страница 15: ...and save it momentarily KEY_LEFT The current focused value will be selected and popup menu will be cleaned then back to Sound menu KEY_RIGHT The current focused value will be selected and popup menu will be cleaned then back to Sound menu KEY_OK The current focused value will be selected and popup menu will be cleaned then back to Sound menu KEY_MENU The current focused value will be selected and ...

Страница 16: ...ction KEY_LEFT The current focused value will be selected and popup menu will be cleaned then back to Sound menu KEY_RIGHT It will enter sub menu to swith the mode of Audio Description KEY_OK It will enter sub menu to swith the mode of Audio Description KEY_MENU The current focused value will be selected and popup menu will be cleaned then back to Sound menu KEY_EXIT Exit Main Menu 1 Switch for Au...

Страница 17: ... operation user interface in ATV DTV Radio Source as follows There are following functions in this page Channel Management To manage Delete Rename Swap Lock Skip all channels Favorite Management To manage Add Delete Favorite channels Country To select country TV connection To select the DTV signal mode Air Cable Satellite Auto Search To select auto search mode All Digital Analogue Digital Manual S...

Страница 18: ...enu will be cleaned then back to Channel menu KEY_OK The current focused value will be selected and popup menu will be cleaned then back to Channel menu KEY_MENU The current focused value will be selected and popup menu will be cleaned then back to Channel menu 3 2 4 Auto Search 3 2 4 1 Air signal mode Select Auto Search item to enter auto search user operation interface as following All Mode Sele...

Страница 19: ... enter air channel manual search in DTV source and the user operation interface as following Select channel number by RIGHT key or entering number directly The strength and the quality shows at the bottom Press ENTER key on Start item to start current channel search The manual searching UI and the auto searching UI are the same 3 2 5 2 Cable signal mode Select channel number by RIGHT key or enteri...

Страница 20: ...to fine tune current channel and the UI shows as the last picture Press Left Right key to fine tune current channel Press MENU key to return to Channel Analogue Manual Search page and press RED key to save the tuned channel to database 3 2 7 Satellite System Select Satellite System item to enter the satellite system setting menu and the user operation interface as following 3 2 7 1 Satellite List ...

Страница 21: ...list KEY_ENTER Select unselect cursor item Transponder KEY_MENU Back to Satellite list KEY_EXIT Exit Main Menu KEY_RED Enter Transponder Add menu KEY_GREEN Enter Transponder Edit menu KEY_YELLOW Enter Transponder Delete confirm menu KEY_BLUE Enter Transponder scan menu Transponder Add menu Operations in Transponder Add menu are shown in the following table Option Value Transponder Current edit ite...

Страница 22: ... 75 0 1 0 7 50 0 5 15 0 0 57 50 5 1 50 5 7 5 0 0 9 7 50 1 0 60 0 1 0 7 50 1 1 30 0 1 1 4 75 U ser Sin g le U ser Du al LNB Po w er On Off 2 2 KHz Au to o ff o n Dis E qC Mo de O ff LNB1 LNB2 LNB3 LNB4 Bu rs t A Bu rs t B Mo tor No ne Dis Eq C1 2 Dis Eq C1 3 Choose DisEqC1 2 1 3 Set Limit menu Operations in Limit menu are shown in the following table Option Valu e Move Continue Control polar axis c...

Страница 23: ... This chapter will describe the function of Feature in mainmenu 4 1 Feature Menu Press Menu Down Down Down Right and then functions in the Sound can be set The appearance of the Feature Menu is shown as follows Operations in Feature Menu are shown in the following table Key Stroke Action KEY_UP Highlight the previous sub item If it is the first button currently then highlight the last one in the l...

Страница 24: ...KEY_EXIT KEY_LEFT Cancel pin code change action and back to Child Lock Menu 4 2 2 Language System language setting includes OSD Language Preferred Subtitle Preferred Audio Digital Teletext Language Anglog Teletext Language Opt ion Valu e OSD Language English Italian Spanish Portuguese French German Preferred Subtitle English French German Italian Spanish Portuguese Danish Czech Dutch Finnish Swedi...

Страница 25: ...Running start Auto Power Off function by setting Auto Power Off Timer in any case This function allows you to power off the TV within a period of time Currently the supported time period are Off 1 Hours 2 Hours 4 Hours 4 2 6 Hearing impared This function offers a subtitle such as a stroke on the door or the bell starts to ring for the current scene in case that the user is weak in hearing 4 2 7 CI...

Страница 26: ...light the previous sub item If it is the first button currently then highlight the last one in the list KEY_DOWN Highlight the next sub item If it is the last button in the list currently then highlight the first one KEY_LEFT Back to Main Menu KEY_RIGHT If the cursor is on OSD Timer Auto SCART Blue Screen Home Mode a popup menu will appear for user to make further choice If not Setup Menu will be ...

Страница 27: ...ll show blue screen 5 2 5 Home Mode Set up mode of Home Mode which can control the backlight The optional modes are Home Dynamic Standard Mild 5 2 6 Reset to Setting If the Lock Channel is On in Feature Menu Lock it needs to enter the password to enter the Reset It will Reset System Setting and Database When the reset is complete it will enter the Auto Installation settings page First it will show...

Страница 28: ... STOP key on remote to stop sliding show and return to the file browser 4 Same as key on remote to play the previous or next file directly 5 To rotate the playing picture 0 º 90 º 180 º 270º 6 To zoom the playing picture 7 Same as INFO key on remote to display the information of the current file 8 To enter Photo Setup menu including Repeat Mode Background Music Music Source Slide Time Effect 9 To ...

Страница 29: ...creen 5 Same as key on remote to play the previous or next file directly 6 To switch the repeat mode including Repeat 1 Repeat All Repeat Dir and Random modes 7 To switch the window between Information and Play List 8 Same as BLUE key on remote to close the panel only in MUSIC mode and then it can be opened by every key on remote 3 Movie 3 1 Format Supported Type Container Video Decoder MOVIE AVI ...

Страница 30: ... set AB repeat the first press sets A point and the second press sets B point and then play between A and B repeatedly 9 To enter the play list menu 10 Same as INFO key on remote to display the information of the current file 11 To enter Movie Setup menu including Program Subtitle Audio Repeat Mode 12 To enter GO TO function user can input the time he want to start directly 4 eBook 4 1 Format Supp...

Страница 31: ...ides mainmenu such as EPG CI Setup Recorder Timeshift Playback and Auto Installation 1 EPG 1 1EPG abstract If you expect to know the schedule or the information of the current playing program or the program that starts in the near future you can refer to the EPG menu by pressing the button EPG on the remote It shows the date and time on the top right of the menu the list of the current available c...

Страница 32: ...nitializing message The scramble channel can be accessible only under both of the following two conditions 1 the CA system ID of the selected scramble channel corresponds to the CAM and Smart Card that the user inserted 2 the Smart Card belonging to the user is released after subscription 2 2 Getting CI Information When the CAM is in good connection with the system enter main menu Feature CI Info ...

Страница 33: ...User can change PIN code through operation on this sub item as the following picture shows Change PIN code 2 3 6 System Information System information means information about CAM such as software hardware version System information 2 3 7 Language Setting Language setting menu shows all the OSD languages the CAM supports After selection on some language all the strings are turned into the selected ...

Страница 34: ...nu manages the partitions connected to system Enter method PVR Timeshift menu Partition Select Partition List menu Menu shows as follows Partition List menu Function a Partitions The list in the menu shows the partitions connected to system b Partitions property Total size and Free size c Format Partition Press KEY_RED to format the focus partition Before format there is a prompted popup window to...

Страница 35: ...rd list KEY_DOWN Focus on the next option on the record list KEY_RED Delete the chosen program KEY_GREEN Delete all the programs KEY_YELLOW Add recording program Enter Timer Edit menu KEY_BLUE KEY_ENTER Edit the chosen recording program Enter Timer Edit menu KEY_MENU Return to the previous menu s focus PVR Timeshift menu Timer option KEY_ Exit Exit all menus Timer menu Key Stroke 3 1 4 Timer Edit ...

Страница 36: ... time minus REC start time b Progress bar is for current REC length compared with the disk free space when REC start c MB Free is the disk instantaneous free space Menu shows as follows REC info menu Key Stroke in menu Key Stroke Action KEY_PAUSE Start or pause recording KEY_DISPLAY Enter banner info menu KEY_STOP Stop REC REC info Key Stroke 3 1 7 Timeshift info menu Timeshift input info menu Inf...

Страница 37: ...s in the first instance and starts to record later Confirm record window Initializing recorder window c As the initialization successfully ends a REC input info menu appears on the right top corner of the picture and it starts to record while the program is playing in the background d Press KEY_DISPLAY to get the current recording information from the Info Banner such as current recording time and...

Страница 38: ...make decision whether to go on If timeshift is force to take place there may be some pause or mosaic Otherwise the speed is enough for Timeshift it ll take place under background and users are able to pause or move fast backward After a pause users are able to pause or move fast backward 4 After Automatically Timeshift it will take some minutes to initialize then it take place automatically Timesh...

Страница 39: ...at present However it can not sure that all kinds of them could record or write into the storage very smoothly especially when the file system is in disorder If users are opt to use a USB flashdisk as the storage media it is recommended to format the disk before us 10 It will take a brief test on the speed of the USB device and then show a warning message when the speed is not enough 3 4 2 Power L...

Страница 40: ... mode menu 6 Fav list menu Key Stroke in menu Key Stroke Action KEY_UP Focus on the previous item program KEY_DOWN Focus on the next item program KEY_MENU Exit menu KEY_FAV_LIST Exit menu KEY_RED Show Rename Fav list name menu 77 76 7 USA TV OSD Operating manual 7 1 Time submenu 7 1 1 Appearance 7 1 2 Function introduction Item Variablerange Default Explanation Time Zone Pacific Alaska Hawaii East...

Страница 41: ...3 5 7 3 Lock submenu 7 3 1 Prompt menu for entering password Note Input the correct password with four number from 0 9 then you can enter next level menu default password 0000 If the password is wrong then there will be prompting information in the middle of the menu 7 3 2 Lock menu 7 3 3 Function explanation Item Variablerange Default Explanation Change Lock Enterthemenufor userto definethe passw...

Страница 42: ...vorite UserdefineshisFavchannel before searching it is greyand can tbeused Show Hi de Userdefinesthechannelsneedto skip beforesearching it is greyand can tbe used Channel No Among all the channels searched Channel Label Enterthemenuofthe channel definedby user DTVSignal Dynamicdisplaytheintensityof DTV signal itis alwaysgreyandcan tbe selected Ⅷ Built in DVD Player Operation ...

Страница 43: ...82 83 ...

Страница 44: ...85 84 ...

Страница 45: ...x Troubleshooting 87 86 ...

Страница 46: ...Should you encounter any problems that cannot be easily addressed within this instruction manual please feel free to contact us at these locations Australia Int l Head Office 073 102 3575 New Zealand 09 415 6936 USA 561 459 1900 All other countries please email support majestic global com Feel free to visit our website for more updated specifications or technical support www majestic global com LE...

Отзывы: