VL-VLP IM 19 JUNE 2017 © 2017 NOVATEC, Inc. All Rights Reserved
Page 9
5-
LOADER INSTALLATION
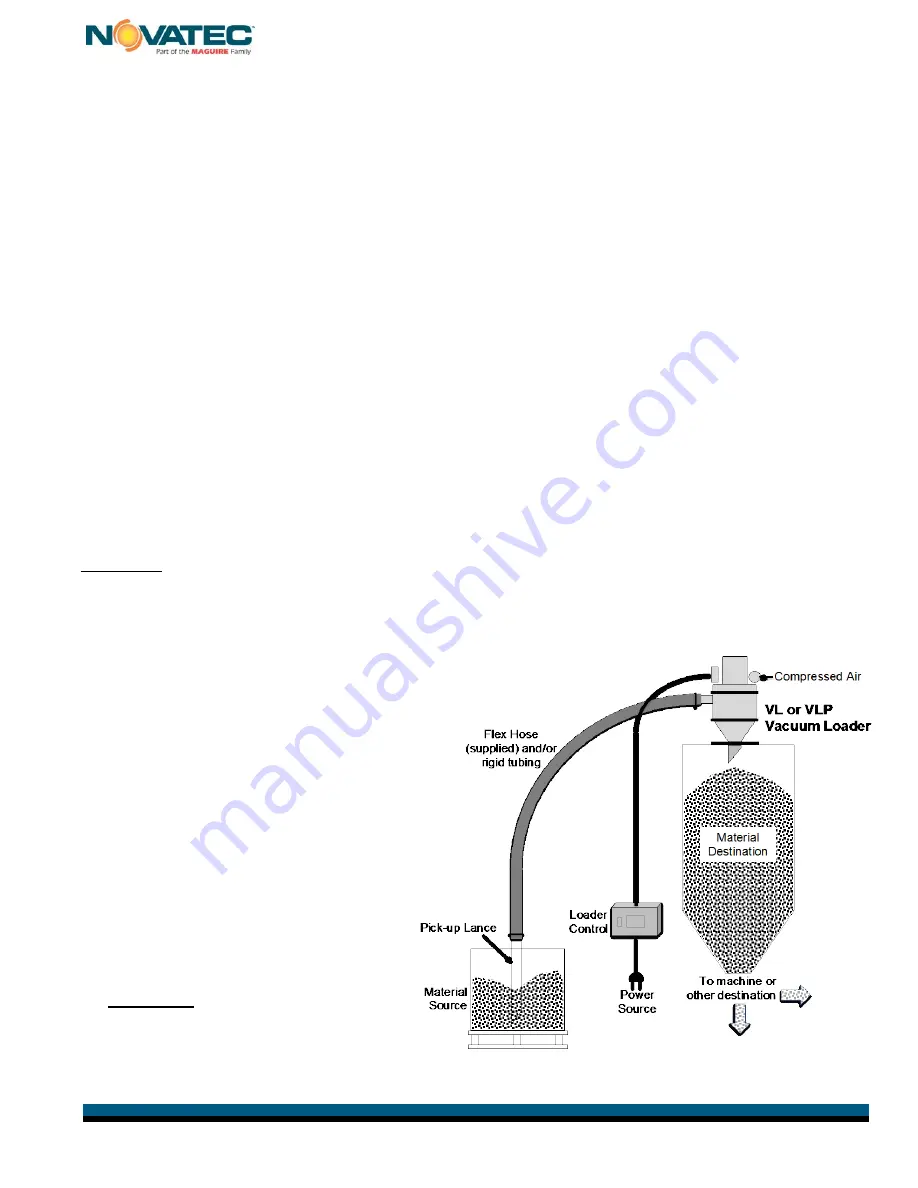
Mount the loader body to the hopper lid, positioning it so that the material inlet is directed
towards the material pick up point. Make sure the dump valve flapper plate has enough
room to freely operate. Secure the loader to the hopper lid with captive bolts or clamps to
ensure a safe installation with no chance of hardware vibrating loose.
On machine mounted units, the bottom flange is usually supplied undrilled to allow a range
of mounting patterns and hardware choices. A gasket is used to provide a tight seal
between the loader base and the machine throat.
Ensure a tight seal when securing the loader to the hopper or machine. This is particularly
important for VLP units that will be conveying powder. The conveying line should be
horizontal and/or vertical, using a 90 degree radius bend for directional changes, and it
should be as direct as possible with no slope. All line connections should be vacuum tight.
Rigid conveying tubing should be properly supported by the installer to provide a safe and
secure installation. Use flexible material handling hose to connect the material pick-up lance
or vacuum take-off box to the conveying line. The flexible hose should be only as long as
needed, since excess hose will reduce loader efficiency.
Connect a clean, dry compressed air supply line to the filter on the accumulator tank. The
minimum requirement for effective filter cleaning is 80 PSI.
CAUTION:
1. DO NOT EXCEED 125 PSI. COMPRESSED AIR.
2. PROPER SUPPORT OF ALL CONVEYING LINES AND A SECURE MOUNTING OF
THE HOPPER LOADER IS NECESSARY FOR A SAFE INSTALLATION.
5.1 CONTROL INSTALLATION
The VL/VLP control box may be
mounted in a location that is convenient
for the operator, making sure that the
control cable will extend to the junction
box on the lid of the hopper loader.
The power and connections cables
should be carefully routed away from
hot components or surfaces and away
from high voltage lines that may
produce undesirable electrical noise.
Connect the control to the power source
as required by the nameplate located
on the side of the loader control box.
CAUTION: FOLLOW ALL
NATIONAL and LOCAL
ELECTRICAL CODES.


