background image

Display (cont’d)  4

1

Instructions continued from previous page

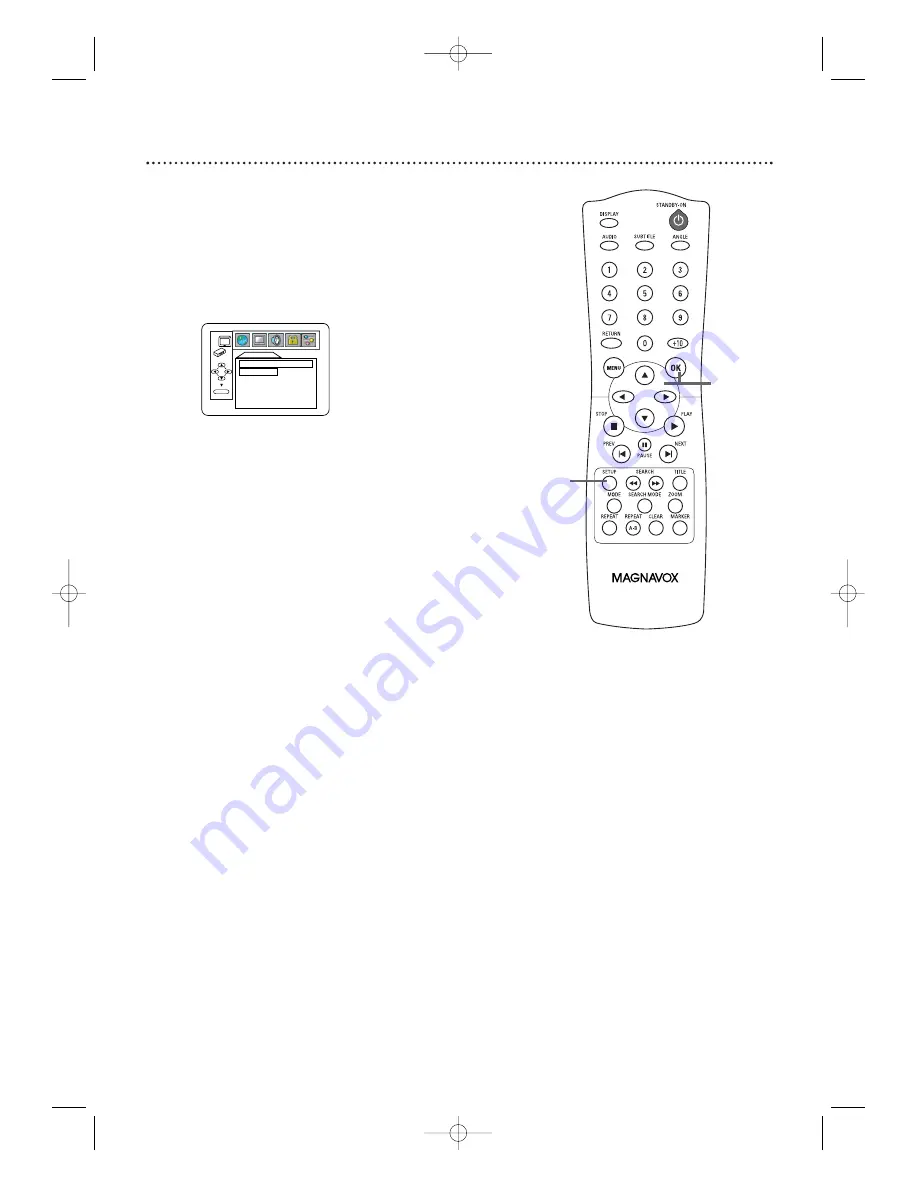
If you selected STILL MODE, press 

K

or 

L

to select a

setting, then press OK.

This determines the quality of an

image in still mode.AUTO is the default setting.
If you select FIELD, still images will be stabilized but
coarse due to the small amount of data.
If you select FRAME, the images will be highly defined due
to the simultaneous output of two fields.

5

Press SETUP to remove the menu.

DISPLAY

AUTO        
FIELD         
FRAME  

OK

STILL MODE

5

4

STILL MODE

E6170UD_EN_QX4_1217  12/17/04  5:44 PM  Page 41

Содержание MDV456 - Purchased

Страница 1: ...GUIDE AND OR OWNER S MANUAL FIRST FOR QUICK TIPS THAT MAKE USING YOUR MAGNAVOX PRODUCT MORE ENJOYABLE IF YOU HAVE READ YOUR INSTRUCTIONS AND STILL NEED ASSISTANCE YOU MAY ACCESS OUR ONLINE HELP AT WWW MAGNAVOX COM OR CALL 1 800 705 2000 WHILE WITH YOUR PRODUCT E6170UD_EN_QX4_1217 12 17 04 5 44 PM Page 1 ...

Страница 2: ...ks in the industry What s more your purchase guaran tees you ll receive all the information and special offers for which you qualify plus easy access to acces sories from our convenient home shopping network Most importantly you can count on our uncompro mising commitment to your total satisfaction All of this is our way of saying welcome and thanks for investing in a MAGNAVOX product P S To get t...

Страница 3: ...ful interference to radio or television reception which can be determined by turning the equipment off and on the user is encouraged to try to correct the interference by one or more of the following measures 1 Reorient or relocate the receiving antenna 2 Increase the separation between the equipment and the receiver 3 Connect the equipment into an outlet on a circuit different from that to which ...

Страница 4: ...r or sold with the apparatus When a cart is used use caution when moving the cart apparatus combination to avoid injury from tip over 13 Unplug this apparatus during lightning storms or when unused for long periods of time 14 Refer all servicing to qualified service personnel Servicing is required when the apparatus has been damaged in any way such as power supply cord or plug is damaged liquid has...

Страница 5: ...24 Track Playback 25 Title Chapter Playback Time Playback 26 Repeat Playback A B Repeat 27 Program Playback 28 Random Playback 29 MP3 JPEG Playback 30 31 Audio Language Stereo Sound 32 Markers 33 Subtitles Camera Angles 34 On Screen Displays 35 36 DVD Player Setup and Features Black Level Virtual Surround 37 Language 38 39 Display 40 41 Progressive Scan 42 Audio 43 Parental Levels 44 Parental Pass...

Страница 6: ...the Player s Setup menu to set features of the DVD Player or the Disc Access the Setup menu by pressing SETUP on the remote when Disc playback is stopped Even if a feature is set in the Player s menu it may not be available if the current Disc does not include that feature Available Disc Features All the features described in this manual may not be available on every Disc If the feature is not ava...

Страница 7: ...DVD in this Player The number inside the globe refers to a region of the world Region 1 represents the United States Canada upper regions of North America Bermuda the U S Virgin Islands and small regions near Australia A Disc encoded in a specific region format can only play on DVD Players with the same region code For example if a Disc is labeled for Region 2 you cannot play the DVD on this Playe...

Страница 8: ... contain materials that can be recycled and reused Specialized companies can recycle your product to increase the amount that needs to be properly disposed Your product uses batteries that should not be thrown away when depleted but should be disposed of as small chemical waste Please find out about the local regulations on disposal of your old product batteries and packaging whenever you replace ...

Страница 9: ... only an RF style jack labeled Antenna In or 75 ohm you need an RF modulator to connect the Player to the TV Contact Magnavox for details or availability A DVD picture still exceeds the quality of videotapes and other analog recordings Details are on page 10 Digital audio provides the clearest sound Connect the Player s COAXIAL DIGITAL AUDIO OUT jack to your Stereo for the best sound Details are o...

Страница 10: ...jack may be labeled differently among different brands Refer to the instructions provided with your RF modulator Connect the other end of the same RF coaxial cable to the ANTENNA IN or RF IN jack on your Television 5 Your RF Modulator should have a Channel 3 4 switch The setting of this switch determines the TV channel on which you will watch materials playing on the DVD Player Set the RF Modulato...

Страница 11: ...tlet Turn on the TV and set it to the Audio Video In channel This channel may be labeled A V or Audio Video Aux or Auxiliary EXT or External etc This channel is usually near channel zero or your TV s remote control may have a button or switch that lets you select the Video In channel Or go to your lowest TV channel 01 or 02 and change channels downward until you find the Video In channel If you ca...

Страница 12: ... 3 Connect the TV s power cord to a power outlet Turn on the TV and set it to the S VIDEO IN channel This channel may be near channel zero or your TV s remote control may have a button or switch that lets you select the S Video In channel Or go to your lowest TV channel 01 or 02 and change channels downward until you find the S Video In channel If you cannot find the S Video In channel check your ...

Страница 13: ... lowest TV channel 01 or 02 and change channels downward until you find the Component Video In channel Or your TV s remote control may have a button or switch that lets you select the Component Video In channel If you cannot find it check your TV owner s manual 4 Connect the DVD Player s power cord to a power outlet Press STANDBY ON y y to turn on the Player You should see the DVD logo on theTV sc...

Страница 14: ...Video In channel This channel may be labeled A V or Audio Video Aux or Auxiliary EXT or External etc This channel is usually near channel zero or your TV s remote control may have a button or switch that lets you select the Video In channel Or go to your lowest TV channel 01 or 02 and change channels downward until you find the Video In channel If you cannot find the Video In channel check your TV...

Страница 15: ...select the Video In channel Or go to your lowest TV channel 01 or 02 and change channels downward until you find the Video In channel If you cannot find theVideo In channel check yourTV manual 5 Plug in the Player s power cord Press STANDBY ON y y to turn on the Player You should see the DVD logo on theTV screen If you do not check your connections and make sure theTV is on the correctVideo In cha...

Страница 16: ...se the tray by pressing OPEN CLOSE A 5 Press STOP C to stop playback Remember this DVD Player will play only certain Discs See page 7 for details An X may appear in the top right corner of the TV screen when you try a feature This means either the feature you tried is not available on the Disc or the Player cannot access the feature at this time This does not indicate a problem with the Player If ...

Страница 17: ...itle Chapter or Time Details are on pages 25 26 SUBTITLE Button Press to select a language for the subtitles among those available or to turn off the subtitles Details are on page 34 PAUSE F Button Press to pause Disc playback Press repeatedly to advance the DVD or Video CD picture step by step or one frame at a time Details are on page 22 SEARCH hand g Buttons Press SEARCH h to search backward on...

Страница 18: ...eo sound mode during Audio CD orVideo CD playback Details are on page 32 OK Button Press to select change or confirm menu items ZOOM Button Press to enlarge a DVD or Video CD picture or a JPEG image Details are on page 24 TITLE Button Press to display a DVD s Title menu Details are on page 21 Press to go to the top of an MP3 or JPEG File List Details are on page 30 Number Buttons Press to select a...

Страница 19: ...s of the display Details are on pages 46 47 Disc tray Insert a Disc here Appears during repeat playback Indicates A B Repeat Appears when REPEAT ALL is active Appears when playback is paused Appears during slow motion playback DVD Video CD Appears during Disc playback Power is turning on Appears after the disc tray closes if the tray is empty if there is an error reading the disc or if an unaccept...

Страница 20: ...k Connect an optional S Video cable here and to the S Video In jack of a television Details are on page 12 VIDEO OUT Jack Connect the supplied yellow video cable here and to the Video In jack of a TV or RF modulator Details are on pages 10 11 14 and 15 AUDIO OUT Left Right Jacks Connect the supplied red and white audio cable here and to the Audio In jacks of a television stereo or RF modulator Mat...

Страница 21: ...sc playback For example the menu may offer choices for subtitle languages director s commentary or soundtrack playback To use the DVD menu and select playback features follow these steps 1 Press MENU The DVD s main menu will appear 2 Press K L s or B to select an item then press OK Continue this process to set up all the features you want or to start playing the DVD 1 2 2 1 Playback Control PBC Fu...

Страница 22: ...e playing at the same point even if you turn off the DVD Player then turn it on again later However opening the disc tray will cancel the Resume feature Playback will start at the beginning the next time you insert the Disc To cancel Resume and start playing the Disc from the beginning press STOP C again while playback is stopped The Stop symbol C will appear briefly on the TV screen Press PLAY B ...

Страница 23: ...DVD playback the sound will be mute during the search For Video CDs Audio CDs or MP3 playback pressing SEARCH g or h will forward or reverse the picture or sound at approximately 2 8 or 30 times the normal speed The speed may vary depending on the Disc g 1 g 2 or g 3 will appear briefly on the TV screen to indicate forward searching Or h 1 h 2 or h3 will indicate reverse searching For MP3 or Audio...

Страница 24: ...y Slow Motion 1 Press PAUSE F during DVD or Video CD playback 2 Press SEARCH D or h Slow motion playback will begin Press SEARCH D or h repeatedly during slow motion playback to play the DVD forward or backward at approximately 1 16 1 8 or 1 2 the normal speed Backward slow motion is not available on aVideo CD An 1 1 16 2 1 8 or 3 1 2 will appear briefly on the TV screen to indicate forward slow m...

Страница 25: ...Track Search display TR appears Within 30 seconds press the Number buttons to select theTrack number Playback will begin at the selected Track For a single digit Track 1 9 enter a zero first For example to play Track 5 press 0 5 You do not have to use the 10 button in Search Mode for Tracks 10 and above C Using PREV and NEXT 3 During playback press NEXT 3 to skip the current Track and move to the ...

Страница 26: ...e will appear to the right of TOTAL in the Time Search display If you make a mistake entering the time press CLEAR to clear the time area Enter the correct information 26 Title Chapter Playback Time Playback Title Chapter Playback 1 During DVD playback press SEARCH MODE until CH for Chapter or TT for Title appears on the TV screen The number of available Titles or Chapters will appear at the right...

Страница 27: ...les If you choose GROUP Repeat during DUAL PLAYBACK all Tracks or Files in each Folder will play repeatedly For example if you choose GROUP Repeat during DUAL PLAYBACK of MP3 Folder A and JPEG Folder B all MP3 Files in Folder A and all JPEG Files in Folder B will be repeated Helpful Hints A B Repeat You can play a section of a DVD Audio CD or Video CD repeatedly Follow these steps to set up the se...

Страница 28: ...he Tracks will play once in the order you set Turning off the Player or opening the disc tray will erase the Program 4 Press MODE repeatedly to remove the display CD DA TOTAL 1 03 30 OK 1 3 30 3 30 2 4 30 4 30 3 5 00 5 00 4 3 10 3 10 5 5 10 5 10 6 1 30 1 30 7 2 30 2 30 1 3 30 3 30 5 5 10 5 10 10 10 4 20 4 20 11 11 3 00 3 00 12 12 3 20 3 20 17 17 4 10 4 10 22 22 2 50 2 50 1 3 30 3 30 1 4 2 3 Do not...

Страница 29: ...ame Example MP3 DUAL PLAYBACK OFF Random Playback You may play the Tracks of an Audio CD in Random order instead of the order in which they are recorded 1 2 3 You can also use this feature for JPEG and MP3 Files 1 While playback is stopped press MODE until the RANDOM screen appears 1 3 2 Random Playback is not available while DUAL PLAYBACK is ON Helpful Hints E6170UD_EN_QX4_1217 12 17 04 5 44 PM P...

Страница 30: ...our computer manual for details on recording Keep these characteristics in mind when making Discs you intend to play on the DVD Player Record MP3 Tracks at a sampling frequency of 44 1 kHz or 48 kHz Record in a bit rate between 32 kbps and 320 kbps When recording JPEG Files the size of the picture should be between 32 x 32 and 6300 x 5100 dots 1 When you put a CD RW or CD R with MP3 or JPEG Files ...

Страница 31: ...setting is ON DUAL PLAYBACK will start automatically Zooming or rotating a JPEG File during DUAL PLAYBACK may cause an intermittent sound Helpful Hints MP3 JPEG Playback cont d 31 Folder Playback available only when DUAL PLAYBACK is ON You may select to play a Folder 1 While playback is stopped press MODE A Folder List will appear 2 Press K or L to select a FOLDER then press PLAY B or OK MP3 and J...

Страница 32: ...ate of the disc The number of available languages appears after the at the right of the display 3 for example If a language is not available after pressing AUDIO several times the DVD does not have that language Some DVDs only let you change the language in the Disc menu Audio languages may be abbreviated such as ENG for English Or three dashes may appear instead of an abbreviation Helpful Hints S...

Страница 33: ...ll replace the Marker number The Marker display will disappear in about 30 seconds or press MARKER again to remove it 4 To return to a Marker during playback press MARKER Press s or B to choose the Marker you want then press OK Disc playback will continue from the marked point Opening the disc tray or turning off the Player will erase all the Markers To erase a single Marker press MARKER Press s o...

Страница 34: ...ress ANGLE repeatedly to select a different perspective The number of available angles appears at the right of the Angle display In this example eight angles are available 8 34 Subtitles Camera Angles Subtitles The DVD Player allows you to select a language for subtitles during playback You may select only the subtitles that are available on the DVD 1 During DVD playback press SUBTITLE repeatedly ...

Страница 35: ...ack number total Tracks Elapsed playing time of the current Track remaining playing time of the current Track ALL 4 12 0 13 45 0 45 40 ALL Current track number total Tracks Elapsed playing time of the current CD remaining playing time of the current CD T Current Repeat setting if active T Track repeat A All Tracks repeat A B A B repeat DVD Display 1 Press DISPLAY repeatedly to see the following di...

Страница 36: ...view MP3 and JPEG File information during playback 1 Press DISPLAY until the current Track or File information appears TR 2 25 0 01 15 Elapsed playing time of the current Track for MP3 only TR Track Current Track number Total Tracks T Current repeat setting or RANDOM or FOLDER PLAYBACK PROGRAM For MP3 Files recorded with Variable Bit Rate VBR the elapsed time displayed on the screen may vary from ...

Страница 37: ...details on availability 1 During Disc playback press MODE repeatedly until the Virtual Surround icon appears in the top left corner of the TV screen 2 While the Virtual Surround icon appears press s B or OK to choose 1 2 or OFF The default setting is OFF The icon will disappear after about 10 seconds Black Level is not available for a PAL DVD Virtual Surround is available only when the Player is c...

Страница 38: ... Press s or B to select CUSTOM at the top of the menu then press OK If the DVD s default settings for Audio and Subtitle are the same language the subtitles may not show unless you turn them on Use the AUDIO and SUBTITLE buttons to select Audio and Subtitles available on the DVD Details are on pages 32 34 If you set AUDIO to ORIGINAL the default setting of the DVD Audio will play If you set PLAYER...

Страница 39: ...sian 5271 Gaelic Scots 5350 Galician 5358 Georgian 5747 German 5051 Greek 5158 Greenlandic 5758 Guarani 5360 Gujarati 5367 Hausa 5447 Hebrew 5569 Hindi 5455 Hungarian 5467 I K Icelandic 5565 Indonesian 5560 Interlingua 5547 Interlingue 5551 Inupiak 5557 Irish 5347 Italian 5566 Japanese 5647 Javanese 5669 Kannada 5760 Kashmiri 5765 Kazakh 5757 Kinyarwanda 6469 Kirghiz 5771 Kirundi 6460 Korean 5761 ...

Страница 40: ...u then press OK LANGUAGE AUDIO ORIGINAL SUBTITLE OFF DISC MENU ENGLISH PLAYER MENU ENGLISH OK 4 Press K or L to select an item then press OK If you selectedTV ASPECT press K or L to select a setting then press OK Choose 4 3 LETTER BOX if you want to see the entire widened picture with black bars at the top and bottom of the screen This looks like the picture you see when watching movies in a theat...

Страница 41: ...age in still mode AUTO is the default setting If you select FIELD still images will be stabilized but coarse due to the small amount of data If you select FRAME the images will be highly defined due to the simultaneous output of two fields 5 Press SETUP to remove the menu DISPLAY AUTO FIELD FRAME OK STILL MODE 5 4 STILL MODE E6170UD_EN_QX4_1217 12 17 04 5 44 PM Page 41 ...

Страница 42: ...you first press SETUP With QUICK selected press OK Press L to select PROGRESSIVE Press OK to choose OFF or ON Press SETUP to remove the menu Helpful Hints 3 Press SETUP to remove the menu If PROGRESSIVE is ON this message appears Press K or L to make a selection then press OK If you select NO the menu disappears and PROGRESSIVE is OFF If you selectYES this appears Confirm your setting then press O...

Страница 43: ...Player is connected to a Stereo using the COAXIAL DIGITAL AUDIO OUT jack as described on page 15 If you selected DOLBY DIGITAL press OK repeatedly to select BITSTREAM or PCM Select BITSTREAM if you used the COAXIAL DIGITAL AUDIO OUT jack to connect the DVD Player to a stereo that is Dolby Digital compatible Details are on page 15 Otherwise choose PCM 6 Press SETUP to remove the menu AUDIO DRC ON D...

Страница 44: ...VEL ALL 8 7 NC 17 6 R 5 4 PG13 3 PG OK When you try to play a DVD whose rating exceeds the level you set an on screen message will indicate the DVD cannot play Remove the DVD then set PARENTAL LEVEL to ALL Reload the DVD and begin playback Some DVDs may let you enter your four digit password to begin playback Follow the on screen messages as prompted Helpful Hint ALL The Parental feature is inacti...

Страница 45: ...ssword Helpful Hints 2 Press or B to select CUSTOM at the top of the menu then press OK LANGUAGE AUDIO ORIGINAL SUBTITLE OFF DISC MENU ENGLISH PLAYER MENU ENGLISH OK 2 5 1 6 3 Press or B to select PARENTAL then press OK The first time you set a password this menu will appear Press the Number buttons to enter a four digit password The password will appear on the screen Write it down so you don t fo...

Страница 46: ... ON or OFF The default setting is ON Choose ON to see the Angle icon when multiple camera angles are available during DVD playback Details are on page 34 Choose OFF to disable the Angle icon If you selected AUTO POWER OFF press OK repeatedly to choose ON or OFF The default setting is ON Choose ON if you want the Player to turn off when there is no activity at the Player or its remote for 30 minute...

Страница 47: ...ou selected SLIDE SHOW press K or L to choose 5sec 10sec or MUSIC then press OK This adjusts the playback speed of the SLIDE SHOW The default setting is 5 sec Choose 5 sec to display each image for 5 seconds Choose 10 sec to display each image for 10 seconds Choose MUSIC to display an image for each MP3 sound file playback when DUAL PLAYBACK is ON 5 Press SETUP to remove the menus If you select MU...

Страница 48: ...ars QUICK SETUP PLAYER MENU ENGLISH TV ASPECT 4 3 LETTER BOX PROGRESSIVE OFF DOLBY DIGITAL BITSTREAM OK 2 Press s or B to select INIT INITIALIZE at the top of the menu then press OK 3 Press K K or L L to selectYES Then press OK twice To cancel the process select NO instead 4 Press SETUP to remove the menu 2 3 1 4 INITIALIZE Initialize NO YES OK E6170UD_EN_QX4_1217 12 17 04 5 44 PM Page 48 ...

Страница 49: ...s a clearer picture by sending separate signals for the luminance and the color If you connect an optional S Video cable you will not need to use the supplied yellow video cable You can use S Video only if your TV has an S Video In jack VIDEO OUT Jack Yellow jack on the rear of the DVD Player that sends video to a TV Use the supplied yellow video cable to make this connection Wide A TV Aspect sett...

Страница 50: ...r TV and make sure it is set to the correct Audio In channel or sound source usually Auxiliary IN Refer to the owner s manual of the audio equipment for details Check theAudio Settings of the Disc For example you may have selected soundtrack on a DVD Details are on page 32 Distorted picture Connect the DVD Player directly to the TV Details are on page 9 There are some cases where the picture may b...

Страница 51: ... Video out Mini DIN 4 pin jack 75 Ω Video out One pin jack 1 Vpp 75 Ω Coaxial digital audio out One pin jack 500m Vpp 75Ω Audio out Two pin jacks one left channel one right channel 2 Vrms 100 kΩ Component video out One pin jack Y 1 Vpp 75Ω Two pin jacks CB PB and CR PR 700m Vpp 75Ω Power Consumption Power on 10 W Power off 0 8 W Operating Temperature 41 F 5 C to 104 F 40 C Relative Humidity 30 to ...

Страница 52: ...co 7 Botón PAUSE F Púlselo para pausar la reproducción de un Disco Púlselo varias veces para avanzar el DVD o una imagen de un CD deVídeo paso a paso o un marco cada vez 8 Botón SETUP Cuando la reproducción de un Disco se encuentre parada púlselo para acceder o eliminar el menú de Ajustes del Reproductor de DVD 9 Botón MODE Cuando la reproducción se encuentre parada púlselo para establecer una rep...

Страница 53: ...a derecha es roja la toma de la izquierda es blanca 2 Conecte el cable de video amarillo suministrado o un cable S Video no incluido a la toma VIDEO OUT o S VIDEO OUT del Reproductor de DVD y a la toma VIDEO IN o S VIDEO IN del televisor 3 Conecte el cable de conexión del televisor a la toma de corriente Encienda el televisor y seleccione el canal Audio Video o S VIDEO In Este canal se encuentra n...

Страница 54: ...pair or other cause not within the control of Magnavox A product that requires modification or adaptation to enable it to operate in any country other than the country for which it was designed manufactured approved and or authorized or repair of products damaged by these modifica tions Damage occurring to product during shipping when improp erly packaged or cost associated with packaging Product ...

Страница 55: ...E6170UD_EN_QX4_1217 12 17 04 5 44 PM Page 55 ...

Страница 56: ...buttons 18 25 ok button 18 open close A button 16 19 parental 44 45 password 45 pause k button 17 22 24 play B button 16 18 19 playback control 7 21 playing 16 power cord 20 prev button 18 25 program 28 progressive scan 9 13 44 random 29 rear panel 20 region codes 7 remote control buttons 17 18 sensor 19 using 8 repeat button 17 27 repeat playback 27 resume on 22 return button 17 safety precaution...

Отзывы: