background image


Your unit might 

come with an 

installed hard drive. 

Before opening 

such an enclosure, 

please read the 

warranty and any 

other notes from 

your vendor 

carefully before 

doing so, as this 

might void your 

warranty. 

Chapter 2 - Installing the HDD 

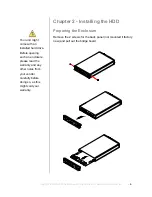
Preparing the Enclosure 

Remove the 2 screws for the back panel (not mounted if factory 

new) and pull out the bridge board. 


Copyright © 2000-2003 by Macpower Peripherals Ltd. - www.macpower.com.tw           

- 4 - 

Содержание DaisyCutter

Страница 1: ...Copyright 2000 2003 by Macpower Peripherals Ltd www macpower com tw User Manual Installation Guide External Storage Enclosure for 2 5 Hard Drives The DaisyCutter...

Страница 2: ...CTION TO YOUR COMPUTER 6 BUS POWER OPERATION 6 INSTALLATION ON A PC MICROSOFT WINDOWS 7 WIN2000 OR WINXP WITH A USB OR FIREWIRE CONNECTION 7 WIN2000 OR WINXP WITH A SERIAL ATA CONNECTION 7 WIN98SE WIT...

Страница 3: ...provides cutting edge technology with maximum durability flexibility and portability Extra slim design and aluminum casing made for high performance at your desktop as well as on the go Product Dimen...

Страница 4: ...ng insufficient power supply Add a power adapter Other possible causes are either a sudden voltage slump in the power supply or a faulty power adapter Indication Green LED on Red LED on Inverse Polari...

Страница 5: ...2000 WinXP 1394b equipped PC Win2000 WinXP Serial ATA equipped PC Win2000 WinXP Mac Requirements Minimum Apple G3 processor G4 for 1394b 64MB RAM USB 1 1 equipped Mac Mac OS 9 1 9 2 10 1 5 10 2 10 3 U...

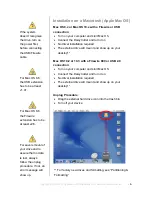
Страница 6: ...any other notes from your vendor carefully before doing so as this might void your warranty Chapter 2 Installing the HDD Preparing the Enclosure Remove the 2 screws for the back panel not mounted if...

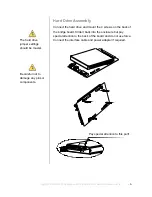
Страница 7: ...ount the 4 screws on the back of the bridge board Slide it back into the enclosure but pay special attention to the back of the board and do not use force Connect the interface cable and power adapter...

Страница 8: ...ire can be daisy chained All devices in a daisy chain have to be switched on to permit the hub daisy chain function Do not cover the Enclosure and leave enough room around it for the drive to cool dow...

Страница 9: ...connection Turn on your Computer and start Windows Connect the DaisyCutter and turn it on Let Windows search and install the driver automatically Open My Computer to see your external hard drive Win9...

Страница 10: ...re or USB connection Turn on your computer and start Mac OS Connect the DaisyCutter and turn it on No driver installation required The external drive will mount and show up on your desktop Mac OS 10 2...

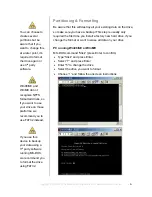
Страница 11: ...you to format the drive using FAT32 Partitioning Formatting Be aware that this will destroy all your existing data on the drive so make sure you have a backup This step is usually only required the f...

Страница 12: ...ME or change to NTFS format If you can not see the drive make sure the jumper settings of your hard drive are correct the drivers are installed and the power is turned on PC running Win2000 or WinXP D...

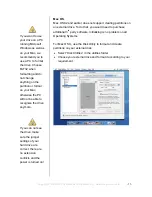
Страница 13: ...ard drive are correct there are no extension conflicts and the power is turned on Mac OS Mac OS9 2 and earlier does not support creating partitions on an external drive To do that you would need to pu...

Страница 14: ...mation contained in this manual is believed to be accurate and reliable Macpower Peripherals Ltd assumes no responsibility for any errors contained in this manual Macpower Peripherals Ltd reserves the...

Отзывы: