


SA160E User Manual Rev 3 - Aug 2016
Page 27
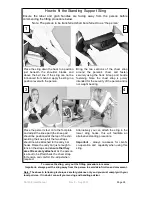
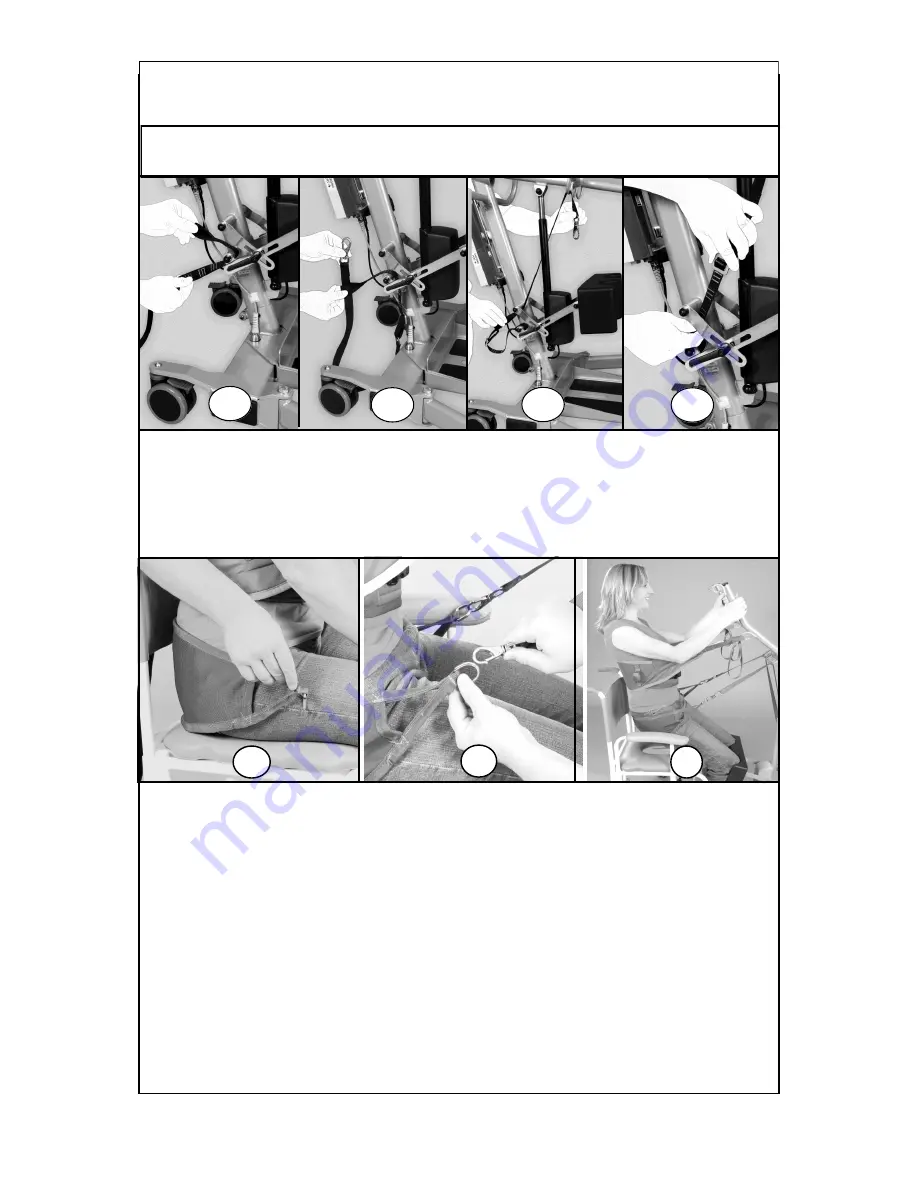
1.
Thread loop of posterior strap under lower bar.
2.
Thread hook through the end of the loop and pull through to form attachment to lower
bar.
3.
Thread hook end of the strap to the inside of the top bar and thread through the metal
loop on the boom of the Mackworth SA160E.
4.
Adjust the length of the strap using the slider buckle to suit the individual.
Using the Posterior Sling in conjunction with the Standing
Support Sling
The posterior straps must first be attached to the Mackworth SA160E by following the
diagrams below:
1
2
3
1.
Fit the Standing support strap as described on the previous page (Items 1 & 2) and
then introduce the posterior sling level with the persons hips.
2.
Attach the posterior sling to the posterior straps.
3.
Introduce the Mackworth MSA160 as described in the previous section (item 3).
Raise the carry bar just enough to tension the straps and
ensure that they are still
securely attached and there is no twists in the posterior straps.
As you start the lifting procedure the posterior sling will support the majority of the lift,
(If NOT adjust the chest sling straps or the posterior straps placed at the bottom near
the hoist attachment bar as shown in item 4 above)
as the standing continues the chest
sling will gradually take over, once in standing the posterior sling will be relaxed to allow
access to clothing.
Only use the Standing Support sling & Posterior sling with clients with the ability to
stand.
Do not fix the posterior straps to anything other than the “D” rings on the posterior
sling (failure to do so may cause material fracture and may also compromise safety!)
1
2
3
4


