background image


SA160E User Manual                                    Rev 3 -  Aug 2016                                            

Page 15                                              

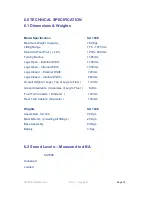
6.0 TECHNICAL SPECIFICATION 


6.1 Dimensions & Weights 

6.2 Sound Levels— Measured in dB A  


SA160E 

 
Unloaded   


Loaded 


Model Specification 

 SA 160E 

Maximum Weight  Capacity 

 160 Kgs 

Lifting Range 

 770  - 1675mm 

Stand Aid Foot Print ( L x W ) 

 1250 x 660 mm 

Turning Radius 

 1305mm 

Legs Open  - External Width 

 1190mm 

Legs Open  - Internal Width 

 1030mm 

Legs Closed  - External Width 

  720mm 

Legs Closed  - Internal Width 

  560mm 

Overall Height of Legs ( Top of Legs to Floor ) 

  112mm 

Ground Clearance ( Undersize of Leg to Floor ) 

   62mm 

Front Twin Castors  ( Diameter  ) 

  100mm 

Rear Twin Castors  ( Diameter  ) 

  100mm 


Weights  

 SA 160E 

Assembled   SA 160 

 46 Kgs 

Mast & Boom ( Including all fittings ) 

 23 Kgs 

Base Assembly 

 23 Kgs 

Battery 

 3 Kgs 


Содержание SA160E

Страница 1: ...nual Rev 3 Aug 2016 Page Unit 1 Tir Llwyd Industrial Estate St Asaph Avenue Kinmel Bay Rhyl Conwy LL18 5JA Tel 44 0 1924 840100 www prismmedical co uk info prismmedical co uk User Manual Mackworth Sta...

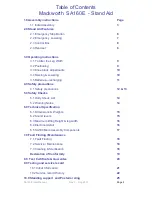
Страница 2: ...ons 12 13 5 0 Safety Checks 5 1 Daily Check List 14 5 2 Warning Notes 14 6 0 Technical Specification 6 1 Dimensions Weights 15 6 2 Sound levels 15 6 3 Maximum lifting Height leg width 16 6 4 Electrica...

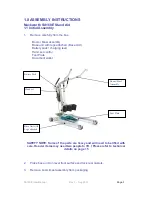
Страница 3: ...pack charging lead Hand set control Foot Plate Document wallet SAFETY NOTE Some of the parts are heavy and will need to be lifted with care Heavier items may need two people to lift Please refer to te...

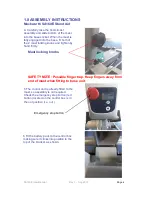
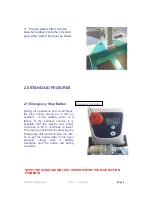
Страница 4: ...tion i e out 6 Fit the battery pack to the control box making sure it clicks into position in the top of the bracket as shown Emergency stop button Mast locking knobs SAFETY NOTE Possible finger trap...

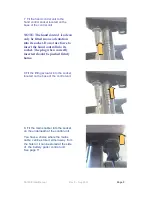
Страница 5: ...and control lead can only be fitted in one orientation into its socket Do not use force to insert the hand control into its socket The plug when correctly inserted should be pushed firmly home 9 Fit t...

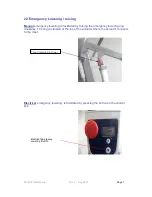
Страница 6: ...l times the stop button should be in the out position In the unlikely event of a failure of the handset control it is possible that the electric ram either continues to lift or continues to lower This...

Страница 7: ...nual emergency lowering is facilitated by turning the emergency lowering ring clockwise The ring is situated at the top of the actuator where the actuator connects to the mast Electrical emergency low...

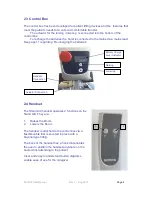
Страница 8: ...regarding Re charging the batteries Handset Connection Actuator Connection Battery Charge Level Indicator Raising Lowering 2 4 Handset The Stand Aid handset operates 2 functions on the Stand Aid They...

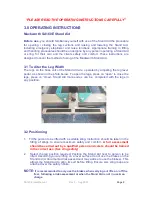
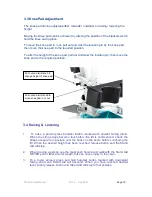
Страница 9: ...o close the legs press on close Stand Aid manoeuvres can be completed with the legs in any position 3 2 Positioning 1 Fit the person to be lifted with a suitable sling Instruction should be taken in t...

Страница 10: ...d hold handset button marked with downward facing arrow and Stand Aid will descend When you have reached desired level simply release button and Stand Aid will stop in that position 3 3 Knee Pad Adjus...

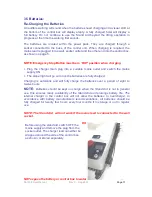
Страница 11: ...ins outlet and switch the mains supply ON 2 The amber light will go out once the batteries are fully charged Charging is automatic and will fully charge the batteries over a period of eight to twelve...

Страница 12: ...the user manual ALWAYS check that the safe working load of the Stand Aid is suitable for the weight of the patient ALWAYS carry out lifting according to the instructions in the sling user manual ALWAY...

Страница 13: ...ety NEVER use Stand Aids in a shower NEVER charge an electric lift in a bathroom or shower room NEVER allow water to enter hand set or battery control box or use the Stand Aid outside in wet condition...

Страница 14: ...batteries need to be re charged Ensure the Stand Aid is off charge before use and all leads are fitted correctly in their sockets Make sure the mast is fully engaged and the locking nuts are fully tig...

Страница 15: ...t L x W 1250 x 660 mm Turning Radius 1305mm Legs Open External Width 1190mm Legs Open Internal Width 1030mm Legs Closed External Width 720mm Legs Closed Internal Width 560mm Overall Height of Legs Top...

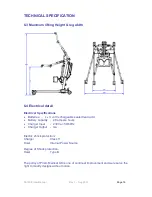
Страница 16: ...s 2 x 12 volt rechargeable sealed lead acid Battery capacity 2 9 ampere hours Charger Input 230V ac 50 60Hz Charger Output n a Electric shock protection Charger Class 11 Hoist Internal Power Source De...

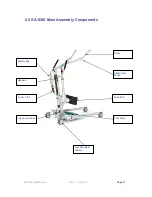
Страница 17: ...SA160E User Manual Rev 3 Aug 2016 Page 17 6 5 SA 160E Main Assembly Components Control Unit Lockable Rear castors Boom Foot Plate Battery Box Handset Knee Pad Leg Lever Pedal Attachment hooks...

Страница 18: ...cordance with the specifications detailed in the test requirements of BS 10535 2006 You should also consider if the hoist requires servicing in accordance with LOLER REGULATIONS Lifting Operations and...

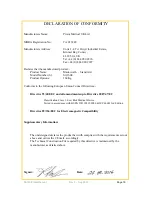
Страница 19: ...160 Kg Conforms to the following European Union Council Directives Directive 93 42 EEC and all amendments up to Directive 2007 47 EC Classification Class 1 Low Risk Medical Device Tested in accordanc...

Страница 20: ...p 2 The liability of Prism Medical UK under terms of this guarantee shall be limited to the replacement or the defective part s to the sales distributor dealer agent person or entity which purchased t...

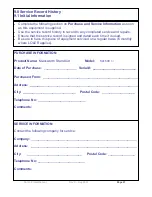
Страница 21: ...Comments Complete the following section on Purchase and Service Information as soon as this equipment is supplied Use the service record history to record to any completed service and repairs Ensure t...

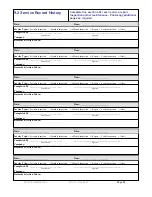
Страница 22: ...___________________ Printed Name Signature Company _____________________________________________________________ Remarks Action Taken Date _______________________ Time ________________________ Service...

Страница 23: ..._________________ Printed Name Signature Company _____________________________________________________________ Remarks Action Taken Date _______________________ Time ________________________ Service T...

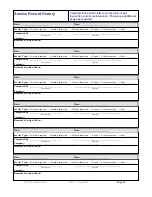
Страница 24: ..._________________ Printed Name Signature Company _____________________________________________________________ Remarks Action Taken Date _______________________ Time ________________________ Service T...

Страница 25: ...traps Any signs of stitching becoming undone on any part of the sling Any signs of the fabric being stretched tearing or undue wear Any signs of discolouring or bleaching on the material Is the sling...

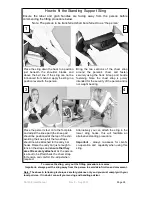
Страница 26: ...apply the sling in a position level with the person Bring the two sections of the chest strap around the person s chest and fasten securely using the hook loop and buckle fastening Note the chest str...

Страница 27: ...tach the posterior sling to the posterior straps 3 Introduce the Mackworth MSA160 as described in the previous section item 3 Raise the carry bar just enough to tension the straps and ensure that they...

Страница 28: ...0100 www prismmedical co uk info prismmedical co uk Disclaimer While every effort has been made to ensure the accuracy of information contained in this user manual no liability can be accepted for any...

Отзывы: