


11
Take a look at the
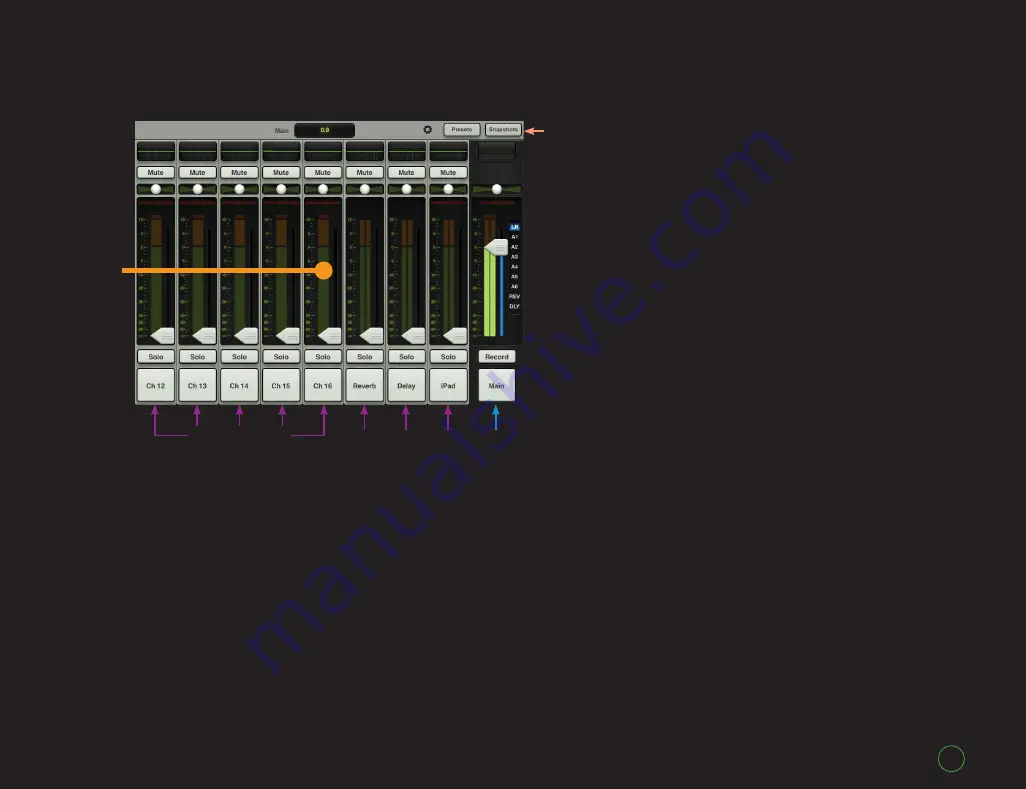
Mixer View
image on the previous page and the
Mixer View
image on this page. What
differences do you notice?
They look similar (and are similar
to a degree)... However, the image on
the previous page displays Channel
Strips 1 – 8, while the image on this
page displays Channel Strips 12 – 16,
Reverb, Delay and the iPad channel.
But just how did we get from the
image displayed on the previous
page to the image displayed on this
page? And what about channels 9,
10 and 11? This is where your iPad
skills come into play!
To view a different set of
channels, simply touch anywhere
on the black background [we call
this “The Swipe Zone”] of a channel
and drag or flick the
Mixer View
left or right. The view scrolls, giving
you immediate access to whatever
channels you desire.
Dragging and flicking are both
seamless transitions. Flicking just
happens to occur at a faster rate.
You will be doing this gesture quite a
bit. Some items may be dragged or
flicked up and down, too.
In this case, – “But just how did
we get from the image displayed
on the previous page to the image
displayed on this page?” – drag or
flick the view left to view the image
displayed on this page or drag or
flick the view right to view the image
displayed on the previous page.
Got it? Let’s look at how the
Channel Strips work...
Overview
Navigation Bar
Channel Strips
12 – 16
The
Swipe
Zone
Master
Fader
Mixer
View
iPad
Delay
Reverb


