


2.1.2 MAIN MENU
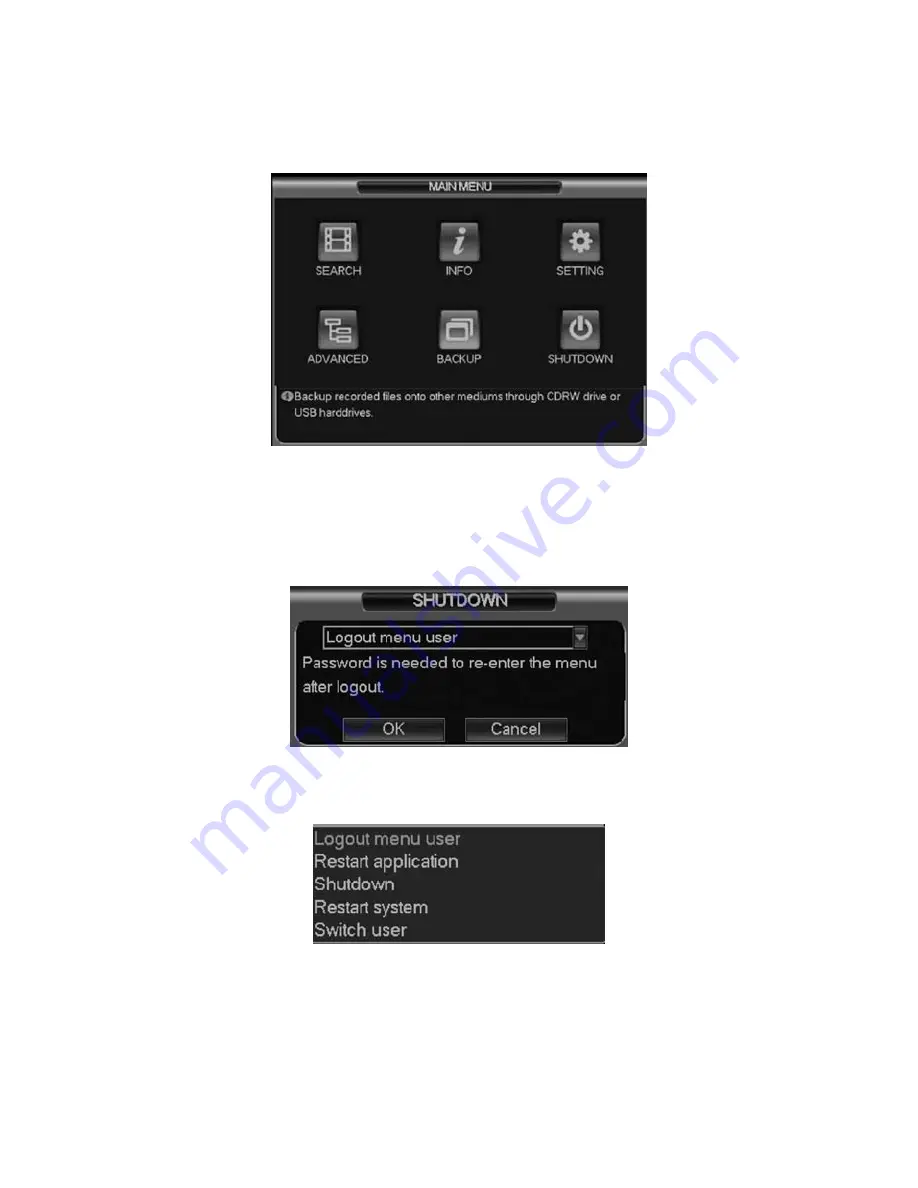
After you are logged in, the system main menu is shown as below. See Figure 2-2.
There are 6 icons: search, information, setting, backup, advanced and shutdown.
You can move the cursor to highlight the icon, and then double click mouse to enter the
sub-menu.
Figure 2-2
2.1.3 LOGOUT
There are 2 ways for you to log out.
The first one is from menu option:
In the main menu, click shutdown button, you can see an interface is shown as below. See
Figure 2-3.
Figure 2-3
There are several options for you. See Figure 2-4.
Figure 2-4
The other ways is to press power button on the front panel for at least 3 seconds, system
will stop all operations. Then you can click the power button in the front panel to turn off the
DVR.
Please note, before you replace the HDD, remember to shut down the device and unplug the
power cable.
2.1.4 AUTO RESUME AFTER POWER FAILURE
The system can automatically backup video and resume previous working status after power
failure.
2.2
LIVE VIEWING
After you logged in, the system is in live viewing mode by default. You can see system
date, time and channel name. If you want to change system date and time, you can refer to
general settings (Main Menu->Setting->General). If you want to modify the channel name,
please refer to the display settings (Main Menu->Setting->Display)
2.3
RECORD SETUP (SCHEDULE)
Note: You need to have proper rights to implement the following operations. Please
make sure the HDDs have been properly installed.
After the system booted up, it is in default 24-hour regular mode. You can set record type
and time in schedule interface.
2.3.1 SCHEDULE MENU
In the main menu, from Setting to Schedule, go to schedule menu. See Figure 2-5.
There are a total of six periods.
• Channel: Please select the channel number first. You can select “All” if you want to set
for all the channels.
• Week day: There are eight options: they ranges from Saturday to Sunday and All.
• Pre-record: System can pre-record the video before the event occurs into the file. The
value ranges from 1 to 30 seconds depending on the bit stream.
• Snapshot: You can enable this function to snapshot images when an alarm occurs.
• Record types: There are three types: Regular, Motion Detection (MD) and Alarm.
Please check icon to select the corresponding function. After completing all the setups
please click save button, system goes back to the previous menu.
At the bottom of the menu, there are color bars for your reference. Green stands for regular
recording, Yellow stands for motion detection and Red stands for alarm recording. White
means the “motion detect” record and “alarm” record are both valid. Once you have set the
DVR to record when the “motion detect” record and “alarm” record at the same time, system
will not record either “motion detect” occurrences nor the “alarm record” occurrences.
1
Recording status
3
Video loss
2
Motion detection
4
Monitor lock
Figure 2-5
13
14


