10
a. a
djuStinG
e
xit
d
elay
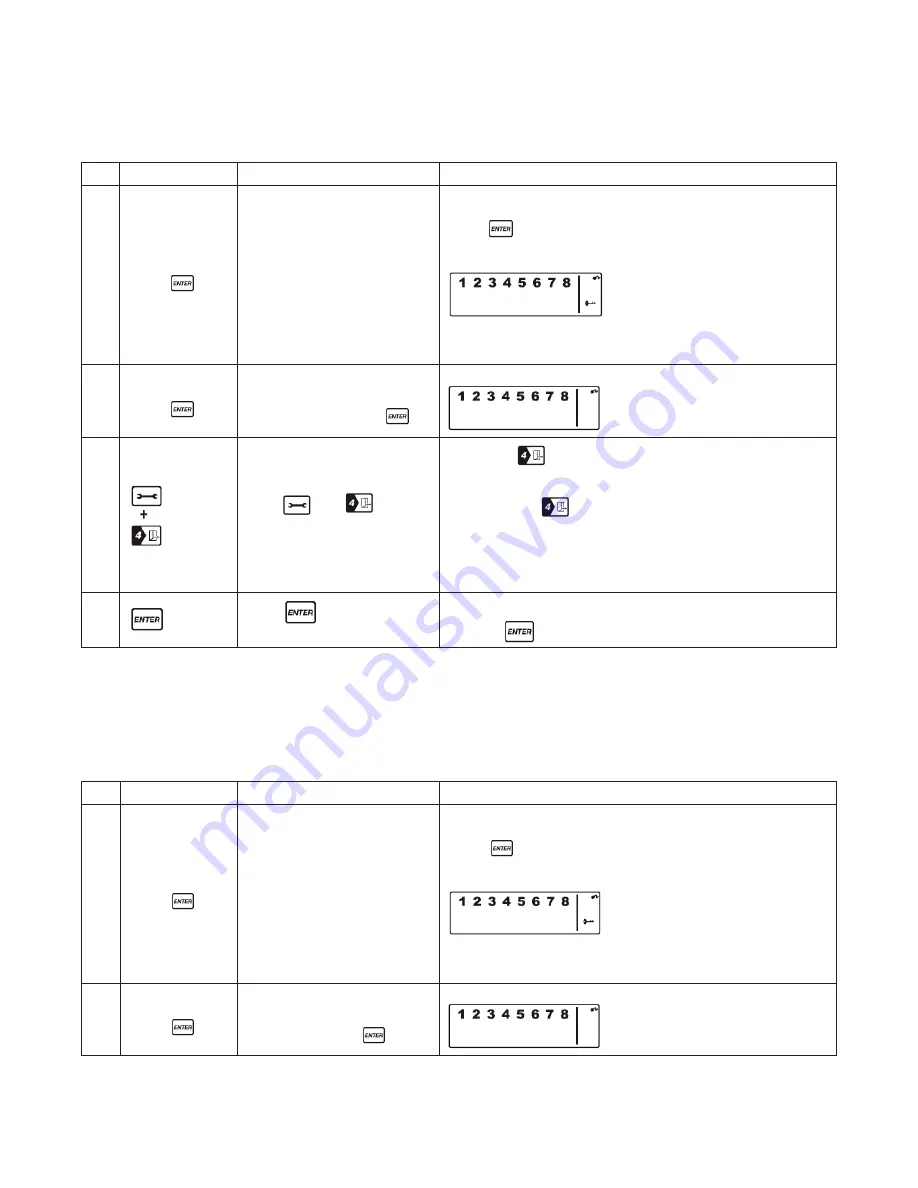
The default setting of the Wireless Alarm Panel allows the user 20 seconds to exit the property before
the alarm is ARMED. However, this Exit Delay can be adjusted to between 10 — 60 seconds as follows:
Keys
Description
Note
1
(1234 or 4-digit
PIN) +
You must be in
STANDBY
mode before adjusting the
Exit Delay
*To make sure you are in
STANDBY
mode:
- Enter the default PIN “ 1–2–3–4 ” OR your new 4-digit PIN
- Press
- The panel will display the image below when you are in
STANDBY
mode:
(One beep indicates that you entered a valid PIN, three
beeps indicate that an invalid operation was performed).
2
(1234 or 4-digit
PIN) +
Enter the default PIN “ 1–2–3–
4” OR your new 4-digit PIN
for setting followed by
The panel will display the below image:
3
Press
then
(as many times as required)
to set the new Exit Delay
• When
is pressed the first time the panel flashes with
the number of seconds currently set for the Exit Delay
(The factory default setting is 20 seconds)
• Each time
is pressed the Exit Delay is increased by a
further 10 seconds between the adjustable range of 10 to
60 seconds
• The Exit Delay time on the LCD display will flash until the
setting is completed
4
Press
to complete the
setting
Confirm the setting and return the panel to
STANDBY
by
pressing
B. a
djuStinG
e
ntry
d
elay
The default setting of the Wireless Alarm Panel allows the user 30 seconds to enter the property and
DISARM the alarm before it is triggered. However, this Entry Delay can be adjusted to between 10—60
seconds as follows:
Keys
Description
Note
1
(1234 or 4-digit
PIN) +
You must be in
STANDBY
mode before adjusting the
Entry Delay
*To make sure you are in
STANDBY
mode:
- Enter the default PIN “ 1–2–3–4 ” OR your new 4-digit PIN
- Press
- The panel will display the image below when you are in
STANDBY
mode:
(One beep indicates that you entered a valid PIN, three
beeps indicate that an invalid operation was performed).
2
(1234 or 4-digit
PIN) +
Enter the default PIN “ 1–2–3–
4” OR your new 4-digit PIN for
setting followed by
The panel will display the below image:
Содержание MAS-WA-SYS
Страница 1: ...UserGuide Model MAS WA SYS ...


