EN
EN
22
23
Getting started...
Getting started...
MPS750S-2
MPS750S-2
Assembly
WARNING! The product must be fully assembled before
operation! Do not use a product that is only partly
assembled or assembled with damaged parts!
Follow the assembly instructions step-by-step and
use the pictures provided as a visual guide to easily
assemble the product!
Do not connect the product to power supply before it is
completely assembled!
Always wear gloves during assembly!
Motor unit assembly
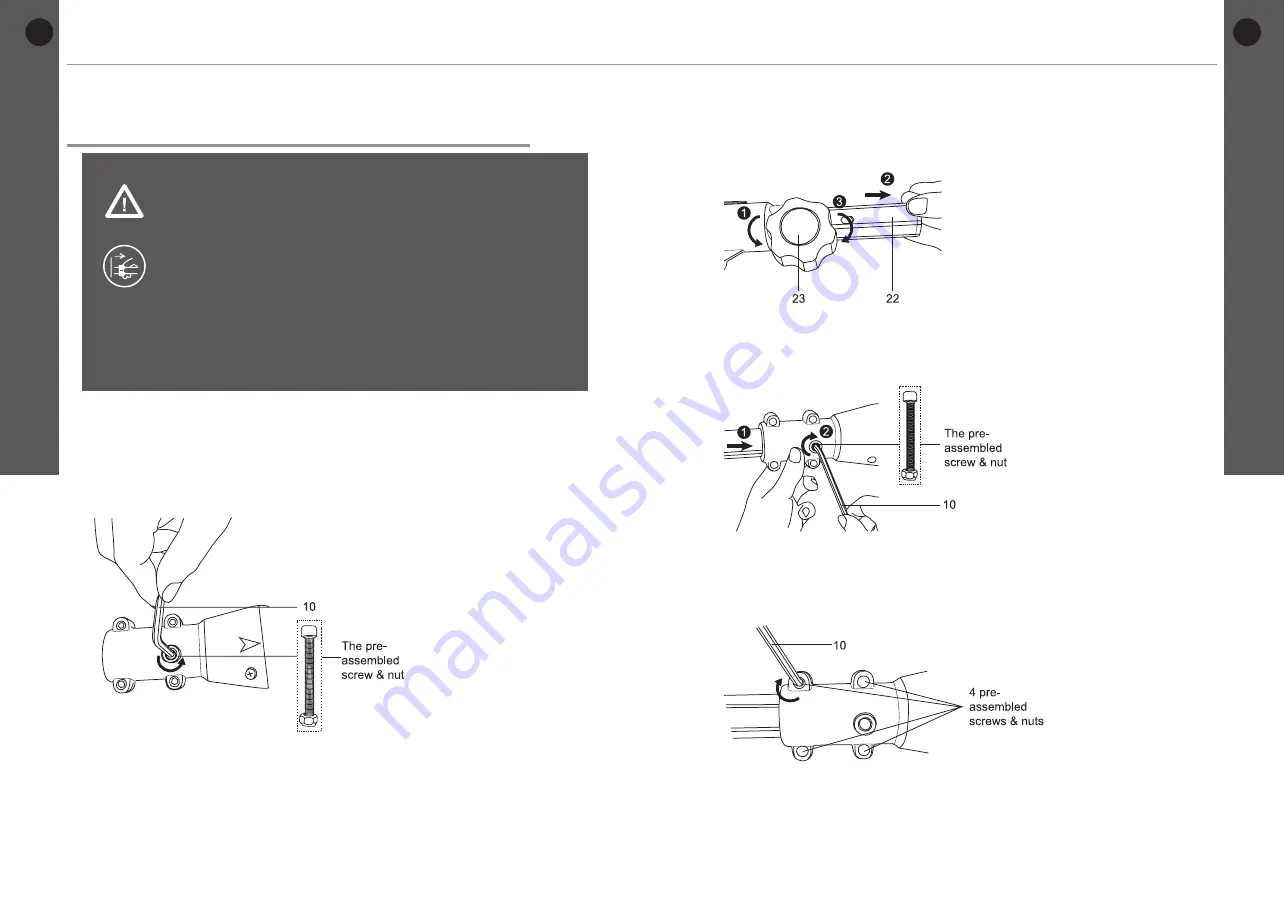
1. Place the product (the rear part) and motor unit on a flat stable
surface with the side cover (12) facing upwards.
2. Turn the pre-assembled screw anticlockwise by using the hex key
(10), and remove it together with the nut, keep them on hand. (Fig. 1
)
Fig. 1
3. Loosen the locking knob (23) by turning it anticlockwise, pull the pole
extension (22) out. Caution as pole may retract quickly. Afterwards
tighten the locking knob (23) by turning it clockwise. (Fig. 2)
Fig. 2
4. Align the pole extension (22) to the motor unit and insert it all the way
to the stop. Secure the connection with the screw and nut. (Fig. 3)
Fig. 3
5. Tighten 4 pre-assembled screws on the motor unit by using the
provided hex key (10). (Fig. 4)
Fig. 4
Before you start
Before you start


