5
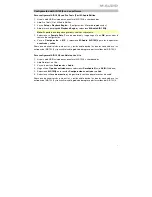
To set AIR 192|4 as your default playback device,
follow the directions below based on your
computer’s operating system.
Windows users:
Before connecting
AIR 192|4
to your computer, install the drivers:
1.
Go to
m-audio.com/drivers
and download the latest
AIR 192|4
driver for your operating
system.
2.
Open the file you downloaded and double-click the driver installer file.
3.
Follow the on-screen instructions to install the drivers.
Windows:
1.
Use the included USB cable to connect the AIR 192|4 to your computer.
2.
In the Taskbar, locate the
Volume Control
"speaker" icon. Right-click the speaker and
select
Playback Devices
.
Alternatively, go to
Start Menu > Control Panel
(or
Settings > Control Panel
in Classic
View)
> Hardware and Sound > Sound
.
3.
In the
Windows Sound
control panel select the
Playback
tab and select
AIR 192|4
as the
default device.
4.
Click the
Recording
tab and select
AIR 192|4
as the default device.
5.
Click
Properties
in the lower right-hand corner.
6.
In the new window, click the
Advanced
tab and select
2-channel, 24-bit, 48000 Hz
(Studio Quality)
as the default format.
7.
Uncheck both boxes under
Exclusive Mode
.
8.
Click
OK
to close the Properties window.
9.
Click
OK
to close the Sound control panel.
macOS:
1.
Use the included USB cable to connect the AIR 192|4 to your computer.
2.
Go to
Applications > Utilities > Audio MIDI Setup
.
3.
In the
Audio Devices
window, select
AIR 192|4
in the left column.
4.
Right-click
AIR 192|4
, and select
Use this device for sound input
.
5.
Right-click
AIR 192|4
, and select
Use this device for sound output
.
6.
Quit Audio MIDI Setup.
Содержание AIR 192|4 Vocal Studio Pro
Страница 2: ...2...
Страница 40: ...Manual Version 1 1...


