background image


IP-CAMERA User Manual - 

15   

C

C

C

h

h

h

a

a

a

p

p

p

t

t

t

e

e

e

r

r

r


5

5

5


R

R

R

e

e

e

m

m

m

o

o

o

t

t

t

e

e

e


C

C

C

o

o

o

n

n

n

f

f

f

i

i

i

g

g

g

u

u

u

r

r

r

a

a

a

t

t

t

i

i

i

o

o

o

n

n

n


5.2


Video Configuration 

Camera  Configuration  includes  three  submenus:  Camera  Configuration,  Video  Stream  and 
Time Stamp. 


5.2.1


Camera Configuration 

Setting steps: 
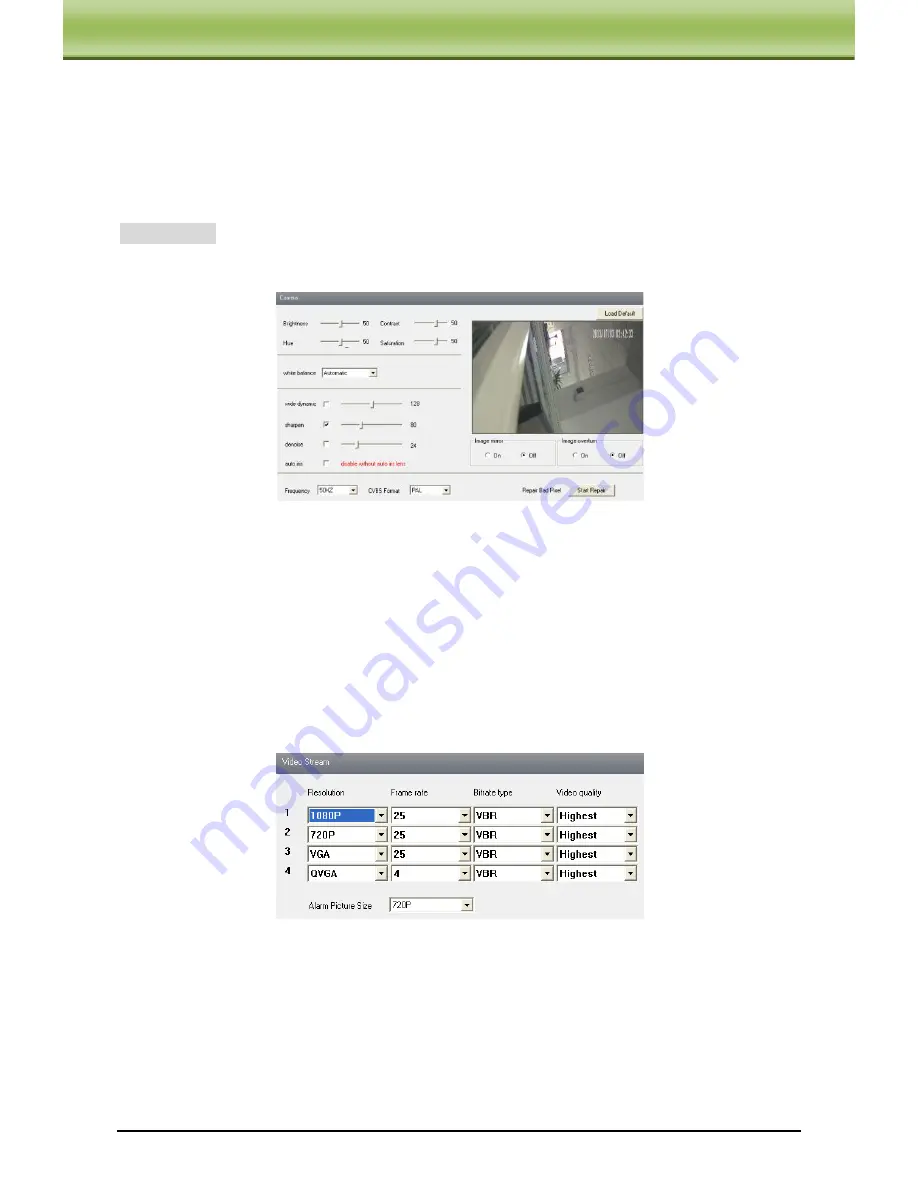
1. Enter into "Video Configuration "

 "Camera" interface as shown below: 


2. Adjust Brightness, Contrast, Hue and saturation of the picture.   
3. Select white balance mode. 
4. Sharpen, denoise and frequency are adjustable. 
5. Enable auto iris, the image mirror and image overturn function.                                                                                       
6. Press the "Save" button to save the settings. 


5.2.2


Video Stream 

1. Enter into "Video configuration"

 "Video Stream" to see a interface shown as below: 


2. Select the resolution of the single frame image at the "Resolution" pull down list. 
3. Select the quantity of video per second at the "Frame rate" pull down list. 
4. Select the data stream type at the "Bit rate type" pull down list. 
5. Set the video quality at the "Video quality" pull down list. 
6. Choose the alarm picture size. 
7. Press the "Save" button to save the settings. 


Содержание IP LBA-LDA P1080

Страница 1: ...k k k I I IR R R W W We e ea a at t th h he e er r r P P Pr r ro o oo o of f f C C Ca a am m me e er r ra a a User Manual Please read this instruction carefully for correct use of the product and pres...

Страница 2: ...r the reversing image will be received Do not operate it incase temperature humidity and power supply are beyond the limited stipulations Keep away from heat sources such as radiators heat registers s...

Страница 3: ...5 1 3 SD Card 14 5 2 Video Configuration 15 5 2 1 Camera Configuration 15 5 2 2 Video Stream 15 5 2 3 Time Stamp 16 5 3 PTZ Configuration 16 5 3 1 Protocol 16 5 3 2 Preset Configuration 16 5 3 3 Cruis...

Страница 4: ...Configuration 30 5 6 3 Security Configuration 30 5 6 4 Configure Backup Restore 31 5 6 5 Reboot Device 31 5 6 6 Upgrade 32 6 Video Search 33 7 Mobile Surveillance 35 7 1 Network Configuration 35 7 2...

Страница 5: ...lishes a sound surveillance system to realize unified management and remote operation to all devices in one network This product is widely used in banks telecommunication systems electricity power dep...

Страница 6: ...to MIC DC12V connect to power supply LAN network port support PoE power supply Alarm NO COM alarm out connect to alarm output device Alarm GND connect to external sensor together with alarm in line Al...

Страница 7: ...ser can connect the PC and IP CAMERA in accordance with above picture Before connecting please connect external devices and then connect the power The connection step as shown as below Step 1 Connect...

Страница 8: ...gure on the left 4 Click Next button to start installing as shown in the figure on the right 5 The installation is completed as shown below 6 Click Finish to complete installation After that two icons...

Страница 9: ...the IP Tool is installed in the PC from the CD Step 2 Use IP Tool to modify the network of IP Cam Then double click the icon on the desktop to run this software as shown below After starting IP Tool a...

Страница 10: ...ease input the user name and password and then click OK button to save the setting Note The default user name is admin The default password is 123456 The new IP address of this device will display as...

Страница 11: ...ress 192 168 226 201 Subnet Mask 255 255 255 0 Gateway 192 168 226 1 HTTP 80 Data port 9008 When use the IP CAM for the first time please connect the device with the above default settings Step 1 Manu...

Страница 12: ...ut user name and password in the login dialog box and click OK button to enter into the live interface You can manage and setup the IP CAM such as change IP address etc 3 2 WAN Access through router o...

Страница 13: ...on n nn n ne e ec c ct t ti i io o on n n Step 3 Enter into the router s management interface through IE browser remap the IP address and port of IP CAM in the virtual server The name depends on the r...

Страница 14: ...Open close audio Right click mouse to appear a pull down list as shown in the above image Stream 1080P 720P VGA QVGA Turn off the live Click this item will close present live preview Enable audio Ena...

Страница 15: ...ration according to some buttons in the playback interface 4 3 Snap Select the picture number and then click Snap icon as shown below Button Description to rotate the dome upwards to rotate the dome d...

Страница 16: ...ures Select the picture number from Frame pull down list box such as 2 and check Title and Time to show capture title and time on the snap pictures simultaneously Click Browse to set saving path Click...

Страница 17: ...e Time and SD card 5 1 1 Basic Information In the Basic Information interface user can setup the device name and also can check the relative information of the server Setting steps 1 Clicking the Conf...

Страница 18: ...mode and time 4 User can setup time by select the Synchronize with NTP Server 5 Press the Save button to save the settings 5 1 3 SD Card Setting steps 1 Enter into System Configuration SD Card as show...

Страница 19: ...ure 3 Select white balance mode 4 Sharpen denoise and frequency are adjustable 5 Enable auto iris the image mirror and image overturn function 6 Press the Save button to save the settings 5 2 2 Video...

Страница 20: ...displayed on the live interface 3 Select the protocol of the PTZ device at the Protocol pull down list 4 Input address of the PTZ in the Address textbox 5 Select baud rate of the PTZ in the Baud rate...

Страница 21: ...s button Click button to have long focus click button to have short focus Zoom button Click button to zoom in the locale picture click button to zoom out the locale picture Iris button Click button to...

Страница 22: ...tings 5 4 Alarm Configuration Alarm configuration includes six submenus Motion Detection Area Motion Detection Trigger Motion Detection Schedule Alarm Input Trigger Alarm Input Schedule and Alarm Out...

Страница 23: ...checkbox is checked Email address shall be set first in the Mail config interface the triggered snap pictures and event will be sent into those address Trigger FTP If Uploading picture is checked the...

Страница 24: ...move the scroll bar to set the schedule of that day 2 Select a date in the list box on the right side and press Erase to remove the schedule on that day Press the Save button to save the settings Hol...

Страница 25: ...Input Schedule Enter into Alarm Configuration Alarm Input Schedule as shown below 1 Select the sensor which needs to setup the alarm parameter at the Sensor pull down list 2 The following setup steps...

Страница 26: ...he Data Port textbox 5 5 2 Wired 1 Enter into Network Configuration Wired to see a tab shown below 2 There are two Options for setup IP obtain an IP address auto by DHCP protocol and use the following...

Страница 27: ...vice in the ECMS NVMS After that the system will auto allot a device ID Please check it in the ECMS NVMS 3 Input the above mentioned server IP server port and device ID in the responding boxes Click s...

Страница 28: ...tton to save the settings Please refer to the following table for parameters and instructions of DDNS configuration Parameter Meaning DDNS server Address of the website which provided by domain name s...

Страница 29: ...the domain Step 3 Click Submit button the system will pop up a dialog box to show that the domain is added successfully Note Time of probationary period is one month If user wants to use it continuat...

Страница 30: ...RTSP addresses are inputted in the media player Application This device supports VLC player You can upload the VLC player in the related website and then select File Open URL from the tool bar of the...

Страница 31: ...ders in the Tasks check box UPnP icon will display 5 5 8 Mail Setting Enter into Network Configuration Mail Setting interface Please refer to below picture 1 From Email sender s e mail address 2 User...

Страница 32: ...tton to delete this account Test Select certain FTP account Click this button to test its valid or not Please refer to the following table for parameters and instructions of FTP configuration 5 6 Adva...

Страница 33: ...box only letters 3 Input characters in Password and Confirm Password textbox letters or numbers 4 Input the MAC address of the PC in Binding MAC address textbox 5 Click OK button and then the new adde...

Страница 34: ...P address list box and click Add button Then this IP address will display in the list box the operation step of Allow the following IP address is the same with Deny the following IP address Select the...

Страница 35: ...port Export Configuration User can import or export the setting information from PC or to device 1 Click Browse to select save path for import or export information on PC 2 User can import or export a...

Страница 36: ...onfiguration Upgrade interface 1 Click Browse button to select the save path of the upgrade file 2 Click Upgrade server firmware button to start upgrading the application program 3 The device will res...

Страница 37: ...icon and search the images which saved in the SD card 1 Select date in the calendar check motion detection relatively and click search button Then the triggered snap pictures will be displayed in the...

Страница 38: ...l click this button select the save path of the picture files on PC to save all preview pictures 5 Fit size click this button the preview pictures will fit on screen 6 Actual size click this button to...

Страница 39: ...PoE and input username and password received from you ISP in network tab Then click Apply You can enter Main Menu Information Network tab to see the IP address If you want to utilize dynamic domain na...

Страница 40: ...ess or domain name user name and password Click Remember server to save the setting click button can quick input saved server address user name and password Work offline view local record and snap Mai...

Страница 41: ...e PTZ click to switch to the second picture Snap Record Talk Live audio Full screen Hide Return Upward rotates the PTZ Downward rotates the PTZ Leftward rotates the PTZ Rightward rotates the PTZ Stop...

Страница 42: ...Configuration interface Main parameters for mobile phone video configuration Select Sound Alarm When Video Loss Sensor Motion happens sound alarm will be triggered Select shake Alarm When Video Loss S...

Страница 43: ...continuous record Remove all former recorded files delete all record files of the current device Buffering time Buffering time of video display 7 3 By Phones with iPhone OS Install through Iphone Step...

Страница 44: ...Ch h ha a ap p pt t te e er r r 7 7 7 M M Mo o ob b bi i il l le e e S S Su u ur r rv v ve e ei i il l ll l la a an n nc c ce e e Step 2 Connect iPhone and PC Step 3 Search SuperLivePro and select it...

Страница 45: ...p pt t te e er r r 7 7 7 M M Mo o ob b bi i il l le e e S S Su u ur r rv v ve e ei i il l ll l la a an n nc c ce e e Step 5 Input username and password Step 6 Synchronously apply SuperLivePro software...

Страница 46: ...in Then click button to add device name IP address Port username and password Step 3 In the live interface choose one channel and click to pop up the server list Then unfold the channel and choose a c...

Страница 47: ...on Choose the channel and click this button to capture the channel image Local record button Choose the channel and click this button to start recording Open Close audio Choose the channel and click t...

Страница 48: ...mentioned interface Return button Click this button to return to the current interface The current server list name Click this button to switch between saved server list and favorite server list Edit...

Страница 49: ...ice If this device has been added to favorite server list deleting it here will also be deleted in the favorite server list Add button Add a new device 3 Saved Server list interface C Click button in...

Страница 50: ...t button to enter favorite server list interface Color means the channel has been selected Gray means the channel hasn t been selected Click button on the live interface to play the selected favorite...

Страница 51: ...l le e e S S Su u ur r rv v ve e ei i il l ll l la a an n nc c ce e e Click button in the live interface to enter saved server list interface Then click saved server list button to switch to the above...

Страница 52: ...k Fig 2 is remote playback by time search Fig 3 is remote playback by event search Fig 4 is remote playback by file search Only a part of devices have the latter 3 playback modes Settings Interface Th...

Страница 53: ...face you can view system information network information and online user information 7 4 By Phones with Android OS Software Installation Step 1 Run Google Market program Step 2 Search Supercam Step 3...

Страница 54: ...or domain name user s ID and password Click Remember server to save the setting click button can quick input saved server address user name and password Main menu Playback playback record file Image i...

Страница 55: ...ei i il l ll l la a an n nc c ce e e Live view Image view Record playback Item Description Item Description Snap Hide Live audio Record hide PTZ click to switch to PTZ interface The first picture The...

Страница 56: ...ack Server list Config interface Add a server list Modify a server list Delete a server list Return Return to the previous interface Alarm setting If Audio alarm is enabled when Video Loss Sensor Moti...

Страница 57: ...e such as device name device ID the software version of device or phone etc 7 5 By Phones with Blackberry OS 1 Open the browser of BlackBerry phone and enter sever address 2 Click Supercam to link 3 C...

Страница 58: ...the option of Browser Configuration 1 Enter into Menu Option Browser Configuration configuration referring to the following figure in the left 2 Enter into Menu Option Cache Operations clear up browse...

Страница 59: ...ble click the IP Tool icon to run this software Then the device can be searched if the device can t be searched please check whether the PC and the device connect to the network or not Click the devic...

Страница 60: ...ware as below picture shows Click Update to start upgrading the progress bar will display as below When upgrading please do not disconnect PC and the device and make sure the power is on After finishi...

Страница 61: ...input username and password click Browse to select the Update file mboot8180 8180 click Update button to start updating Do not disconnect PC to device when upgrading and make sure the power is on The...

Страница 62: ...ed contact administrator to get the correct port number D Exclude the above reasons Recover default setting by jointing the default line and GND line Note default IP 192 168 0 201 mask number 255 255...

Страница 63: ...t the device connect to wireless A Check the statues of wireless router Please make sure the router is open B Check the router and the device port Please make the router setup is matched with device...

Страница 64: ...0P VGA QVGA Video resolution 1920x1080 1080P 1280x720 720P 640x320 VGA 320x160 QVGA Frame rate Max30 fps stream 1080P 1024kbps 12288 kbps Adjustable 720P 512kbps 6144 kbps Adjustable VGA 128kbps 2560...

Отзывы: