28 Betty R
29
Betty R
En
gl
is
h
2
2
Mounting
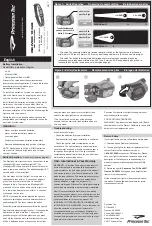
The Lupine helmet bracket can be attached to virtually
any helmet that has ventilation slits. The bracket is easy
to mount. For further information, see the text and
pictures on the pages that follow.
Pull both straps through the best situated ventilation
slits. Try out various options until you find the optimal
position.
Since virtually all ventilation slits are raked for-
ward, its best to mount the bracket as far as possible un-
der the edge of the helmet, to prevent the bracket from
slipping.
In doing this, thread the two straps through the
slits as shown in the picture.
Make the straps as tight as possible by pulling hard on
them, and in such a way that the bracket is centered.
After pressing the two velcro elements (upper and
lower strap) together, tuck the trailing ends of the
velcro under your helmet to avoid unsightly “ears.”
Grasp the bracket and move it back and forth with
moderate force, to make sure that it is firmly in place.
Helpful hints:
Normally the two straps are too long. However, only shorten them after
mounting and removing the bracket once, because once you’ve snipped off the extra length,
you can’t put it back on again.
Helmet bracket:
11
2
Note:
The adjustability of the lighthead is defined by the
silicone rings at both sides of the lighthead. To always
ensure flawless functionality,
both black bolts must be
tightened securely.
Headbelts
The installation of the lamp on the headbelt
works in the same way by two bolts and
o-rings.
Our headbelt is available in two different
versions. The blue standard headbelt ( Art.
No. 205) and our “Heavy Duty” headbelt:
The headbelt hd is the first choice for
orienteering and other fast runners.
Have a look at
www.lupine.de
(Art. No. 207)
Mounting the helmet mount, headbelt or quickre-
lease mount the following rule of thumb applies: All-
ways use the bolts and o-rings which were supplied
with the headbelt, helmet- or quickrelease mount.
Hint:
Sometimes it is easier to install the helmet mount
without attached light. Remove the lamphead by help
of the included size 3 allen key.
Содержание Betty R 9/12
Страница 26: ...50 Betty R 51 Betty R Notizen Notes...


