U.L. Model No.: SW93/SW95/SW96
6
3. Wall Control Installation (Continued)
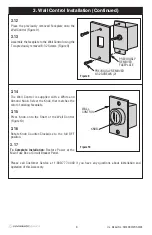
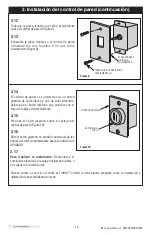
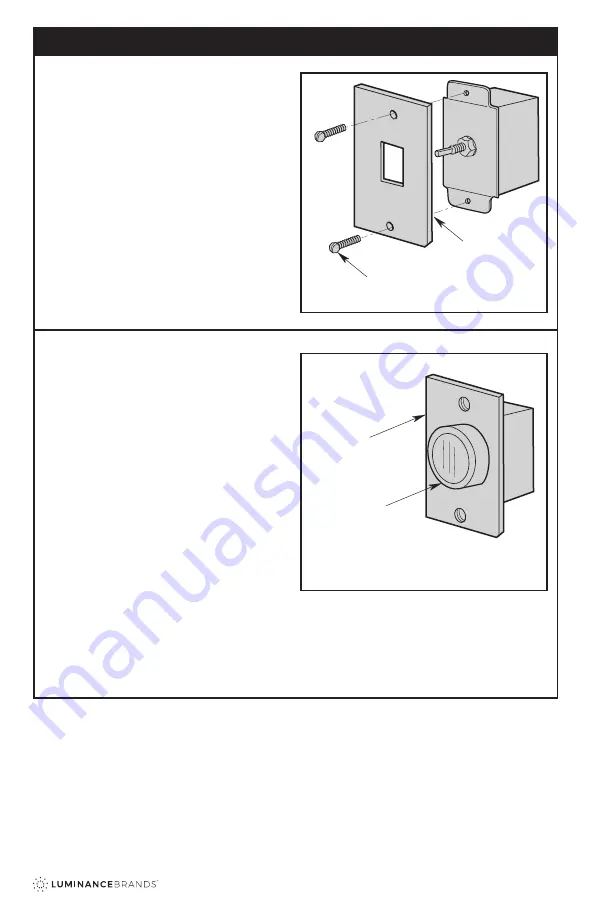
3.12
Place the previously removed Faceplate onto the
Wall Control (Figure 9).
3.13
Assemble the faceplate to the Wall Control using the
Two previously removed 6-32 Screws (Figure 9)
Figure 10
PREVIOUSLY
REMOVED
FACEPLATE
PREVIOUSLY REMOVED
6-32 SCREWS (2)
Figure 9
3.14
The Wall Control is supplied with a White and
Almond Knob. Select the Knob that matches the
color of existing Faceplate.
3.15
Press Knob onto the Shaft of the Wall Control
(Figure 10).
3.16
Rotate Knob Counter-Clockwise to the full OFF
position.
3.17
To Complete Installation:
Restore Power at the
Main Fuse Box or Circuit Breaker Panel.
KNOB
WALL
CONTROL
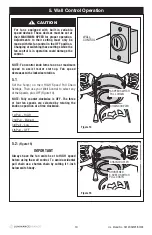
Please call Customer Service at 1-800-777-4440 if you have any questions about installation and
operation of this Accessory.


