ZW39
Z-Wave Smart Plug
(Dimmer)
Specifications:
Power: 120VAC, 60Hz
Loading: 500W
Frequency: 908.42MHz
FCC ID: OXGZW36
IC: 10460A-ZW36
Installation Manual
Z-Wave Network Configuration
Note:
Your device may need to be within 100 feet of the controller
to be included. If so, include the device to the network
within 10 feet of the controller and relocate it to the desired
position in your home. Be sure to refresh the network if the
device is included in this manner.
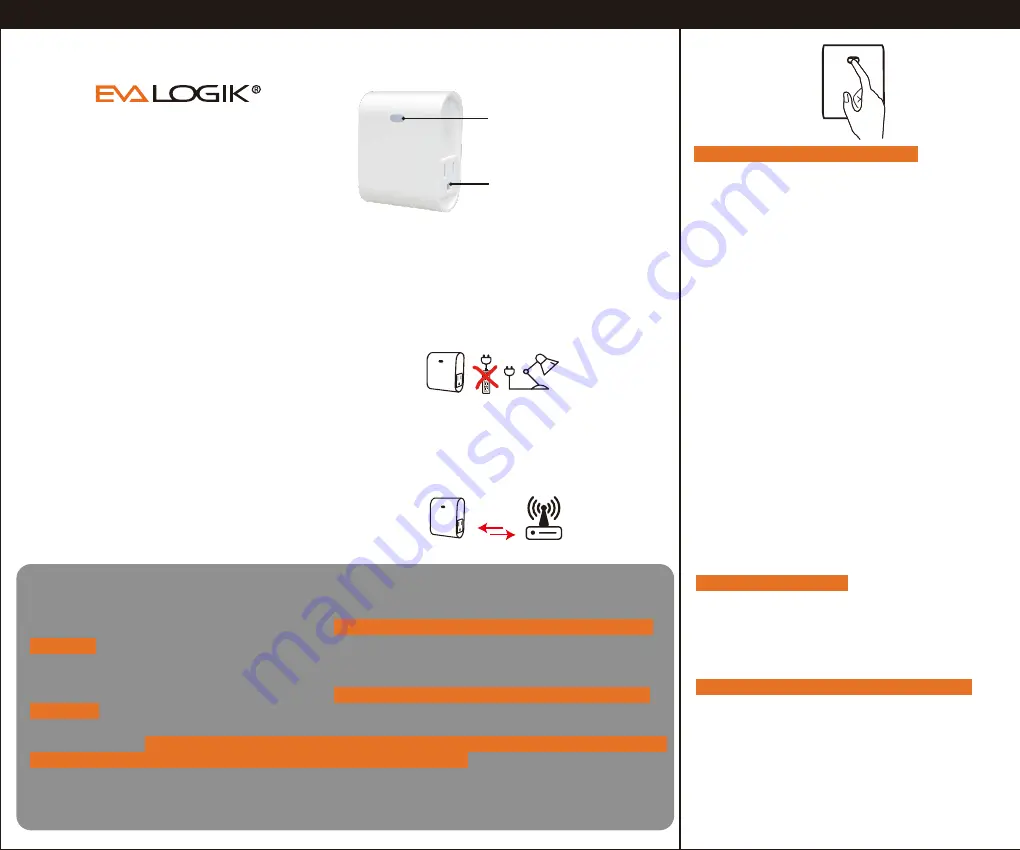
Plug the light you want to control into the Z-Wave Smart
plug controlled outlet .
NOTE: Plug directly into outlet, do not use with extension
cords.
Manual / Program button
This outlet can remotely turn
On/Off the connected device.
Smart Outlet
100 feet
Single press : manually turn
on/off your device.
Hold to adjust brightness.
INTRODUCTION
The EVA LOGIK ZW39 is a Z-Wave enabled 500W
receptacle designed for most residential lighting
and applications. It's compatible with LED,
halogen, incandescent.The ZW39 fully works with
the Fibaro, Smartthings, Wink hub as well as all
other certified Z-Wave controllers.
Scene 1: Tap 2x
Min / Max brightness level setting
1: Press the button 5 times quickly, the blue indicator flashes slowly. At the same time, the lamp will adjust to
the min brightness automatically.
2: Hold the button to adjust the brightness of the bulb, select the appropriate brightness level to set the min
brightness.
3: Quickly press the button 5 times to confirm (the min brightness is set completed). Then the device will move
to Max Brightness setting automatically.
4: Hold the button to adjust the brightness of the bulb, select the appropriate brightness level to set the max
brightness.
5: Press the button 5 times to confirm.
6: After confirmation, the bulb will bright up from the min brightness to the max brightness, then dim from the
max brightness to the min brightness to calibrate the device automatically. The blue indicator stops flashing.
7: Min / Max brightness level settings are completed.
Note: If you do not confirm at Step 3/Step 5, the setting mode will be exited after 10s, and the adjusted bright-
ness value will not be saved.
1. Follow the instructions for your Z-Wave
certified controller to remove a device from
the Z-Wave network.
2. Once the controller is ready to remove your
device,
press the manual/program button(A)
on the smart dimmer 3 times quickly.
Adding Device To Z-Wave Network
To Remove The Device
Again:
If you have issues with pairing/including, please
move the device as close as possible to the hub
and try again--you can move to your final location
when completed.
Note:
If the manual button(A
)
doesn't light up after
pressed 3 times, please reset the device:
click the
button 2 times quickly then hold for at least 10
seconds.
This operation could be done when
manual control is functional--single press can
turn on/off the lamp.
1. Follow the instructions for your Z-Wave
certified controller to add a device to the
Z-Wave network.
2. Once the controller is ready to add your device,
press the manual/ program button(A) on the
smart dimmer 3 times quickly.
The white LED
will blink quickly.
Auto-add mode:
LED will blink within 30
seconds after first plugged in.
Manual:
Click the button 2 times quickly then
hold for at least 10 seconds
Host reset:
Remove it from the host connection
and the device will factory reset
To Return The Device To Factory Defaults:
Association
(LED flashes 2 times when the configuration
parameter changed.)
Support 2 groups, each group max support 2 devices
Group 1 lifeline
Group 2 send basic set
Now, you have complete control to turn your fixture
ON/OFF or set dim levels according to groups,
scenes, schedules and interactive automation
programmed by your controller. If your Z-Wave
certified controller features remote access, you can
control your fixture from your mobile devices.


