————————————————
Accessories from
—
The Original
——
Rev. 01 31/01/2011
Page 2 of 3
the attached bushings (l=17mm) and new bolts (M8x40) at the LSL-yoke. The ignition lock cover
and steering damper are fitted as original. To fix top yoke, first tighten steering head nut up to
15Nm / 11lbf ft, then fix the slider-tubes clamping bolts with 20Nm / 14.75lbf ft. Now tighten
steering head up to the original torque that refers to the manufacturer’s instruction.
Recommended handlebar type: LSL-Superbike, flat, Type N1
Mount new handlebar into the clamps. Mount the handlebar clamps evenly and tighten them after
the fitment with 25Nm / 18.44lbf ft torque.
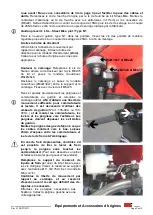
Modify the steering stop!
To gain more
clearance between handlebar and fairing you
have to modify the steering stop. Use suitable
glue to fix the aluminium shims (t=2mm) on the
steering stop.
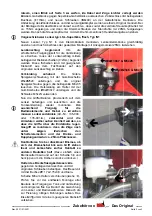
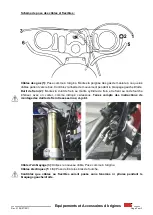
Lift up the fairing:
The backward mirror
mounting point is supported with a rubber
washer Ø6xØ25x6, using attached bolt M6x35.
The fairing mounting point is supported with a
rubber washer Ø8xØ30x7, using bolt M5x25.
Now you should check the clearance to the tank
and faring, therefore you have to mount all
controls provisorily on the handlebar and the
tank cover needs to be remounted.
For a
proper alignment it’s necessary to use bar
ends
(part-no.: 135-004.. or 135-001A..)
and
align the controls in a way that the grips
project over the bar ends. The throttle case
has to be mounted with the cables facing
downward. Brake cylinder and clutch
bracket need to be mounted with a gap of
approximately 25mm to the other controls.
Assure (without brake pressure) whether the
brake lever can be pulled up to the grip and
doesn’t contact any other parts before.
(Loosening one calliper and wobble it to push
the pistons back should be the easiest way.)
Mount the new bracket for the brake fluid
reservoir
with original bolts. Fit reservoir on the
bracket using bush Ø11.7x2.75x3.8 and big
washer M6 (see
).
Readjust handlebar and controls if necessary.
Then drill the bores for the controls and fix them
finally. The left grip should be installed with
glue.
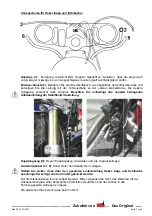
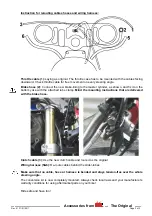
Ø8xØ30x7 & M5x25
Ø6xØ25x6 & M6x35
Содержание 120H125
Страница 4: ......
Страница 8: ...LSL Motorradtechnik GmbH D 47809 Krefeld www lsl eu...
Страница 12: ......

