7
Using the display
Turning on the display
Turn on the display before turning on the computer. When the power is on, the LED on the power
button lights blue and the screen image will appear after about 10 seconds. If the LED doesn't
light blue or no image appears, please verify if the display is properly connected.
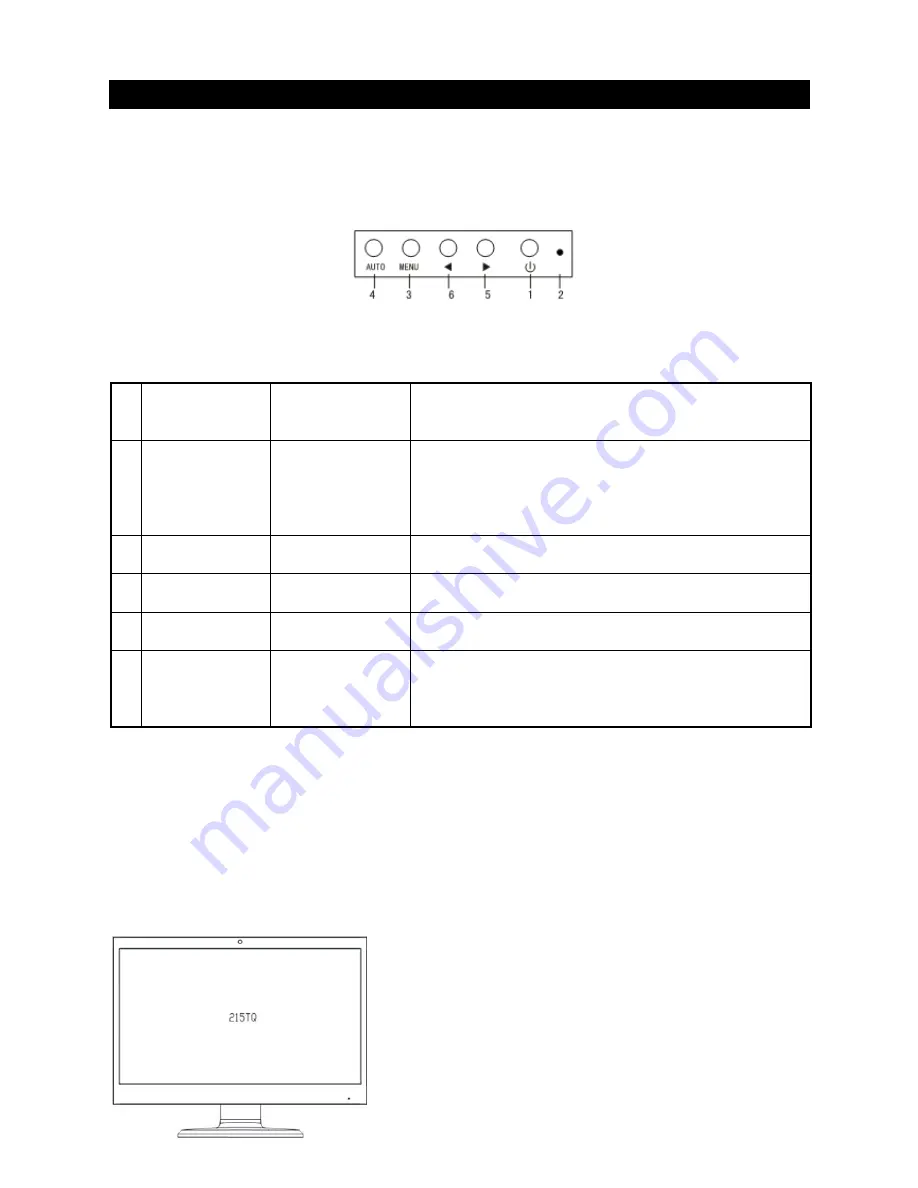
(Figure 4)
Function controls
1 POWER
Power
Switch
Power ON/OFF
Blue LED - Power ON mode
Orange LED - Power saving mode
2 LED
Power Indicator
When the monitor is under normal working condition,the
indicator will light green (or blue);if the monitor is under
power saving mode ,the indicator will glow red (or
orange)or off, And the indicator will turn off under the
power off mode.
3 MENU
OSD function
menu
OSD off: Displays the OSD function menu
OSD on: Confirm the OSD function option
4 AUTO
Auto adjustment
button
OSD off: Perform the auto adjustment function
OSD on: Exit the OSD function menu
5 >
Right/increase
button
OSD on: Press this button to select/increase the
adjustment
6 <
Left/decrease
button
OSD off: Press this button directly to serve as the
shortcut for input
OSD on: Press this button to select/decrease the
adjustment
Control of the Touch Function
Note:
1. Before using the touch function, make sure you connect the USB cable from
the monitor into the USB port on the computer or DVR. The touch applications
from the CD-ROM must be installed if you are running Windows XP and VISTA.
2. When the touch function is active, make sure there are no obstructions on the
screen.
(Figure 5) Ensure there are no foreign objects that may come
in contact with the display.
The touch function may replace the mouse after you start the
Windows operating system and introduce appropriate finger
gesture judgement.
Содержание L22LT11B
Страница 1: ...1...
Страница 14: ...10...
Страница 15: ...11...
Страница 18: ...14 Touch Screen Specifications...
Страница 21: ......


