background image


  page 10


  1. Push the lever up        2.  Fasten the lever           3. Turn the additional locking clamp to secure the lever 


 Charging using the mains adapter  


Only charge the battery via the rear charging socket, using the enclosed charger, connected to  

          a suitable mains socket (220-240V~).  

Before plugging in the charger, make sure that the e-scooter is switched off and that it cannot  

         roll away.  

Take all usual precautions required when dealing with electricity.  

Never touch, short circuit or submerge electronic parts, and never spray water underneath the rear     

         wheel casing.  

Always charge the battery under supervision and do not leave the charger plugged in any longer than  

         necessary once the battery is fully charged.  

Begin by plugging the mini-plug of the charger into the socket on the CARVY.  

Then plug the mains plug of the charger into the power socket. The charging LED lights up on the  

          mains adapter while the charging is in progress.  

Once the CARVY has finished charging (the charging LED lights up green), pull out the mains plug,     

         remove the mini-plug from the CARVER. Always make sure that the mini-plug is pulled out before  
         riding off, to avoid any damage.  

Store and use the mains adapter inside, in a dry place and at room temperature.  


Содержание CARVY

Страница 1: ...page 1 Design Pat No 006254546 0001 Owners manual safety instructions Pictures may differ from original product...

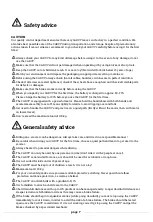
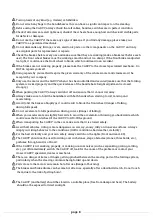
Страница 2: ...clean and dry Always watch out for vehicles in the public traffic and other people For your own safety make sure you wear suitable protective clothing Never go without elbow protection and knee prote...

Страница 3: ...__________________________________________________ Page 15 Checking the tires_____________________________________________________________________ Page 15 Charging the battery_________________________...

Страница 4: ...page 4 Overview...

Страница 5: ...CARVY conception is inspired by the Cheetah small physique light weight agile fast speed powerful tenacious We succeeded to combine all of these attributes into one special innovative gold awarded ele...

Страница 6: ...cond Step off and leave Yyou will never need to search a stable underground to unfold a kickstand or a wall to lean the scooter against 3 Upright position with parallel feet The extra wide deck is des...

Страница 7: ...rds to avoid tipping over and falls Get used to handle the CARVY and practice on a quiet path firstly without the motor then with motor on lowest level Don t exceed the maximum load of 100 kg General...

Страница 8: ...ake sure to hold the handlebars with both hands when starting to roll moving and accelerating Avoid to hit the brakes abruptly as it could result to block the front wheel danger of falling during full...

Страница 9: ...in the carton box 1 Press the black pin to release the locking of the Steering column and lift it up 2 Unfold the handle bar until the folding system is locked 3 Close the quick release and the additi...

Страница 10: ...y water underneath the rear wheel casing Always charge the battery under supervision and do not leave the charger plugged in any longer than necessary once the battery is fully charged Begin by pluggi...

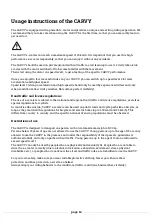
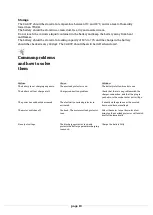
Страница 11: ...RVY or an original replacement charger If you didn t use your CARVY for more than 30 days check the battery charge level If you are not going to use the CARVY for a longer time make sure that the batt...

Страница 12: ...e regulations as well as special regulations for cyclists In countries like Austria CARVY e scooters can be used on public roads and cycle paths like a bicycle as long as they match with regulations f...

Страница 13: ...king the CARVY the handlebars need to be inserted into the stem up to the handlebar nuts and fixed with the enclosed screws to a tightness of 11 2Nm using the provided Allen key If the CARVY has been...

Страница 14: ...page 14 Power controls...

Страница 15: ...e brake has been adjusted fix the adjustment screw in their new position with the locking nut Before during or after riding on a wet path you need to test the brakes because these can have a delayed o...

Страница 16: ...ce one foot on the deck push the scooter like a kick scooter to start rolling and then press the accelerator lever down gently using your right thumb The CARVY will start accelerating Once moving plac...

Страница 17: ...automatically when the CARVY is in use The front power LED light must be switched on with the additional ON OFF switch when the weather conditions offer bad visibility or it is getting dark We recomme...

Страница 18: ...tely Unplug the charger when you have finished charging the CARVY Charging should take place in a dry well aerated room do not charge it outside Make sure that there are no flammable substances within...

Страница 19: ...t charging any more Cause The overload protector is on Solution The battery is full and ready to use The battery will not charge at all Charger connection problem Check that there is no problem with t...

Страница 20: ...page 20 Design Pat No 006254546 0001 www longway e mobility com...

Отзывы: