background image

GB

En

ter

tainmen

t

47

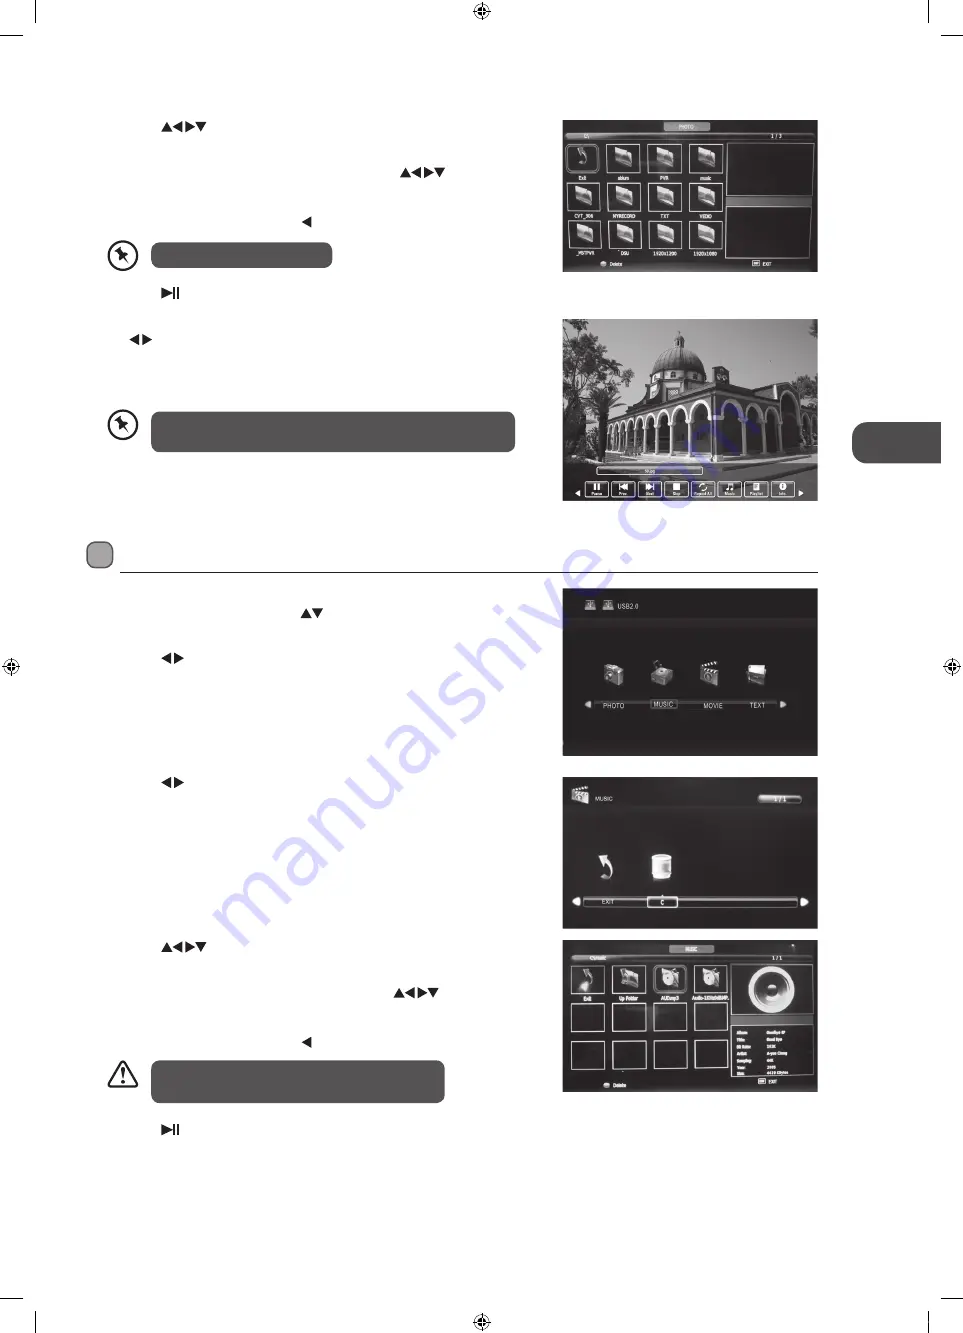
5.  Press the 

 button to view.

6.  Press the OK button or the INFO button to display the function bar. Press 

the     buttons and then press the OK button to select the function: 
Pause / Prev. / Next / Stop / Repeat (Repeat All / Repeat Off / Repeat 1) / 
Music / Playlist / Info / Rotate clockwise / Rotate anti-clockwise / Zoom In 
/ Zoom Out / Move View.

 Listening to Music

1.  Press the SOURCE button on the front right side panel of the TV or on 

the remote control then press the 

 buttons to select the USB mode 

and then press the OK button.

2.  Press the     buttons to select MUSIC and then press the OK button. 

5.  Press the 

 button to start to play.

4.  Press the 


 buttons to navigate in the music folder and then press 

the OK button. 


If you want to select the specified music, press the 


 buttons to 

select the music file and then press the OK button. A tick box will be 
displayed. If you want to delete the file, press the RED button to enter 
the Sub Menu and then press the   button to confirm. 

4.  Press the 


 buttons to navigate in the picture folder and then 

press the OK button.


If you want to select the specified photos, press the 


 buttons to 

select the picture file and then press the OK button. A tick box will be 
displayed. If you want to delete the file, press the RED button to enter 
the Sub Menu and then press the   button to confirm. 

3.  Press the     buttons to select your storage device and then press the 

OK button. 

•  Some audio file formats will not be supported.

•  Supported file formats: mp3.

If this folder also contains music files, you can select a music 

track to play at the same time you view your photos.

7.  Press the EXIT button to return to the previous menu.

File format supported: JPG.

L22FEDV_Y_O12_IB_120430_Annie.indd   47

12年4月30日   下午6:49

Содержание L22FEDO12

Страница 1: ...22 Full HD LED TV with DVD Player Instruction Manual L22FEDV12 L22FEDY12 L22FEDO12 L22FEDV_Y_O12_IB_120430_Annie indd 1 12 4 30 6 48...

Страница 2: ...L22FEDV_Y_O12_IB_120430_Annie indd 2 12 4 30 6 48...

Страница 3: ...he Input Source 19 Channel Selection 19 Display Channel Information 19 Volume Adjustment 19 Customising TV Settings 20 Channel Setting TV DTV or Radio Mode 20 Auto Tuning 20 DTV Manual Tuning DTV Mode...

Страница 4: ...Shift Function 50 Recording DTV Programme onto a USB Storage Device 51 Timer Programming 52 Play Recorded Programme 53 Using the DVD Features 54 Using the Built in DVD Player 54 Compatible Disc Types...

Страница 5: ...es the latest technology to enhance your viewing experience We recommend that you spend some time reading this instruction manual so that you fully understand these features You will also find some hi...

Страница 6: ...ncluded using the 3 screw A provided to fix the base stand to the TV Installing Removing the Base Stand 100 mm 100 mm Four mounting holes size M6 screw The screw holes will only align if the front of...

Страница 7: ...the disc with the label side facing the rear of the TV 12 cm discs only Don t insert 8 cm discs 4 Press to eject disc DVD mode 5 Press to start playback or pause DVD mode 6 SOURCE Press to select amon...

Страница 8: ...IN L R Connects to a DVD player Digital Set Top Box or other AV devices with component YPbPr video and audio output sockets 6 Connects to the headphones 7 CI CARD IN Allows the insertion of a Common A...

Страница 9: ...ery type indicated in this manual When the batteries are exhausted the remote will not function Replace both batteries at the same time with new ones Do not install new batteries with used ones and do...

Страница 10: ...itch input source to ATV ATV mode 12 DVD A short cut to switch input source to DVD DVD mode 13 USB A short cut to switch input source to TV Digital radio channels DTV mode 14 SOURCE Select among the d...

Страница 11: ...f the previous chapter track photo DVD USB mode 24 Record the current programme DTV mode 25 To skip to the beginning of the next chapter track photo DVD USB mode 26 To stop the playback or recording D...

Страница 12: ...DISPLAY Displays channel and programme information 39 Coloured buttons Access the TELETEXT items or channel edit when using Digital Freeview TV Channels ATV DTV mode GOTO RED To skip to a specific loc...

Страница 13: ...utton on the front right side panel of the TV or on the remote control to display the Source List Use the buttons to select HDMI and then press the OK button to confirm Making Video and Audio Connecti...

Страница 14: ...ins socket before switching on the TV 3 Press the STANDBY button on the front right side panel of the TV or the button on the remote control to turn on your TV 4 Press the SOURCE button on the front r...

Страница 15: ...CART Cable 1 Use a SCART cable to connect the TV s SCART input socket to an external AV device s SCART output socket 2 Plug the connected devices into the mains socket before switching on the TV 3 Pre...

Страница 16: ...e the buttons to select any desired input source and then press the OK button to confirm The TV s volume control will have no effect You may control the audio level via the Audio Receiver Rear Right S...

Страница 17: ...te control to turn the TV on The red LED indicator will turn blue Only use the included mains adapter Do not use it with any other equipment Always disconnect the TV from the mains socket when not in...

Страница 18: ...ghted Press the buttons to select the your preferred option if available 4 Press the OK button to confirm Country Code This will be shown as GBR for the UK Primary Region This will show the regional c...

Страница 19: ...nter the Channel List Then use the buttons to highlight and select the channel Press the OK button to view the selected channel If a blocked channel is selected the password screen will be displayed P...

Страница 20: ...buttons to select the country where you will operate the TV Press the OK button to confirm 2 Press the buttons to select Auto Tuning and then press the OK button Channel Setting TV DTV or Radio Mode A...

Страница 21: ...buttons to select the CHANNEL menu and then press the OK button CHANNEL PICTURE SOUND TIME OPTION LOCK EXIT Auto Tuning DTV Manual Tuning Signal Information CI Information Software Update OAD Off Soft...

Страница 22: ...enu and then press the OK button ATV Manual Tuning DTV 0 Programme Colour System PAL Sound System I Current CH 1 Fine Tune 470 25 MHz AFC Off Search 3 A Channel Edit screen will pop up Press the butto...

Страница 23: ...re selecting channels Press the BLUE button again to undo it e FAV Favourite Press the FAV button to set the selected channel as one of the favourite programmes Press the FAV button again to undo it 4...

Страница 24: ...viewing card is inserted in accordance with the Service Provider s instructions 2 Insert the Common Access Module into the slot Flip the Common Access Module to another side and try again if you feel...

Страница 25: ...Module Information This screen is for illustration only To view the module information 1 Press the MENU button and then press the buttons to select the CHANNEL menu and then press the OK button CHANNE...

Страница 26: ...s below 1 Press the MENU button to go to the MAIN menu Press the buttons to select OPTION and then press the OK button 2 Press the buttons to select Restore Factory Default and then press the OK butto...

Страница 27: ...cool for Personal mode Cold Increases blue tint Normal Warm Increases red tint Noise Reduction Reduces the noise level of the connected device Off Low Middle High Screen PC mode Adjusts the PC deskto...

Страница 28: ...ny other technology that has been offered for a two speaker playback environment TruSurround HD builds upon its predecessor the industry leading surround sound virtualiser SRS TruSurround XT Not only...

Страница 29: ...IME menu and then press the OK button 2 Press the buttons to select the following time options and then press the OK button Clock Time Zone Sleep Timer Auto Standby OSD Timer Summer Time GMT Off 4 H 1...

Страница 30: ...re the unit switches to standby mode If you want to operate the TV for a long period of time turn off the auto standby function Press the MENU button to display the main menu Press the buttons to sele...

Страница 31: ...tore Factory Default OSD Language Audio Language TT Language PVR File System Subtitle Language Off Auto On HDMI CEC English English West English TT Language Allows you to select your preferred Teletex...

Страница 32: ...uage TT Language PVR File System Subtitle Language Off Auto On English English West English 3 Press the buttons to select the Primary Secondary Audio Language Press the button and then press the butto...

Страница 33: ...ish West English Hearing Impaired Shows information for the hearing impaired in some programmes For DTV channels only if available 1 Press the MENU button and then press the buttons to select the OPTI...

Страница 34: ...confirm and then press the button to start formatting Warning All data will be lost Start Exit Format disk Format disk File System Size PVR File System Type PVR File System Size SD 107 Mins FAT32 All...

Страница 35: ...the screen This selection will allow you to adjust the picture horizontally in linear proportion Black bars will appear on both the left and right of the screen 16 9 This selection will allow you to...

Страница 36: ...n will allow you to zoom in the picture without any alternation while filling the entire screen with subtitles shown at the bottom of the screen This selection will allow you to zoom in the picture wi...

Страница 37: ...Device Menu Press the OK button to display the setup menu of the connected HDMI CEC compliant device You can use the buttons to navigate through the setup menu some HDMI CEC compliant devices may not...

Страница 38: ...System The Lock System is designed to prevent accidental retuning of the TV losing channels and prevent children watching unsuitable programmes The Lock System must be set to On for this function to...

Страница 39: ...Guidance Off Key Lock Off Off 3 Use the 0 9 buttons to input the old password and then input the new 4 digit password Re enter new password for confirmation 4 Press the button to return to the previou...

Страница 40: ...remember the new password If you forget the new password enter the master password 8899 Lock System Set Password Block Channel Parental Guidance Off Key Lock Off Off Block Channel 1 S 07 2 S 08 ATV AT...

Страница 41: ...ey Lock Off Off 5 Press the buttons to select an age rating Off 4 18 Then press the OK button to confirm 6 Press the MENU button to return to the previous menu press again to return to the main menu 7...

Страница 42: ...t password to enter the LOCK menu 2 Press the buttons to select Lock System and then press the OK button Please enter password The default password is 0000 If you change the password be sure to rememb...

Страница 43: ...ELLOW Date Press the YELLOW button and then press the buttons to view the schedule of the previous next day Press the YELLOW button again to return to the EPG BLUE Remind Press the BLUE button while o...

Страница 44: ...e 100 by using the 0 9 buttons Mix To view a page of text while watching a TV programme press the TEXT button twice The text will be superimposed over the TV programme Double height text If you have d...

Страница 45: ...on digital teletext and move onto the next step by pressing OK RED GREEN YELLOW BLUE or 0 9 buttons etc 5 To change digital teletext service select a different service by pressing the 0 9 buttons or...

Страница 46: ...table hard disk may require more power than the TV USB socket can provide To ensure correct operation please use the power adapter for that device If a USB hub is used make sure its mains adapter is c...

Страница 47: ...the buttons to select the music file and then press the OK button A tick box will be displayed If you want to delete the file press the RED button to enter the Sub Menu and then press the button to co...

Страница 48: ...e EXIT button to return to the previous menu 3 Press the buttons to select your storage device and then press the OK button Viewing Movies 1 Press the SOURCE button on the front right side panel of th...

Страница 49: ...the buttons and then press the OK button to select the function Prev page Next page Prev Next Stop Music Playlist Info 3 Press the buttons to select your storage device and then press the OK button M...

Страница 50: ...ton to confirm The PVR Time Shift Progress Bar 1 Indicates the status of the currently displayed video 2 Indicates the time lagging behind the live broadcast DVR reviewing 3 Indicates the available re...

Страница 51: ...he recording progress bar will disappear after 15 seconds To display the recording progress bar again press the OK button or the button 2 Press the button to stop recording If you want to turn off you...

Страница 52: ...Programming This function is used to perform scheduled recording The recording from timer programme or direct recording may have a little bit of delay when it starts to record the broadcast programme...

Страница 53: ...Press the buttons to select the MY PVR folder and then press the OK button 5 Press the buttons to select your recorded programme and then press the OK button A tick box will be displayed If you want...

Страница 54: ...ordable Audio Video format or JPEG files DVD R AUDIO VIDEO JPEG CD R CD Recordable Audio Video format or JPEG files AUDIO VIDEO JPEG CD RW CD Rewritable Audio Video format or JPEG files AUDIO VIDEO JP...

Страница 55: ...ill stop the playback There will be no sound during forward or backward For DVD discs the above functions may very due to different DVD disc s structure Forward Backward for DVD CD Multimedia discs Th...

Страница 56: ...Only for the discs has this character Zoom for DVD Allows you to select the video size of programme stream Press the DVD ZOOM button to select the size you want Goto for DVD CD Multimedia discs This f...

Страница 57: ...s into Music Picture Video folders 1 Press the buttons to navigate through the folders and files 2 Press the 0 9 buttons to select the contents directly for example to select track 23 press the OK but...

Страница 58: ...9 Wide Widescreen picture shown in the full screen General Setup Page TV Display 16 9 OSD Lang ENG Screen Saver On Last Memory Off English French German Spanish Italian Protuguese OSD Set the OSD lan...

Страница 59: ...ption Audio Setup Page Speaker Setup Dual Mono Dynamic Audio Setup Page Downmix STR LT RT Stereo Speaker Setup Downmix LT RT Mixed stereo LT RT output Stereo Mixed stereo surround output Audio Setup P...

Страница 60: ...Spanish Italian Protuguese Audio Set the Audio language to your language of choice Preference Page TV Type Multi Audio ENG Subtitle ENG Disc Menu ENG Parental Password Default English French German Sp...

Страница 61: ...itial use please enter factory default password 136900 2 Input a new 6 digit password and then press the OK button to confirm Preference Page TV Type Multi Audio ENG Subtitle ENG Disc Menu ENG Parenta...

Страница 62: ...use compressed air to remove dust Maintenance Handling Discs Do not touch the playback side of the disc Do not attach paper or tape to the disc Playback side Cleaning Discs Fingerprints and dust on t...

Страница 63: ...s Please contact your service centre if the picture has not appeared after five minutes No or poor colour or poor picture Adjust the settings in the PICTURE menu Try another channel The problem may be...

Страница 64: ...ou may need to get your aerial checked Talk to your retailer or contact your local aerial installer Why do I get blocking on my digital picture In most cases blocking is caused by a reception problem...

Страница 65: ...eck the display settings of your computer before connecting to the TV If the display setting of your computer does not match the TV there may be no video Resolution Vertical Frequency Hz Aspect Ratio...

Страница 66: ...n HOME STANDBY mode 37W 0 5W Average Annual Energy Consumption 54 00 kWh annum Standby Power Consumption 0 5W Operating Temperature 0 C 50 C Operating Humidity 10 80 Mercury Content mg X Presence of L...

Страница 67: ...enance Hints and Tips Specification 67 A B C D E F G ENERG Y IE IJA IA 2010 1062 2011 54 00 kWh annum 37 Watt 55 cm 21 5 inch L22FEDO12 L22FEDY12 L22FEDV12 B L22FEDV_Y_O12_IB_120430_Annie indd 67 12 4...

Страница 68: ...Unplug the unit from the mains socket during a lightning storm Mains Adapter Cable Make sure the unit or unit stand is not resting on top of the mains adapter cable as the weight of the unit may damag...

Страница 69: ...sult in hazardous radiation exposure Before moving the unit ensure the disc tray is empty Always remove the disc when the unit is not in use Failure to do so will risk severely damaging the disc and t...

Страница 70: ...orporation and Macrovision are protected by trademarks HDMI the HDMI logo and High Definition Multimedia Interface are trademarks or registered trademarks of HDMI Licensing LLC The FREEVIEW word and l...

Страница 71: ...L22FEDV_Y_O12_IB_120430_Annie indd 71 12 4 30 6 49...

Страница 72: ...L22FEDV_Y_O12_IB_120430_Annie indd 72 12 4 30 6 49...

Отзывы: