62
17.0
COMMISSIONING AND TESTING
17.1
ELECTRICAL INSTALLATION
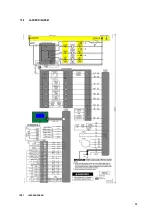
Notes on the requirements for electrical installation are provided in Section15.0: ELECTRICAL SUPPLY. A schematic drawing of
the control circuit is shown in Figure 15.8.
17.2
GAS INSTALLATION
For design see Section 9.0: GAS SUPPLY. See Section 3.0: PRINCIPAL PARTS for details on the position of the gas connection.
17.3
WATER CONNECTIONS
For design see Section 12.0: WATER CONNECTIONS
The system should be thoroughly flushed out with cold water without any circulating pumps in position.
Ensure all the valves are open.
Check the system for leaks and repair as necessary. If the system is configured in a sealed arrangement, check the expansion
vessel cushion pressure and pressurisation unit settings.
17.4
COMMISSIONING THE EQUIPMENT
17.4.1
GENERAL
CHECKS
PRIOR
TO
LIGHTING
A person deemed competent must be responsible for the commissioning of this equipment. Before
attempting to commission any equipment, ensure that personnel involved are aware of what action is
about to be taken and begin by making the following checks:
1.
Flue way passages are clear.
2.
Adequate ventilation exists in the plant room (if necessary).
3.
The system is fully charged with water, ready to receive heat. All necessary valves are open and all allied pumps are
circulating water.
4.
The gas supply pipework is clear of any loose matter, tested for soundness and purged.
5.
The condensate drain is installed correctly and the condensate trap is filled with water.
If the condensate trap is not filled before use, products of combustion may escape and can lead to severe
personal injury or death
17.4.2
EQUIPMENT
CHECKS
PRIOR
TO
LIGHTING
This unit has been designed for a nominal gas inlet pressure of 20.0 mbar when used on natural gas. Information relating
to propane firing can be found in Section 18.0: LPG FUEL
1.
Gas supply is connected but turned to the “off” position. Any unions or fittings are correctly tightened, test points are closed
and the flame sense electrode lead is connected correctly. Ensure the ceramic sheath around the flame sense electrode
is not cracked or broken.
2.
Ensure electricity supply is connected.
Содержание ECOKNIGHT EKW116CE
Страница 28: ...28 Max distance between brackets ...
Страница 29: ...29 ...
Страница 30: ...30 ...
Страница 34: ...34 ...
Страница 35: ...35 ...
Страница 55: ...55 15 8 WIRING DIAGRAM 15 8 1 WIRING DIAGRAM ...
Страница 56: ...56 15 9 LADDER DIAGRAM 15 9 1 LADDER DIAGRAM ...
Страница 87: ...87 ...
Страница 88: ...88 ...


