background image

42  CZ

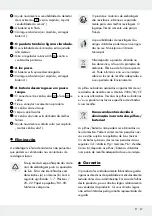
 O možnostech likvidace vysloužilých  
zařízení se informujte u správy vaší obce 
nebo města.

 V zájmu ochrany životního prostředí vy-
sloužilý výrobek nevyhazujte do domov-
ního odpadu, ale předejte k odborné 
likvidaci. O sběrnách a jejich otevíracích 
hodinách se můžete informovat u  
příslušné správy města nebo obce.

Vadné nebo vybité baterie resp. akumulátory se 
musí, podle směrnice 2006/66/ES a jejích 
příslušných změn, recyklovat. Baterie, akumulátory 
i výrobek odevzdejte zpět do nabízených sběren.

Ekologické škody v důsledku 
chybné likvidace baterií /  
akumulátorů!

Baterie / akumulátory se nesmí zlikvidovat v domácím 
odpadu. Mohou obsahovat jedovaté těžké kovy a 
musí se zpracovávat jako zvláštní odpad. Chemické 
symboly těžkých kovů: Cd = kadmium, Hg = rtuť, Pb 
= olovo. Proto odevzdejte opotřebované baterie /  
akumulátory u komunální sběrny.

 Záruka

Výrobek byl vyroben s nejvyšší pečlivostí podle 
přísných kvalitativních směrnic a před odesláním 
prošel výstupní kontrolou. V případě závad máte 
možnost uplatnění zákonných práv vůči prodejci. 
Vaše práva ze zákona nejsou omezena naší níže 
uvedenou zárukou.

Na tento artikl platí 3 záruka od data zakoupení. 
Záruční lhůta začíná od data zakoupení. Uscho-
vejte si dobře originál pokladní stvrzenky. Tuto stvr-
zenku budete potřebovat jako doklad o zakoupení.

Pokud se do 3 let od data zakoupení tohoto vý-
robku vyskytne vada materiálu nebo výrobní vada, 
výrobek Vám – dle našeho rozhodnutí – bezplatně 
opravíme nebo vyměníme. Tato záruka zaniká, 

jestliže se výrobek poškodí, neodborně použil nebo 
neobdržel pravidelnou údržbu. 

Záruka platí na vady materiálu a výrobní vady. Tato 
záruka se nevztahuje na díly výrobku podléhající 
opotřebení (např. na baterie), dále na poškození 
křehkých, choulostivých dílů, např. vypínačů, aku-
mulátorů nebo dílů zhotovených ze skla.

Содержание 300304

Страница 1: ...and safety instructions PROJECTEUR SOLAIRE À LED Instructions de montage d utilisation et consignes de sécurité LED SOLAR SCHIJNWERPER Montage bedienings en veiligheidsinstructies PROJETOR SOLAR LED Indicações de montagem utilização e segurança FOCO LED SOLAR Instrucciones de montaje de uso y de seguridad LED SOLÁRNÍ REFLEKTOR Pokyny k montáži obsluze a bezpečnostní pokyny ...

Страница 2: ... FR BE Instructions de montage d utilisation et consignes de sécurité Page 20 NL BE Montage bedienings en veiligheidsinstructies Pagina 28 CZ Pokyny k montáži obsluze a bezpečnostní pokyny Strana 36 ES Instrucciones de montaje de uso y de seguridad Página 43 PT Indicações de montagem utilização e segurança Página 51 ...

Страница 3: ...A B 1 3 12 13 14 7 8 2 4 5 6 9 10 11 15 11 ...

Страница 4: ...C D E 12m 0m 1m 1m F 18 17 16 ...

Страница 5: ...ien Akkus Seite 7 Funktionsweise Seite 8 Akku aufladen Seite 8 Montage Seite 8 Spot montieren Seite 8 Solarzelle montieren Seite 9 Inbetriebnahme Seite 9 Bewegungsmelder ein ausschalten Seite 9 Leuchtdauer einstellen Seite 9 Empfindlichkeit des Sensors einstellen Seite 10 Lichtempfindlichkeit einstellen Seite 10 Bewegungsmelder ausrichten Seite 10 Reinigung und Lagerung Seite 10 Fehlerbehebung Sei...

Страница 6: ...ist nur für den privaten Ge brauch und nicht für den gewerblichen Einsatz oder für andere Einsatzbereiche bestimmt Teilebeschreibung 1 Dübel Montagematerial für Spot Ø 9mm 2 Schraube Montagematerial für Spot Ø 6 x 40mm 3 Montagehalterung 4 Drehgelenk 5 Federscheibe 6 Unterlegscheibe 7 Befestigungsschraube 8 Solarstrombuchse 9 Bewegungsmelder 10 Spot 11 EIN AUS Schalter 12 Solarzelle 13 Schraube Mo...

Страница 7: ...rstehen Kinder dürfen nicht mit dem Produkt spielen Reinigung und Benutzerwartung dürfen nicht von Kindern ohne Beaufsichtigung durchgeführt werden Verwenden Sie das Produkt nicht wenn Sie irgendwelche Beschädigungen feststellen Die Leuchtmittel sind nicht austauschbar Sollten die Leuchtmittel am Ende ihrer Lebens dauer ausfallen muss das ganze Produkt er setzt werden 0 5 m BRANDGEFAHR Montieren S...

Страница 8: ...g von dem Ladezustand des Akkus sowie der Quali tät der Sonneneinstrahlung Montage Hinweis Entfernen Sie vollständig das Verpack ungsmaterial Entscheiden Sie vor der Montage wo Sie die Solar zelle 12 und den Spot 10 montieren Die Solar zelle 12 und der Spot 10 können unabhängig voneinander montiert werden müssen aber nach der Montage mit der ca 3 m langen Netzleitung der Solarzelle 12 verbunden we...

Страница 9: ...Ausrichtung nach Süden Wählen Sie eher eine Ausrichtung mit leichten Abweichun gen nach Westen als mit leichten Abweichungen nach Osten Horizontale Ausrichtung Die horizontale Ausrichtung der Solarzelle ist abhängig vom geographischen Breitengrad des Montageortes Als ideal gilt in Mitteleuropa ein Winkel von 30 40 Eine Montageplatte mit 6 Bohrungen befindet sich auf der Rückseite der Solarzelle 12...

Страница 10: ...efestigungsschraube 7 wie der fest um die Einstellungen zu fixieren Drehen Sie den Drehregler LUX 16 in die ge wünschte Position Ermitteln Sie diese während der Dämmerungszeit in der der Spot 10 rea gieren soll Drehen Sie den Drehregler LUX 16 langsam im Uhrzeigersinn bis er auf Bewegung im Erfassungsbereich reagiert Reinigung und Lagerung Drücken Sie den EIN AUS Schalter 11 in die Position OFF we...

Страница 11: ...es nicht in den Hausmüll sondern führen Sie es einer fachgerechten Entsor gung zu Über Sammelstellen und deren Öffnungszeiten können Sie sich bei Ihrer zuständigen Verwaltung informieren Defekte oder verbrauchte Batterien Akkus müssen gemäß Richtlinie 2006 66 EG und deren Ände rungen recycelt werden Geben Sie Batterien Akkus und oder das Produkt über die angebotenen Sammeleinrichtungen zurück Umwe...

Страница 12: ...ntieleistung gilt für Material oder Fabrika tionsfehler Diese Garantie erstreckt sich nicht auf Produktteile die normaler Abnutzung ausgesetzt sind z B Batterien und daher als Verschleißteile angesehen werden können oder Beschädigungen an zerbrechlichen Teilen z B Schalter Akkus oder die aus Glas gefertigt sind ...

Страница 13: ...e 16 Charging the rechargeable battery Page 16 Assembly Page 16 Mounting the spotlight Page 16 Mounting the solar cell Page 17 Preparing the product for use Page 17 Switching the motion detector on and off Page 17 Setting the lighting duration Page 17 Adjusting the sensitivity of the sensor Page 17 Setting the daylight level Page 18 Orientating the motion detector Page 18 Cleaning and storage Page...

Страница 14: ... use or for use in other applications Description of parts 1 Dowels mounting material for spotlight Ø 9mm 2 Screws mounting material for spotlight Ø 6 x 40mm 3 Mounting bracket 4 Hinge joint 5 Spring washer 6 Flat washer 7 Fasten screws 8 Solar electricity socket 9 Motion detector 10 Spotlight 11 ON OFF switch 12 Solar cell 13 Screws mounting material for solar cell Ø 4 x 34mm 14 Solar cable plug ...

Страница 15: ...y with the product Cleaning and user maintenance shall not be made by children without supervision Do not use the product if you detect any kind of damage The illuminants are not replaceable If the illuminants fail at the end of their lifes the entire light must be replaced 0 5 m FIRE HAZARD Fit the product so that it is at least 0 5 m away from the material to be illuminated Exces sive heat can r...

Страница 16: ... battery is fully charged after 4 to 6 days The duration of the charging process depends on the charge state of the rechargea ble battery as well as the quality of the expo sure to sunlight Assembly Note Remove all packaging materials from the product Before mounting decide where you want to Mount the solar cell 12 and the spotlight 10 The solar cell 12 and the spotlight 10 can be mounted inde pen...

Страница 17: ... tion In central Europe and angle of 30 40 is ideal A mounting plate with 6 drill holes for screws is located at the back of solar cell 12 Mount the solar cell 12 at the designated loca tion using the 4 small screws 13 and dowels 15 Depending on the topography of the mounting location you can freely choose 4 of the drill holes in the mounting plate however you should ideally select 2 drill holes o...

Страница 18: ...he motion detector 9 and the solar cell 12 for dirt regularly If dirt or is present remove it to guarantee flawless function of the product Especially during the winter keep the product free from snow and ice Clean the product with a lint free slightly moist cloth and mild cleaning agent Troubleshooting Fault Cause Solution The product does not switch on The ON OFF switch 11 is in the OFF position...

Страница 19: ...es rechargeable batteries Batteries rechargeable batteries may not be dis posed of with the usual domestic waste They may contain toxic heavy metals and are subject to haz ardous waste treatment rules and regulations The chemical symbols for heavy metals are as follows Cd cadmium Hg mercury Pb lead That is why you should dispose of used batteries re chargeable batteries at a local collection point...

Страница 20: ...echargeables Page 22 Fonctionnement Page 23 Chargement de la pile Page 23 Montage Page 23 Montage du spot Page 23 Montage de la cellule solaire Page 24 Mise en service Page 24 Activer désactiver le détecteur de mouvement Page 24 Réglage de la durée d éclairage Page 25 Régler la sensibilité du capteur Page 25 Réglage de la sensibilité lumineuse Page 25 Orienter le détecteur de mouvement Page 25 Net...

Страница 21: ...iné à une utilisation privée et non à une utilisation commerciale ou à d autres domaines d utilisation Descriptif des pièces 1 Chevilles matériel de montage pour spot Ø 9 mm 2 Vis matériel de montage pour spot Ø 6 x 40 mm 3 Support de montage 4 Articulation rotative 5 Rondelle élastique 6 Rondelle 7 Vis de fixation 8 Connecteur de courant solaire 9 Détecteur de mouvement 10 Spot 11 Interrupteur MA...

Страница 22: ... ans et plus ainsi que par des personnes ayant des capacités physiques sensorielles ou mentales réduites ou manquant d expérience ou de connaissances s ils sont surveillés ou s ils ont été informés de l utilisation sûre du pro duit et comprennent les risques liés à son utili sation Les enfants ne doivent pas jouer avec le produit Le nettoyage et l entretien du produit ne doivent pas être effectués...

Страница 23: ...harger entièrement la batterie avant la première mise en service Chargement de la batterie par la cellule solaire Placez le commutateur MARCHE ARRÊT 11 en position OFF pour éviter d entraver le pro cessus de recharge lorsque le produit est allumé Brancher le connecteur du câble solaire 14 au connecteur de courant solaire 8 du spot 10 Placer la cellule solaire 12 conformément à la description du ch...

Страница 24: ...e mur Respecter les instructions de service et de sécurité présentes dans le manuel d utilisation de la perceuse Il existe sinon un risque mortel ou de blessures par électro cution Choisir l emplacement de la cellule solaire 12 en fonction des critères suivants La cellule solaire 12 doit autant que possible être exposée au rayonnement solaire direct Une mise à l ombre partielle de la cellule 12 au...

Страница 25: ... tant que celle ci ne dépasse pas près de 20 000 lx Orienter le détecteur de mouvement Desserrez la vis de fixation 7 du détecteur de mouvement 9 Tourner la molette de réglage LUX 16 pour le mettre en position Orienter le détecteur de mouvement dans l axe de la zone de détection prévue Parcourir la zone de détection jusqu à ce que la réaction du détecteur de mouvement soit sa tisfaisante en modifi...

Страница 26: ...e L orientation de la cellule solaire est défavorable Corriger l orientation de la cellule solaire voir chapitre Montage de la cellule solaire Mise au rebut L emballage se compose de matières recyclables pouvant être mises au rebut dans les déchetteries locales b a Veuillez respecter l identification des matériaux d emballage pour le tri sélectif ils sont identifiés avec des abbréviations a et des...

Страница 27: ...tie ne constitue pas une restriction de vos droits légaux Ce produit bénéficie d une garantie de 3 ans à compter de sa date d achat La durée de garantie débute à la date d achat Veuillez conserver le tic ket de caisse original Il fera office de preuve d achat Si un problème matériel ou de fabrication devait survenir dans 3 ans suivant la date d achat de ce produit nous assurons à notre discrétion ...

Страница 28: ...oor batterijen accu s Pagina 30 Functie Pagina 31 Batterij opladen Pagina 31 Montage Pagina 31 Spot monteren Pagina 31 Zonnecel monteren Pagina 32 Ingebruikname Pagina 32 Bewegingsmelder aan uitzetten Pagina 32 Verlichtingsduur instellen Pagina 32 Gevoeligheid van de sensor instellen Pagina 33 Lichtgevoeligheid instellen Pagina 33 Bewegingsmelder instellen Pagina 33 Reiniging en opbergen Pagina 33...

Страница 29: ... buitenshuis Dit product is alleen bedoeld voor gebruik in pri vé huishoudens en niet voor commercieel gebruik of voor gebruik op andere gebieden Beschrijving van de onderdelen 1 Plug montagemateriaal voor spot Ø 9mm 2 Schroef montagemateriaal voor spot Ø 6 x 40mm 3 Montagehouder 4 Draaischarnier 5 Veerring 6 Onderlegplaatje 7 Bevestigingsschroef 8 Zonnestroomansluiting 9 Bewegingsmelder 10 Spot 1...

Страница 30: ...n of geïnstrueerd werden met betrekking tot het vei lige gebruik van het product en zij de hieruit voortvloeiende gevaren begrijpen Kinderen mogen niet met het product spelen Reiniging en onderhoud mag niet door kinderen zonder toezicht worden uitgevoerd Gebruik het product niet als u beschadigingen heeft geconstateerd De verlichtingsmiddelen kunnen niet worden vervangen Mochten de verlichtingsmid...

Страница 31: ...in Zonnecel 12 monteren Opmerking na 4 tot 6 dagen met goede zonnestralen is de batterij weer opgeladen De duur van de laadprocedure is afhankelijk van de laadtoestand van de batterij en de kwaliteit van het zonlicht Montage Opmerking verwijder het verpakkingsmateriaal alstublieft in zijn geheel Beslis voorafgaand aan de montage waar u de zonnecel 12 en de spot 10 wilt monteren De zon necel 12 en ...

Страница 32: ...enlijk beïnvloeden Hemelrichting Het beste is om naar het zuiden te richten Kies eer der voor het richten met lichte afwijkingen naar het westen als voor het richten met lichte afwijkingen naar het oosten Horizontale richting Het horizontaal richten van de zonnecel is afhanke lijk van de geografische breedtegraad van de montageplaats Ideaal in Midden Europa is een hoek van 30 40 Aan de achterkant ...

Страница 33: ...e instellingen te bewaren Draai de draairegelaar LUX 16 in de gewenste positie Bepaal deze tijdens de schemering waarin de spot 10 moet reageren Draai de draairegelaar LUX 16 langzaam met de klok mee totdat hij op beweging in het gebied reageert Reiniging en opbergen Zet de AAN UIT schakelaar 11 op de stand OFF als u het product niet gebruikt en wilt opslaan Controleer de bewegingsmelder 9 en de z...

Страница 34: ...ecte of verbruikte batterijen accu s moeten volgens de richtlijn 2006 66 EG en veranderingen daarop worden gerecycled Geef batterijen accu s en of het product af bij de daarvoor bestemde verzamelstations Milieuschade door foutieve verwijdering van de batterijen accu s Batterijen accu s mogen niet via het huisvuil worden weggegooid Ze kunnen giftige zware metalen be vatten en vallen onder het chemi...

Страница 35: ...BE en hierdoor als aan slijtage onderhevige onderde len gelden bijv batterijen of voor beschadigingen aan breekbare onderdelen zoals bijv schakelaars accu s of dergelijke onderdelen die gemaakt zijn van glas ...

Страница 36: ...8 Funkce Strana 39 Nabíjení akumulátoru Strana 39 Montáž Strana 39 Montáž bodového světla Strana 39 Montáž solárního článku Strana 40 Uvedení do provozu Strana 40 Zapnutí vypnutí pohybového senzoru Strana 40 Nastavení doby svícení Strana 40 Nastavení citlivosti senzoru Strana 40 Nastavení světelné citlivosti Strana 40 Nasměrování pohybového senzoru Strana 41 Čištění a skladování Strana 41 Odstraně...

Страница 37: ...oždinka montážní materiál pro bodové světlo Ø 9 mm 2 Šroub montážní materiál pro bodové světlo Ø 6 x 40 mm 3 Montážní držák 4 Otočný kloub 5 Pérová podložka 6 Podložka 7 Šroub na připevnění 8 Zdířka solárního proudu 9 Pohybový senzor 10 Bodové světlo 11 Vypínač ZAP VYP 12 Solární článek 13 Šroub montážní materiál pro solární článek Ø 4 x 34 mm 14 Solární kabelová zástrčka 15 Hmoždinka montážní mat...

Страница 38: ... údržbu Výrobek nepoužívejte jestliže jste zjistili nějaká poškození Osvětlovací prostředky nelze vyměnit Po výpadku nebo poškození osvětlovacích pro středků se musí celý výrobek vyměnit 0 5 m NEBEZPEČÍ POŽÁRU Montujte výrobek nejméně 0 5m od nasvíce ných materiálů Nadměrný vývin tepla může vést ke vzniku požáru POZOR NEBEZPEČÍ ZRANĚNÍ Poškozené sklo lampy je třeba před dalším použitím svítidla vy...

Страница 39: ...íťovým vedením o délce 3 m solárního článku 12 Po montáži umís těte síťový kabel tak aby nebyl vystaven mechanic kému zatížení Abyste zabránili poškození síťového kabelu použijte pro jeho připevnění běžné insta lační materiály jako jsou např objímky nebo kabe lové kanály Upozornění Přiložený montážní materiál je vhodný jen pro běžné pevné zdivo Pro jiné pod klady budou možná zapotřebí jiné upevňov...

Страница 40: ... vlevo a úplně vpravo viz obr B Potom zaveďte zástrčku solárního kabelu 14 a zastrčte jí do zdířky solárního proudu 8 bo dového světla 10 Spojte solární článek 12 a montážní desku po mocí otočného kloubu Nasměrujte solární člá nek 12 tak aby byl vystaven pokud možno přímému slunečnímu světlu Uvedení do provozu Zapnutí vypnutí pohybového senzoru Pro zapnutí pohybového senzoru 9 stiskněte vypínač 11...

Страница 41: ...ven Nastavte otočný regulátor LUX 16 na světlejší prostředí Pohybový senzor 9 je znečištěný nebo chybně nasměrovaný Vyčistěte pohybový senzor 9 nebo ho nově nastavte Citlivost pohybového senzoru 9 je příliš nízká Nastavte znovu citlivost pohybového senzoru 9 viz kapitola Nastavení citlivosti senzoru Akumulátor je vybitý Nabijte akumulátor viz kapitola Nabíjení akumulátorového článku Výrobek se zap...

Страница 42: ... baterie akumulátory u komunální sběrny Záruka Výrobek byl vyroben s nejvyšší pečlivostí podle přísných kvalitativních směrnic a před odesláním prošel výstupní kontrolou V případě závad máte možnost uplatnění zákonných práv vůči prodejci Vaše práva ze zákona nejsou omezena naší níže uvedenou zárukou Na tento artikl platí 3 záruka od data zakoupení Záruční lhůta začíná od data zakoupení Uscho vejte...

Страница 43: ...ionamiento Página 46 Cargar la batería Página 46 Montaje Página 46 Montar el foco Página 46 Montar la placa solar Página 47 Puesta en funcionamiento Página 47 Encendido apagado del sensor de movimiento Página 47 Ajustar el tiempo de iluminación Página 48 Ajustar la sensibilidad del sensor Página 48 Ajuste de la sensibilidad lumínica Página 48 Orientar el sensor de movimiento Página 48 Limpieza y m...

Страница 44: ...ra uso privado y no para uso comercial ni cual quier otra aplicación Descripción de los componentes 1 Taco material de montaje para el foco Ø 9 mm 2 Tornillo material de montaje para el foco Ø 6 x 40 mm 3 Soporte de montaje 4 Articulación giratoria 5 Arandela elástica 6 Arandela 7 Tornillo de fijación 8 Conector de energía solar 9 Sensor de movimiento 10 Foco 11 Interruptor ENCENDIDO APAGADO 12 Pl...

Страница 45: ...er utilizado por niños mayores de 8 años así como por personas con capacidades físicas sensoriales o men tales reducidas o que cuenten con poca expe riencia y o falta de conocimientos siempre y cuando se les haya enseñado cómo utilizar el producto de forma segura y hayan compren dido los peligros que pueden resultar de un mal uso del mismo No permita que los niños jueguen con el producto La limpie...

Страница 46: ... la primera puesta en funcionamiento Recarga de la batería mediante célula solar Ponga el interruptor de ENCENDIDO APAGADO 11 en posición OFF para que la operación de carga no se vea influida por la conexión del producto Introduzca el conector 14 del cable de la cé lula solar en el conector de energía solar 8 del foco 10 Posicione la célula solar 12 tal y como se describe en Montar la placa solar ...

Страница 47: ...r descarga eléctrica Al elegir el lugar de montaje de la célula solar 12 tenga en cuenta lo siguiente La placa solar 12 requiere la mayor incidencia directa de luz solar posible La exposición par cial de la placa solar 12 a la sombra durante el día puede afectar considerablemente a la recarga de la batería Orientación La orientación óptima es hacia el sur Elija prefe rentemente una orientación con...

Страница 48: ...lador giratorio LUX 16 hasta la posición Oriente el sensor de movimiento hacia la posición central del área detección deseada Camine por el área de detección hasta quedar satisfecho con el comportamiento de conexión del detector de movimiento Modifique para ello la posición del regulador giratorio SENS 17 o la orientación del sensor de movimiento Apriete el tornillo de fijación 7 para fijar el aju...

Страница 49: ...a laje para la separación de residuos Está compuesto por abreviaturas a y números b que significan lo siguiente 1 7 plásticos 20 22 papel y car tón 80 98 materiales compuestos El producto y el material de embalaje son reciclables Separe los materiales para un mejor tratamiento de los resi duos El logotipo Triman se aplica solo para Francia Para obtener información sobre las posi bilidades de desec...

Страница 50: ... documento se requerirá como prueba de que se realizó la compra Si en el plazo de 3 años a partir de la fecha de com pra se produce un fallo de material o fabricación en este producto repararemos el producto o lo sustitui remos gratuitamente por un producto nuevo según nuestra elección La garantía quedará anulada si el producto resulta dañado o es utilizado o mante nido de forma inadecuada La gara...

Страница 51: ... Modo de funcionamento Página 54 Carregar bateria Página 54 Montagem Página 54 Montar foco Página 54 Montar célula solar Página 55 Colocação em funcionamento Página 55 Ligar desligar detector de movimento Página 55 Regular o período de iluminação Página 55 Ajustar sensibilidade do sensor Página 56 Ajustar a fotossensibilidade Página 56 Alinhar o detector de movimentos Página 56 Limpeza e conservaç...

Страница 52: ...enas ao uso privado em domicílios e não ao uso comercial ou outras áreas de aplicação Descrição das peças 1 Bucha Material de montagem para foco Ø 9 mm 2 Parafuso Material de montagem para foco Ø 6 x 40 mm 3 Suporte de montagem 4 Articulação rotativa 5 Mola de disco 6 Arruela plana 7 Parafuso de fixação 8 Caixa de energia solar 9 Detector de movimentos 10 Foco 11 Interruptor Ligar Desligar 12 Célu...

Страница 53: ... anos assim como por pessoas com capacidades físicas sensoriais ou mentais reduzidas ou deficiências na experiência e conhecimento se forem vigiadas ou instruídas em relação ao uso seguro do produto e se compreenderem os perigos que daí possam resultar As crianças não devem brincar com o produto A limpeza e a manutenção pelo utiliz ador não devem ser realizadas por crianças sem vigilância Não util...

Страница 54: ...egar a bateria com a célula solar Coloque o interruptor de LIGAR DESLIGAR 11 na posição OFF para não influenciar o carre gamento do produto através de um ligamento Insira a ficha de cabo solar 14 do cabo da célula solar na caixa de energia solar 8 do foco 10 Coloque a célula solar 12 como de scrito no capítulo Montar célula solar Aviso Após 4 a 6 dias com boa radiação solar a bateria estará carreg...

Страница 55: ...2 tenha em consideração o seguinte A célula solar 12 precisa de radiação solar di reta Também uma sobra parcial na célula so lar 12 durante o dia pode reduzir severamente o carregamento da bateria Direcção A melhor disposição é para sul É melhor seleccionar um alinhamento com um ligeiro desvio para oeste ao invés de um ligeiro desvio para este Alinhamento horizontal O alinhamento horizontal da cél...

Страница 56: ...rtura até estar satisfeito com a sensibilidade do detector de movimentos Para tal altere a posição do regu lador rotativo SENS 17 ou o alinhamento do detector de movimentos Aperte o parafuso de fixação 7 novamente para fixar o ajuste Rode o regulador rotativo LUX 16 para a po sição pretendida Verifique essa durante aman hecer ou escurecer na qual o foco 10 deve reagir Gire o regulador rotativo LUX...

Страница 57: ...a mente para uma melhor reciclagem O logotipo Triman somente vale para a França As possibilidades de reciclagem dos artigos utilizados poderão ser averigua das no seu Município ou Câmara Municipal Não deposite o produto utilizado no lixo doméstico a favor da proteção do ambiente Elimine o de forma responsá vel Pode informar se no seu município sobre os locais de recolha adequados e o seu período d...

Страница 58: ...ituído por nós segundo a nossa escolha e sem qualquer custo Esta garantia expira se o producto estiver danificado se não for devidamente utilizado ou se não for efectuada a devida manu tenção A garantia é válida em caso de defeitos de material ou de fabrico Esta garantia não é extensível a componentes do produto que se desgastam com o uso e que por isso podem ser consideradas peças de desgaste por...

Страница 59: ... Model No HG02109A HG02109B HG02109C Version 03 2018 Stand der Informationen Last Information Update Version des informations Stand van de informatie Stav informací Estado de las informaciones Estado das informações 01 2018 Ident No HG02109A B C012018 8 IAN 300304 ...

Отзывы: