59
60
Troubleshooting
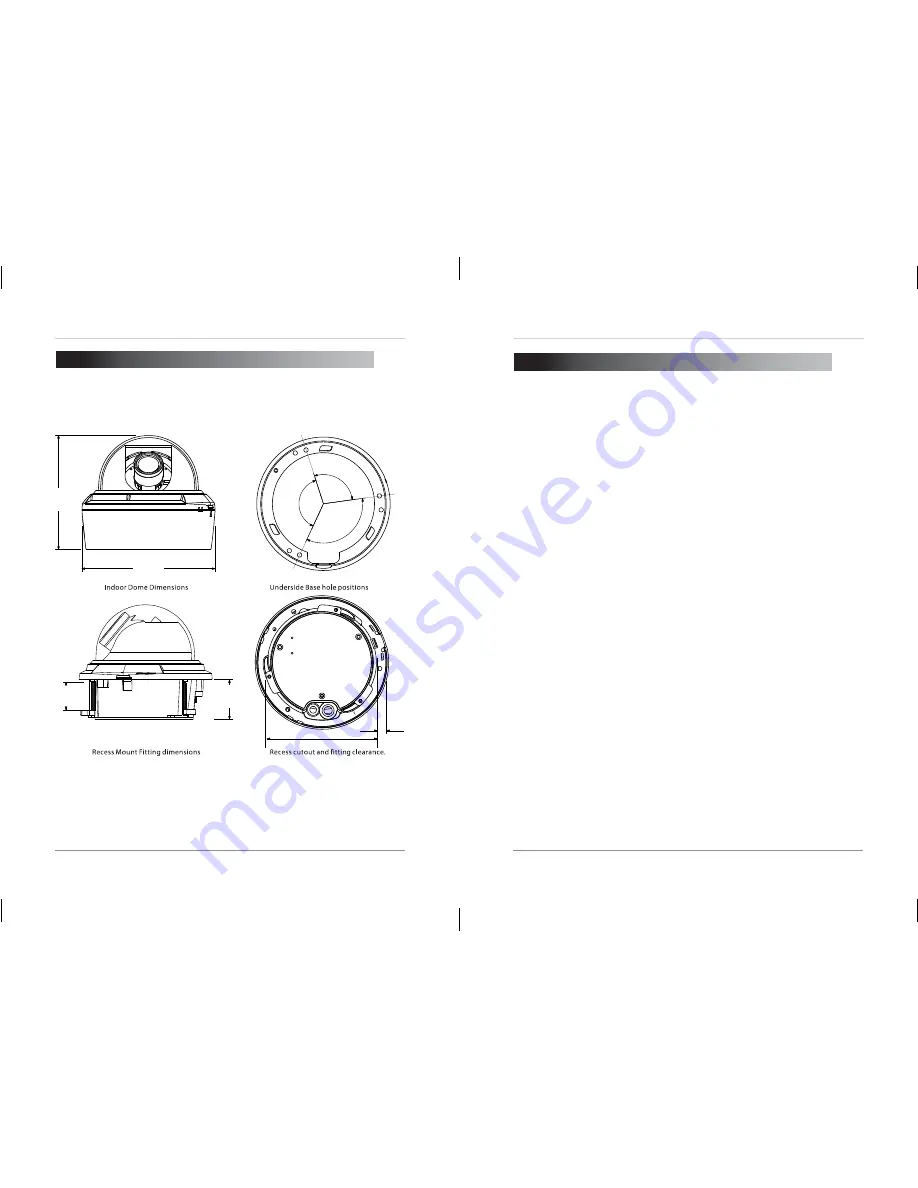
8. DIMENSIONS
Units: mm /&Inch
Because our products are subject to continuous improvement, product
design and specifications without notice and without incurring any obligation.
E&O.E.
112 mm
4.4"
39 mm
1.5"
115 mm
4.5"
27 mm
1.1"
137?
123?
100?
7 mm
.28"
130 mm
5.1"
Troubleshooting
9. TROUBLESHOOTING
Can’t
find the camera IP address using NVMS or other software:
•
Make sure Ethernet and/or DC power cables are correctly connected to
the camera.
•
Make sure the PoE switch or DC power source meets the
camera’s
power
requirements (class 3 PoE / 450mA / 5.4W / 12V). If using PoE, make sure
the PoE switch is powered on.
•
Make sure the PC is on the same network as the camera. Ping the
camera’s
IP address. On your PC, go to
Start > Programs > Accessories
> Command Prompt
. Type
ping
then the
camera
’
s local IP address
and
press
Enter
. If you get the message
“Requ
est timed
out,”
PC and camera
are not on the same network or camera is not connected. Camera is
connected if you receive replies.
•
Connect the BNC test cable to the camera and the other end to a test
monitor. The monitor display shows
the camera’s
IP address. A default
IP address of 192.168.0.120 may mean that the camera cannot obtain an
IP address from the router. Check the Ethernet/power connections and
router configuration.
•
Camera set for static IP mode using an incorrect IP address. By default,
the camera is set for DHCP mode, which means it will automatically obtain
an IP address from your router. Reset the camera to factory default
settings by removing the camera cover and pressing the reset button for
5 seconds or more.
Can’t
connect to the camera on a web browser using local IP address:
•
See steps above.
•
Verify
the camera’s
local IP address using one of the methods listed in
“4.
Finding
the Camera’s
IP
Address”
on page 9.


