INSTALLATION
8
INSTALLATION
Powering up the system
- Power up Quad View Switch. At first all six LEDs will flash for a short time, then the green QUAD LED
indicates that the unit is ready for operation in Quad Mode (factory default).
- Power up all connected computers. Quad View Switch recognizes all input video sources and displays them
all on your monitor screen.
- To change the display mode use the relevant keyboard commands (see pages 9-12) or push buttons (see
page 3,4 and 13).
Connecting the computers
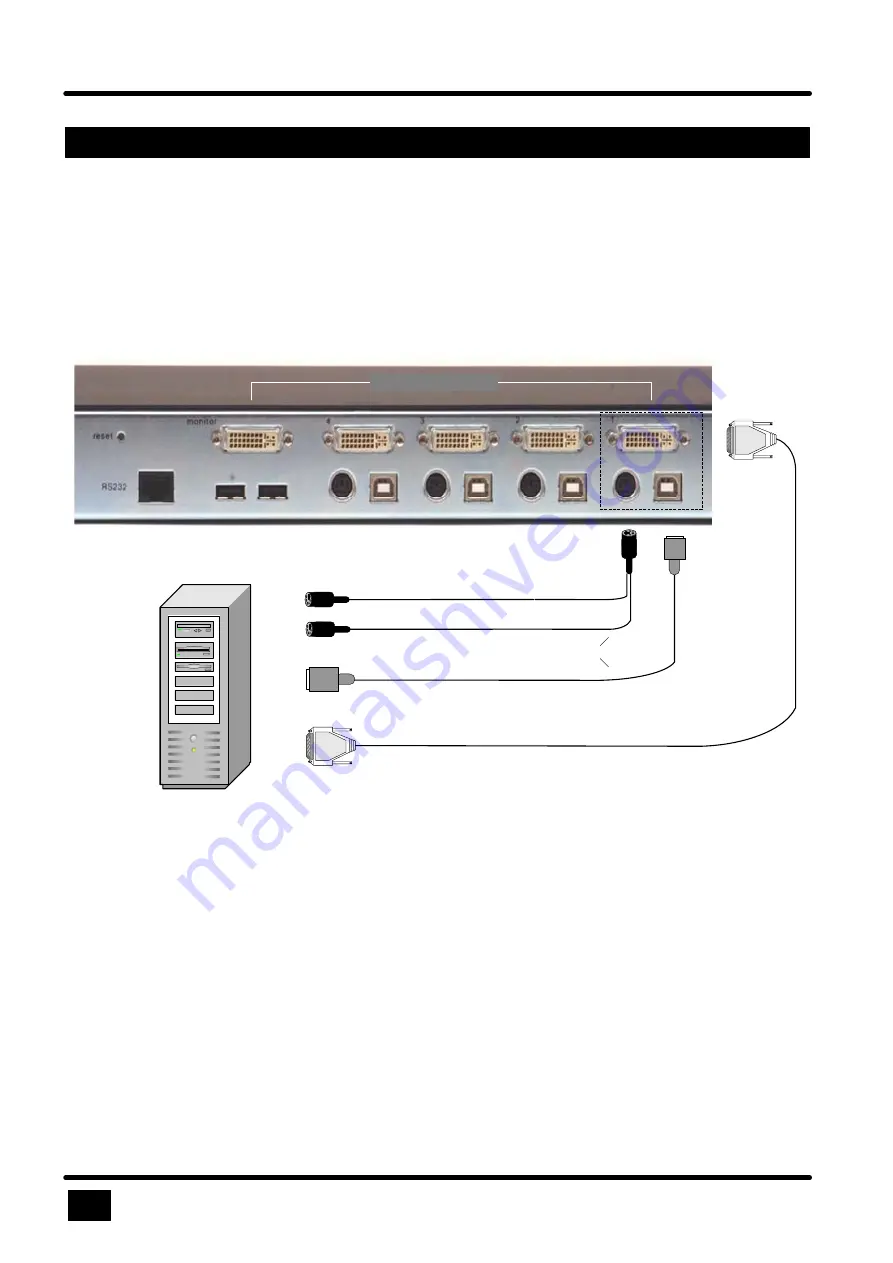
- Disconnect the keyboard, monitor and mouse from a computer after it has been switched off.
- Connect keyboard and mouse either with a single USB cable to USB-B connector or connect them with
two PS/2 cables and a Y cable to the common PS/2 connector (see below).
- Connect an analog computer video source (VGA) with a VGA to DVI-I cable. Digital video sources are
connected via DVI cable.
Quad View Switch - Installation and Operation Manual
1
2
3
4
DVI-I
USB-B
PS/2
DVI-I
DVI-I
DVI-I
DVI-I
PS/2 - Y cable
USB cable (A-B)
or
DVI-I
oder
VGA
USB-A
USB
-B
keyboard
& mouse
keyboard
mouse
digital
or
analog
DVI-I -HD15 or DVI cable
DVI-I
COMPUTER 1 - 4
Configuration
Enter OSD main menu (see page 13) by either keyboard command
Hotkey O
(factory hotkey = STRG + ALT)
or simultaneous pressing of
Quad
and
PiP
buttons on front of Quad View Switch for longer than one second.
The main menu window pops up over the computer’s video. Easy to use menus guide you through the
configuration process. In chapter „OSD“ all parameter settings are described.


