background image

 42

Media Operation

Copy

T

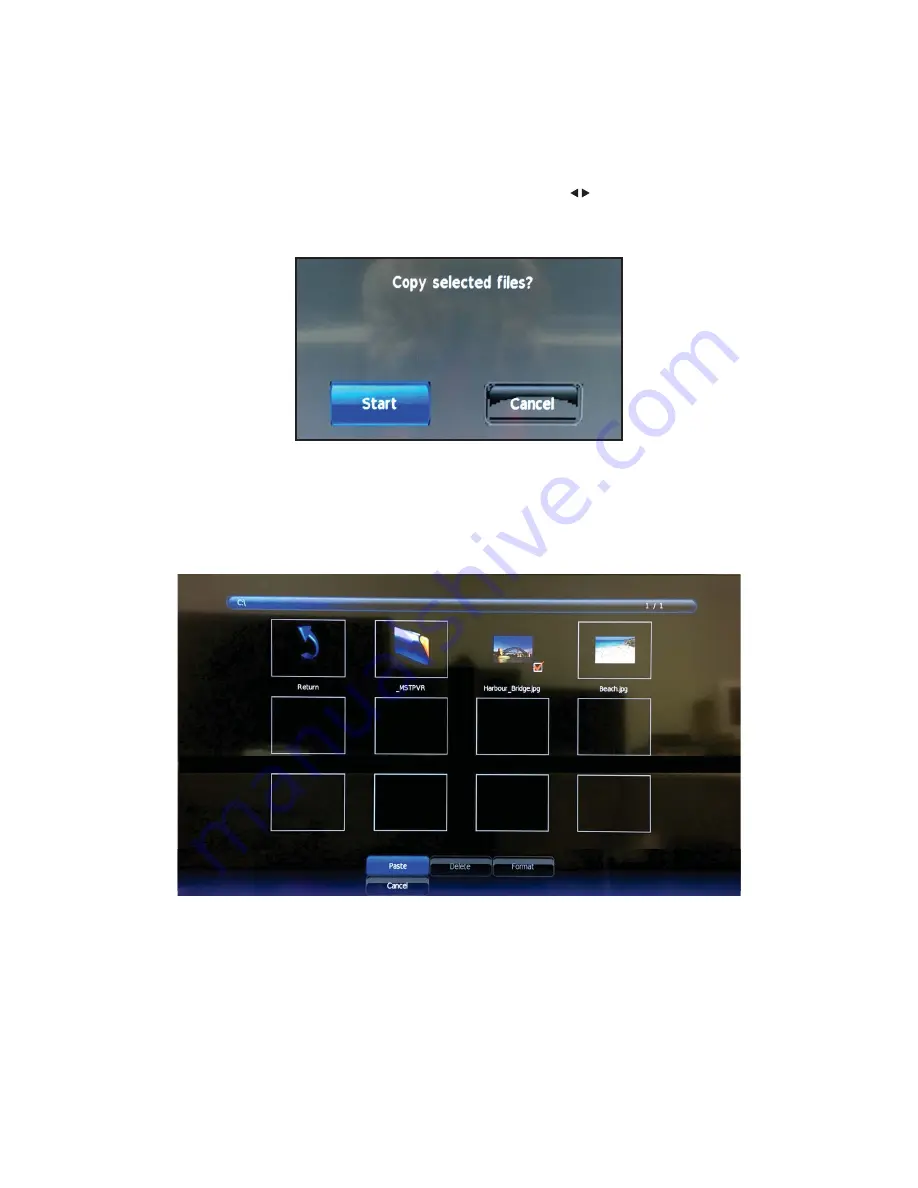
o copy a file, select the Copy option in the Sub Menu by using the  

  buttons and press ENTER. A 

confirmation pop up will appear. Select Start to begin copying the file.

After the file has been copied, the Sub Menu options will now show a Paste option - select Paste, and 

press ENTER.  

Содержание L65UTV18a

Страница 1: ...65 164cm UHD LED LCDTV Instruction Manual L65UTV18a 24 Month Manufacturer s Warranty...

Страница 2: ...ide 11 Caring for the Environment 13 Connection Overview 14 Input Source 17 Channel Menu 18 Picture Menu 22 Sound Menu 24 Time Menu 26 Option Menu 29 Lock Menu 35 Hotel Mode 38 Media Operation 40 Phot...

Страница 3: ...view Side Buttons Side 1 Power Button Turn television on off 2 Source Source select 3 Menu Enter or exit from Menu Use CH to select an option Use VOL to adjust an item 4 CH Select channel 5 VOL Adjust...

Страница 4: ...tenna RF connection 8 Optical Digital audio output 9 USB USB port 10 Earphone Earphone Output 11 AV Input External AV signal input and relevant right left sound channel inputs 12 Video Y Pb Pr Compone...

Страница 5: ...9 MENU Opens the Main Menu 10 SOURCE Press to view and select available input sources 11 ENTER and Allows you to navigate the on screen Menus and adjust the system settings to your preference 12 EXIT...

Страница 6: ...8 CANCEL When a page is selected in text mode it may take some time before it becomes available CANCEL button will return to TV mode When the re quired page is found the page number will appear at the...

Страница 7: ...es when watching digital television depending on availability 28 HOLD Hold On or Off for current page display 29 TEXT Switch Teletext On and Off 30 REC LIST Shows the list of recorded programmes 31 RE...

Страница 8: ...s such as Using a stable and appropriately sized television cabinet Ensure its stability by using a television safety strap to attach the television to the cabinet Use the stand which has been supplie...

Страница 9: ...es such as lit candles on the television 13 WARNING Connect to a suitable 100 240V 50 60 Hz power supply only 14 Use the power cord with care do not dam age the power cord in any way If the power cord...

Страница 10: ...ger of explosion if battery is incorrectly replaced Replace only with the same or equiva lent type 25 Batteries battery pack or batteries installed shall not be exposed to excessive heat such as sunsh...

Страница 11: ...6 qty AAA Batteries 2 qty Remote Control MENU SOURCE ENTER EXIT SLEEP P MODE S MODE DISPLAY INDEX REVEAL SIZE TIMESHIFT RECLIST TEXT EPG ASPECT CANCEL FREEZE HOLD TV RADIO SUBTITLE FAV LIST REC REDG...

Страница 12: ...surface 2 Use the correct sized screw driver to af x the foot using 3 screws for each side Repeat the process for the other side IMPORTANT Ensure that you do not over tighten the screws Position and...

Страница 13: ...the buttons to select the OK Connecting the Antenna and Power 1 Connect one end of the antenna cable to the antenna socket RF IN at the back of the television set Please note that the antenna cable is...

Страница 14: ...g life do not throw out this television with your household rubbish An envi ronmentally friendly method of disposal will ensure that valuable raw materials can be recovered and used again Electrical a...

Страница 15: ...line the basic connection options available with this Linden television Audio Video AV Input Press the SOURCE button using either the remote control or the button located on the side of the televi sio...

Страница 16: ...e of the television set and select the PC option PC Audio Output VGA Output DVD VGA Output HDMI Input Press the SOURCE button on either the remote control or the button located on the side of the tele...

Страница 17: ...remote control or the button located on the side of the television set and select COMPONENT source Connection Overview USB Input Press the SOURCE button on either the remote control or the button loca...

Страница 18: ...st Press or SOURCE button to scroll through Input Source options Optical Audio Output Press ENTER button to select the highlighted input source Check the selected Input Source has an ac tive device at...

Страница 19: ...e previous menu Auto Tuning DTV Ensure that you the Input Source is set to Antenna prior to Auto Tuning your television 1 Press the SOURCE button on your remote control and scroll down using the butto...

Страница 20: ...se the buttons to select the channel then press the ENTER button to manually tune the channel A Signal Strength Indicator is shown along the bottom of the DTV Manual Tuning page DTV Digital Television...

Страница 21: ...selected channel Press the BLUE button to skip the selected channel Programme Edit Channel Edit The Programme Edit sub menu allows you to delete move or skip television channels which have been tuned...

Страница 22: ...lows the television to automatically match the television s channel numbers to the local broad cast s Electronic Programme Guide EPG channel numbers From the Channel Menu use the buttons to select LCN...

Страница 23: ...the ENTER button to enter the Picture Mode sub menu Alternatively press PMODE button on your remote to enter Picture Mode You can adjust the Picture Mode to Standard Dynamic Mild User You can adjust C...

Страница 24: ...the proportion between the height and width of a picture From the Picture Menu use the buttons to select Aspect Ratio then use the buttons to select between Auto 4 3 16 9 Zoom1 and Zoom2 Noise Reduct...

Страница 25: ...e control Use the buttons to select between Music Preserves original sound Movie Enhances treble and base for a rich sound experience Sport Enhances vocals ideal for sports programmes Standard Produce...

Страница 26: ...select SPDIF Mode then use the buttons to select between PCM AUTO OFF Audio Description AD Switch Certain broadcast programmes have Audio Descriptions available The AD Audio Description describes the...

Страница 27: ...to adjust 3 Press MENU button to save your adjustments and return to the previous menu Use the buttons to select Date Month Year and Minute then use the buttons to adjust Clock This allows you to set...

Страница 28: ...set your television to Auto Standby and use the remote control the timer starts again If you do not use your remote control after you have set your television to Auto Standby your television will swi...

Страница 29: ...ime Zone then press the ENTER button to enter the Clock sub menu Use the buttons to set the correct time zone then press MENU to set Daylight Saving Daylight Saving sets the time to one hour earlier t...

Страница 30: ...ess ENTER button to adjust 3 Press MENU button to save your adjustments and return to the previous menu On Screen Display OSD Language This allows you set the language displayed in your On Screen Disp...

Страница 31: ...This allows you to set the language of the subtitles if available From the Option Menu use the buttons to select Subtitle Language then press the ENTER button to enter the Subtitle Language sub menu...

Страница 32: ...stem allows you to use a check and format a USB hard drive that is plugged into your television To record a television programme you must have USB storage device connected to the television as the tel...

Страница 33: ...another storage device as any data will be deleted during formatting 2 Press MENU and scroll across to the Option Menu and press ENTER 3 Once in the Option Menu scroll down to PVR File System and pres...

Страница 34: ...ct Restore OSD Default then press the ENTER button to enter the Reset Factory Default sub menu Option Menu HDMI CEC Use the buttons to turn HDMI CEC ON or OFF Auto Standby This allows you to set your...

Страница 35: ...Option Menu use the buttons to select Blue Screen then use the buttons to select ON or OFF Time Record This allows you to set a time to record programmes from your desired television channel onto a US...

Страница 36: ...nu Use the buttons select Lock then press ENTER or to enter 1 Press buttons to select the option that you want to adjust in the Lock Menu 2 Press ENTER and or buttons to adjust 3 Press MENU button to...

Страница 37: ...use the buttons to select System Lock then press the ENTER button to enter the Lock Menu Enter the password to unlock the Lock Menu then press ENTER Default password is 0000 Enter the password defaul...

Страница 38: ...le Please note that not all broadcast programmes have age ratings available and these programmes will be available to view by default From the Lock Menu use the buttons to select Parental Guidance the...

Страница 39: ...el Mode Setting Use the buttons to select ON or OFF Input Block This allows you to lock unlock the Input Source available on the television From the Lock Menu use the buttons to select Hotel Mode then...

Страница 40: ...scroll through the channels to select the default channel Max Volume This allows you to set the maximum volume level on the television From the Lock Menu use the buttons to select Hotel Mode then pres...

Страница 41: ...edia Before operating the Media Menu insert your USB hard drive in to the side of your television Press the SOURCE button on your remote control and use the buttons to select USB then press ENTER to e...

Страница 42: ...ar in the centre of the screen and a red tick mark will appear if the le has been selected correctly Press the button to enter the Sub Menu Media Operation The Sub Menu options will appear on the bott...

Страница 43: ...he Copy option in the Sub Menu by using the buttons and press ENTER A con rmation pop up will appear Select Start to begin copying the le After the le has been copied the Sub Menu options will now sho...

Страница 44: ...the bottom of the screen Press the button to paste the copied le Delete To delete a le select the Delete option in the Sub Menu by using the buttons and press ENTER A con rmation pop up Determine del...

Страница 45: ...ation on the USB drive To format the USB drive select the Format option in the Sub Menu by using the buttons and press ENTER A con rma tion pop up will appear Determine formatting U disk Select Yes to...

Страница 46: ...buttons to select the image le in the Photo sub menu you want to view then press ENTER to select the image A preview of the image will be shown in the centre off the screen Press the button to make th...

Страница 47: ...menu Use the buttons to select the music le in the Music menu you want to listen to then press ENTER to select the music le A preview of the music le will be shown in the centre off the screen Press t...

Страница 48: ...Press the button to make the movie full screen Press the button and a range of functions such as Stop Play Pause etc will be displayed on screen Use the buttons to scroll through the on screen option...

Страница 49: ...48 Media Operation Press the button and a range of functions such as Fast Forward Rewind etc will be displayed on screen Use the buttons to scroll through the on screen options...

Страница 50: ...me and date and end time and date Electronic Programme Guide EPG Press the EPG button to display the Electronic Programme Guide EPG Recording a Programme Scheduled To set a programme to be recorded in...

Страница 51: ...reminder and will not record the programme From the EPG press the button and the following pop up box will be displayed Electronic Programme Guide EPG Info Press the button and the programme informat...

Страница 52: ...ou are recording a programme only Play and Stop will be available A red circle with a white triangle in the middle will appear on the top left corner indicating that the programme is being recorded To...

Страница 53: ...ENTER to play A white triangle will appear on the top left corner indicating that the programme being played on screen is a recording All the on screen functions will now be available to use while pl...

Страница 54: ...pause sym bol will appear on the top left hand side of the screen to indicate that the programme has been paused To resume watching press the TIMESHIFT button again The television will resume playing...

Страница 55: ...select other channels to check whether it is the televi sion or just the channel itself which has problems Ensure the television is tuned correctly follow instructions under Channel Menu on Pages 18 2...

Страница 56: ...3V 2 x AAA size batteries Power Supply Remote Control 2 x AAA batteries Dimensions L x W x H Television With Stand 1461mm x 285mm x 903mm Television Without Stand 1461mm x 85mm x 843mm Net Weight Tele...

Страница 57: ...stomer care Aus 1300 530 800 customercare lindenproducts com au lindenproducts com au While every effort has been made in the preparation of this instruction manual the publishers cannot be held respo...

Отзывы: