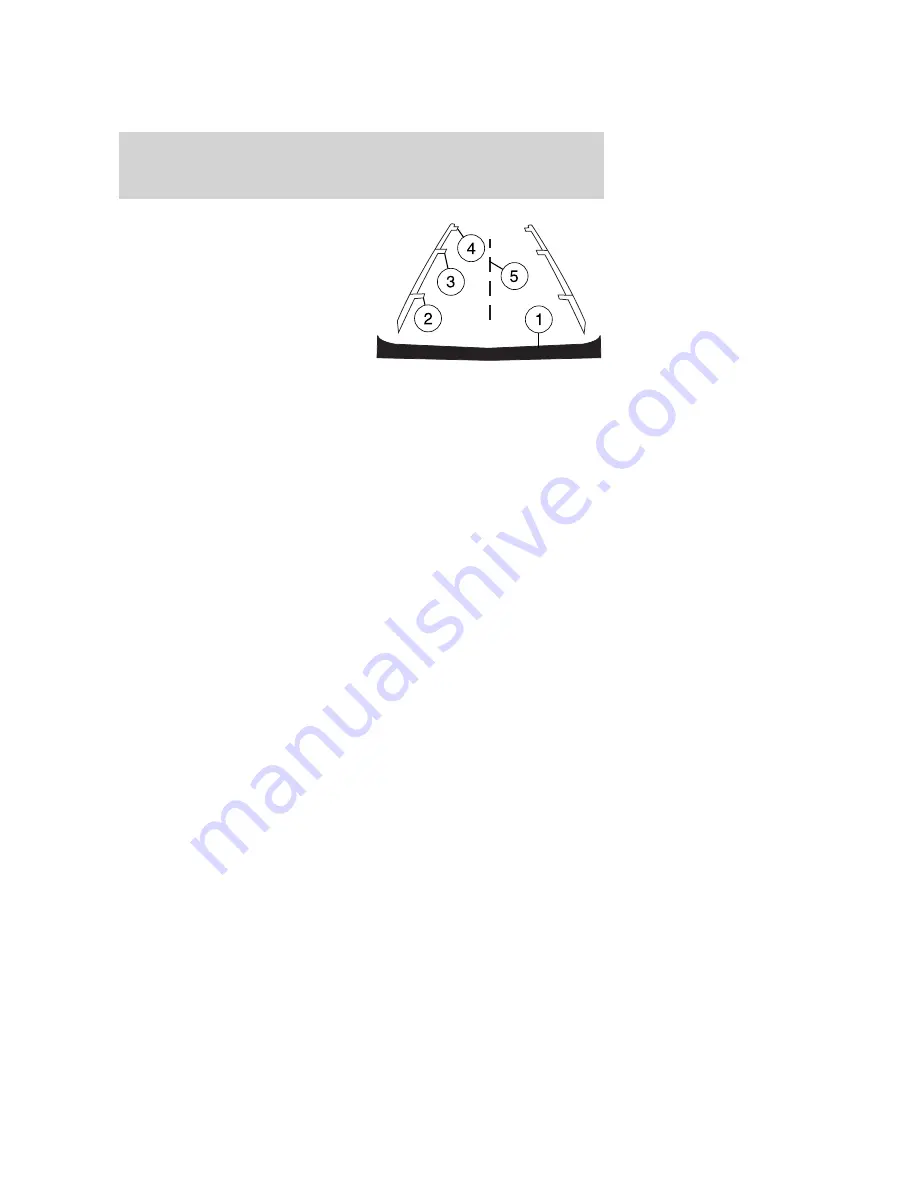
•
(1) Rear bumper
•
(2) Red zone
•
(3) Yellow zone
•
(4) Green zone
•
(5) Centerline of vehicle
Always use caution while backing.
Objects in the red zone are closest
to your vehicle and objects in the
green zone are further away. Objects
are getting closer to your vehicle as they move from the green zone to
the yellow or red zones.
Use the side mirrors and rearview mirror to get better coverage on both
sides and rear of the vehicle.
Image delay if displayed through the rearview mirror:
When shifting out of R (Reverse) and into any other gear, the image in
the rearview mirror will remain on for a few seconds before it shuts off
to assist in parking or trailer hookup.
Image delay if displayed through the Navigation screen:
After shifting out of R (Reverse) and into any gear other than P (Park),
the image in the navigation screen will remain until the vehicle speed
reaches five mph (8 km/h), only if the rear camera delay feature is on, or
until any navigation radio button is depressed.
Note:
The default setting for the camera delay is off. Push the “Settings”
button found on the navigation screen (if equipped) to set the camera
delay feature to on or off.
When towing, the camera system will only see what is being towed
behind the vehicle; this might not provide adequate coverage as it
usually provides in normal operation and some objects might not be
seen.
The camera lens for the reverse camera system is located on the liftgate,
above the license plate. Keep the lens clean so the video image remains
clear and undistorted. Clean the lens with a soft, lint-free cloth and
non-abrasive cleaner.
Note:
If the camera system image is not clear or seems distorted, it may
be covered with water droplets, snow, mud or any other substance. If
this occurs, clean the camera lens before using the reverse camera
system.
2009 Navigator
(nav)
Owners Guide, 2nd Printing
USA
(fus)
Driving
274


