


English
27
English
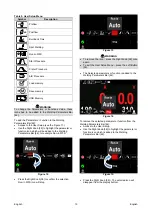
Figure 64.
Press the Left Knob [35] or Button [37] to exit
Recording icon will appear on the
Status
bar
[38].
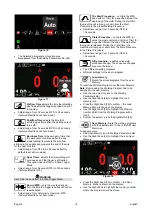
Note:
To stop the recording go to Service
Menu and press the
Service weld logs
icon again.
Weld history –
after recording, welding
parameters are saved into the USB device
folder.
To access the Welding history:
Make sure that USB device is connected.
Access to the Settings and Configuration Menu.
Go to
Service Menu
→
Weld History
Figure 65.
Press the Right Knob [36] to get access of
Weld
history
– the list of used parameters:
Weld number
Average WFS
Average current [A]
Average voltage [V]
Arc time [s]
Welding program number
Job number/name
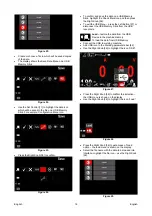
SnapShot -
create a file that contains
detailed configuration and debugging
information collected from each module in
the
POWERTEC I380C ADVANCED, POWERTEC
i450C ADVANCED
. This file can be sent to Lincoln
Electric Support to troubleshoot any possible issues that
cannot be easily resolved by the user.
To obtain a SnapShot:
Make sure that USB device is connected.
Go to
Configuration
→
Service Menu
→
Snapshot
Figure 66.
Press the Right Knob [36] to start Snapshot process.
Figure 67.
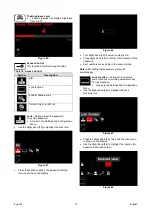
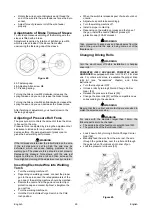
Welding GMAW and FCAW Process in
non-synergic mode
During non-synergic mode wire feed speed and welding
voltage are independent parameters and must be set by
the user.
Procedure of begin welding of GMAW or FCAW-SS
process:
Determine the wire polarity for the wire to be used.
Consult the wire data for this information.
Connect output the gas-cooled gun to GMAW /
FCAW process to Euro Socket [6].
Depending on the using wire, connect the work lead
[13] to output socket [3] or [4]. See [26] point –
terminal block of changing polarity.
Connect the work lead [13] to the welding piece with
the work clamp.
Install the proper wire.
Install the proper drive roll.
Make a sure if it is needed (GMAW process), that the
gas shield has been connected.
Turn the machine on.
Push the gun trigger to feed the wire through the gun
liner until the wire comes out of the threaded end.
Install a proper contact tip.
Depending on the welding process and the type of
the gun, install the nozzle (GMAW process) or
protection cap (FCAW process).
Close the Left side panel.
The welding machine is now ready to weld.
By applying the principle of occupational health and
safety at welding, welding can be begun.
WARNING
Keep the gun cable as straight as possible when loading
electrode through cable.