


English 10
English
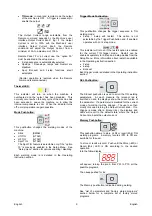
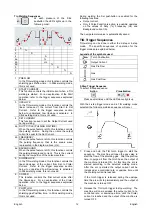
Pulsing Mode Pushbutton:
In the TIG welding modes, this pusbutton turns the
pulsing function ON. When active, the LED next to the
pusbutton is turned ON. In Stick welding mode, this
command is disabled.
When Pulse is active is possible to set Duty cycle (%),
Frequency (Hz) and Background (%) parameters.
During TIG welding is not possible switch ON or OFF the
Pulse command: if ON, during welding is possible
operates on the values of Duty, Frequency and
Background current.
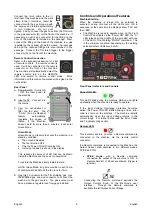
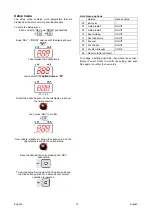
Output Current Knob:
It is used to set the Output Current used during welding.
This knob is also a multi-purpose command: see the
“Operating Instruction” section for a description of how to
use this command for parameters selection.
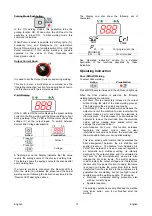
V & A Display:
If the A LED is ON the meter displays the preset welding
current (A) before welding and the actual welding current
during welding. If the V LED is ON the meter shows the
voltage (V) at the output leads. To switch between
Current and Voltage visualization:
Action
Visualization
Press A/V
Current
Press A/V
Voltage
A flashing dot on the Display indicates that the value
read is the average value of the previous welding time.
This feature shows the average value for 5seconds after
every welding time.
If a remote control is connected (the Remote LED is
ON), the meter (A) indicates the preset and the actual
welding current following the instruction explained in the
“Remote LED” description above.
The Display can also show the following set of
characters:
SOFT
CRISP
01, …..10
PROGRAM
For program records
E 01, ......99
For error codes
See “Operating Instruction” section for a detailed
description of the functions described by these
indications.
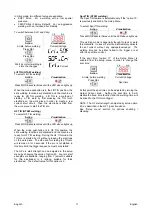
Operating Instruction
Stick (SMAW) Welding
To select Stick welding:
Action
Visualization
Press MODE several times until the LED above lights up
When the Stick position is selected, the following
welding features are enabled:
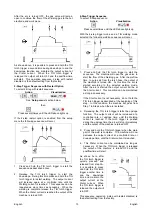
Hot Start: This is a temporary increase in the output
current during the start of the stick welding process.
This helps ignite the arc quickly and reliably.
Anti-Sticking: This is a function which decreases the
output current of the machine to a low level when the
operator makes an error and sticks the electrode to
the work piece. This decrease in current allows the
operator to remove the electrode from the electrode
holder without creating large sparks which can
damage the electrode holder.
Auto Adaptive Arc Force: this function increases
temporary the output current, used to clear
intermittent connections between the electrode and
the weld puddle that occur during stick welding.
This is an active control feature that guarantees the
best arrangement between the arc stability and
spatter presence. The feature "Auto Adaptive Arc
Force" has instead of a fixed or manual regulation,
an automatic and multilevel setting: its intensity
depends by the output voltage and it is calculated in
real time by the microprocessor where are also
mapped the Arc Force levels. The control measure
in each instant the output voltage and it determines
the amount of the peak of current to apply; that value
is enough to breaks the metal drop that is being
transferred from the electrode to the workpiece as to
guarantee the arc stability, but not too high to avoid
spatters around the welding puddle. That means:
Electrode / workpiece sticking prevention, also
with low current values.
Spatters
reduction.
The welding operations are simplified and the welded
joins looks better, also if not brushed after the
welding.