background image


3.MENU 
OPERATION 


Before  setting  the  menu  functions,  please  make  sure  the  device  is  connected 

correctly.  When  power  on,  press  MENU  on  the  device  or  on  the  remote 

controller. The menu of function setting will display on the screen. 

Press  >/<  buttons  on  the  device  or  

/


buttons  on  the  remote  controller 

to  select items on the left of the display. Then press + / – buttons on the 

device or 

/

buttons 

on the remote controller to change the 

values. 


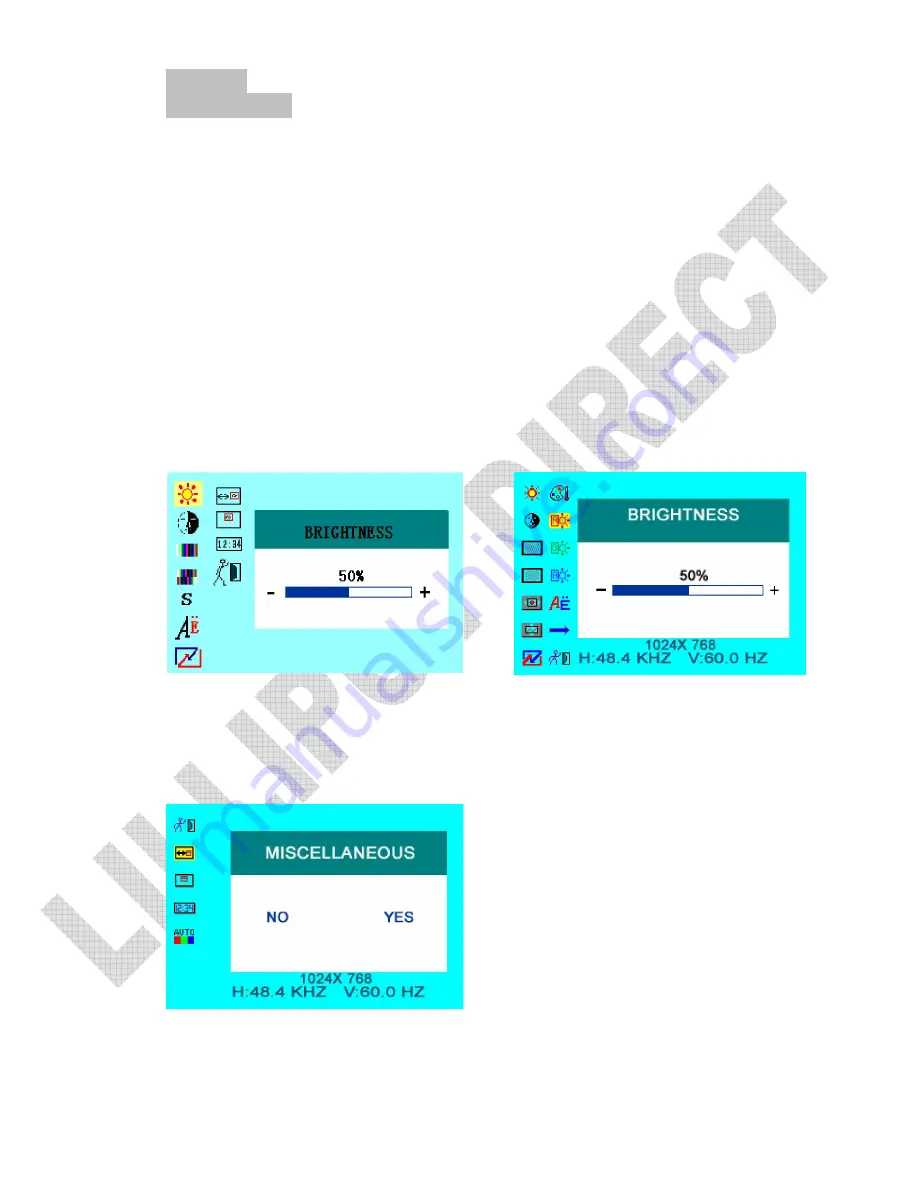
The following pictures are the setting displays of different 
modes. 


IN  AV  MODE  &  S  connector  IN  PC 
MODE


As follows: 


OSD  
MISCELLANEOU


Содержание FA1045

Страница 1: ...TFT LCD COLOR MONITOR...

Страница 2: ...e that you will have the enjoyment of your new mini color TFT LCD Toensurethebestuseoftheunit pleasereadthishandbookcarefully beforehand CAUTION 1 Please use the adapter attached in the accessory 2 Do...

Страница 3: ...CONTENTS 1 PRODUCT DESCRIPTION 2 REMOTE CONTROLLER 3 MENU OPERATION IN AV MODE IN PC MODE IN DVI HDMI YBPDR MODE 4 MATCHED CABLES 5 ACCESSORIES 6 PARAMETER 7 TROUBLESHOOTING 8 REMARK...

Страница 4: ...cally 4 To select function on OSD or to adjust the brightness directly There aresix levels of brightness push this button directly to change among them 5 MENU To activate OSD menu long press to unders...

Страница 5: ...Volume down or to adjust the value of setting function 4 MENU To activate OSD menu long press to underscan overscan pictures automatically when receiving HDMI High Definition Multimedia Interface sig...

Страница 6: ...u of function setting will display on the screen Press buttons on the device or buttons on the remote controller to select items on the left of the display Then press buttons on the device or buttons...

Страница 7: ...adjust the beginning point and terminal point of image FREQUENCY to adjust the frequency range of image OSD H POSITION to adjust the picture position in horizontal direction OSD H POSITION to adjust...

Страница 8: ...xit to quit the on screen display menu Sharpness Adjust the sharpness of picture OSD Duration Adjust the display duration of OSD from 5 100 seconds 4 SPECIAL MATCHED CABLES YPBPR signal connect cable...

Страница 9: ...s 9 USB connection cable 1 piece 10 Home DC adapter 1 piece 11 YPBPR signal connect cable 1 piece 12 Manual 1 copy 6 PARAMETER PANEL TFT LCD 10 4 HIGH RESOLUTION 800 600 Brightness 230cd VIEWING ANGLE...

Страница 10: ...loose pins in the cable connector can cause a bad connection Remote controller doesn t work Check the battery to make sure the battery is installed properly and make sure it is not a low battery The...

Страница 11: ......

Отзывы: