19 66-UM-4KNVR-CSE-6
⚫
Soft Reboot:
Click to soft reset the system.
⚫
Watchdog Test:
Click to test the system watchdog function. This will reboot the NVR.
⚫
Kernel Version: The kernel version of the system.
⚫
Setup Wizard: Click to execute the quick setup wizard.
⚫
Support: Click to open server execution log options dialog, record system execution details.
Chapter 3 Network Setup
Click
to enter
NVR SETTINGS
, and
click
NETWORK
in the left pane.
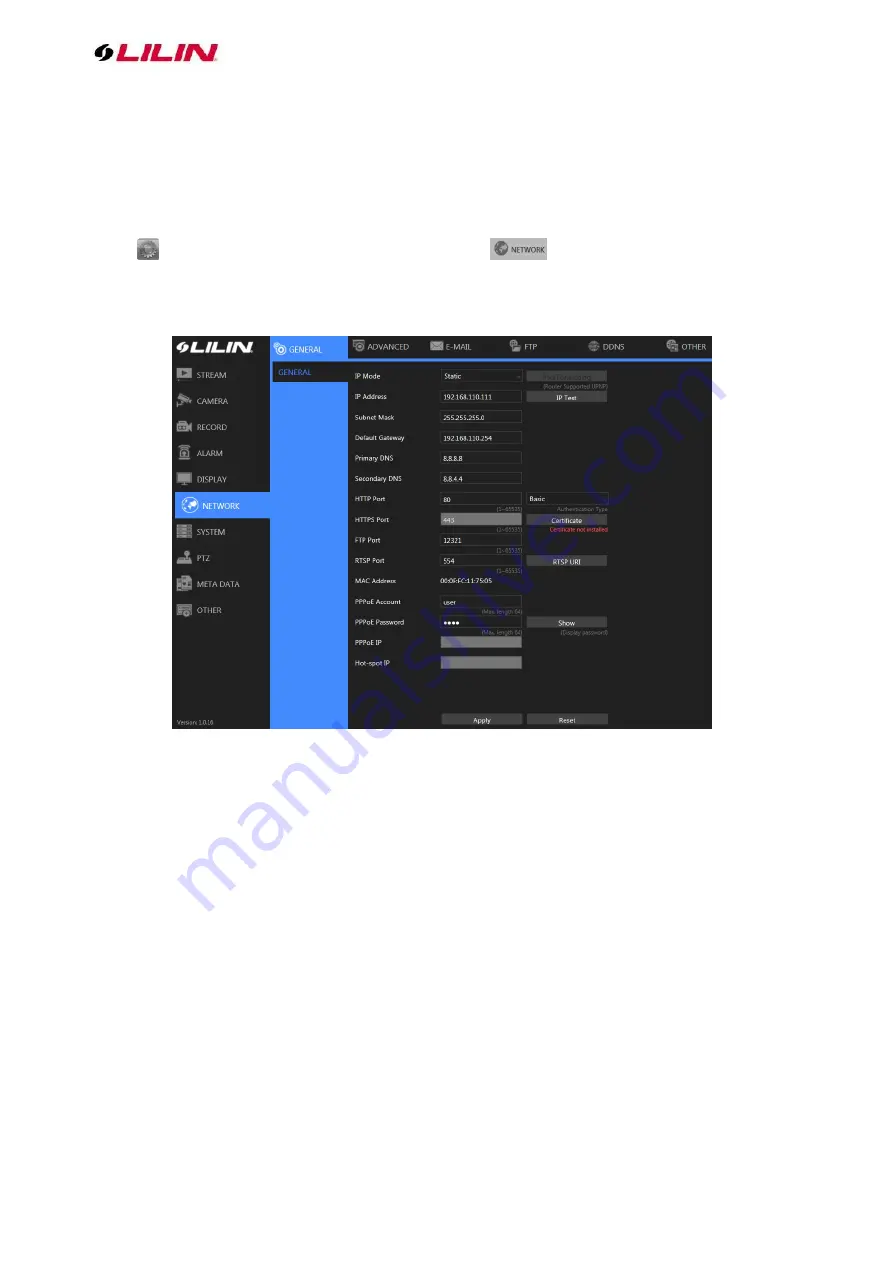
Chapter 3-1 General
Enter the required information in the fields:
⚫
IP Mode: Select the connection type of the NVR from
Static
,
DHCP
, and
PPPoE
.
⚫
IP Address: Enter the IP address you want to use, and press
IP Test
if necessary.
⚫
Subnet Mask: Enter the desired subnet mask.
⚫
Default Gateway: Enter the desired default gateway.
⚫
Primary DNS: Enter the first priority DNS server.
⚫
Secondary DNS: Enter the secondary DNS server in case the primary DNS is not available.
⚫
Video Port: Specify a desired video port.
⚫
HTTP Port: Specify a desired HTTP port.
⚫
FTP Port: Specify the desired FTP port.
⚫
MAC: This is the MAC address of your NVR.
⚫
PPPoE Account: If you choose to connect through PPPoE, enter the account name here.
⚫
PPPoE Password: Enter the required password for PPPoE connection.
⚫
PPPoE IP: Your PPPoE IP will be displayed here.
⚫
Hotspot IP: Your hotspot IP will be displayed here.
Note:
When connected to an Android device via a USB connector, please turn on the USB tethering
function to assign a hotspot IP to the NVR.


