www
.lightware.co.za • info@
lightware.co.za
SF02/F
SF02/F
Laser rangefinder
Product manual
2. Quick start guide
1. CAUTION - The SF02/F laser rangefinder contains a laser and should
never be aimed at a person or an animal. Do not look at the beam
directly with optical instruments.
2. Plug a USB cable into the SF02’s mini USB connector and connect the
other end into a PC. This provides both power and communication
for the unit.
3. Download
LightWare Terminal
software from
www.lightware.co.za >
Library > Documents > Software
onto your PC. Open the installer
package and follow the installation instructions. Everything needed
for communicating with SF30 will automatically be installed.
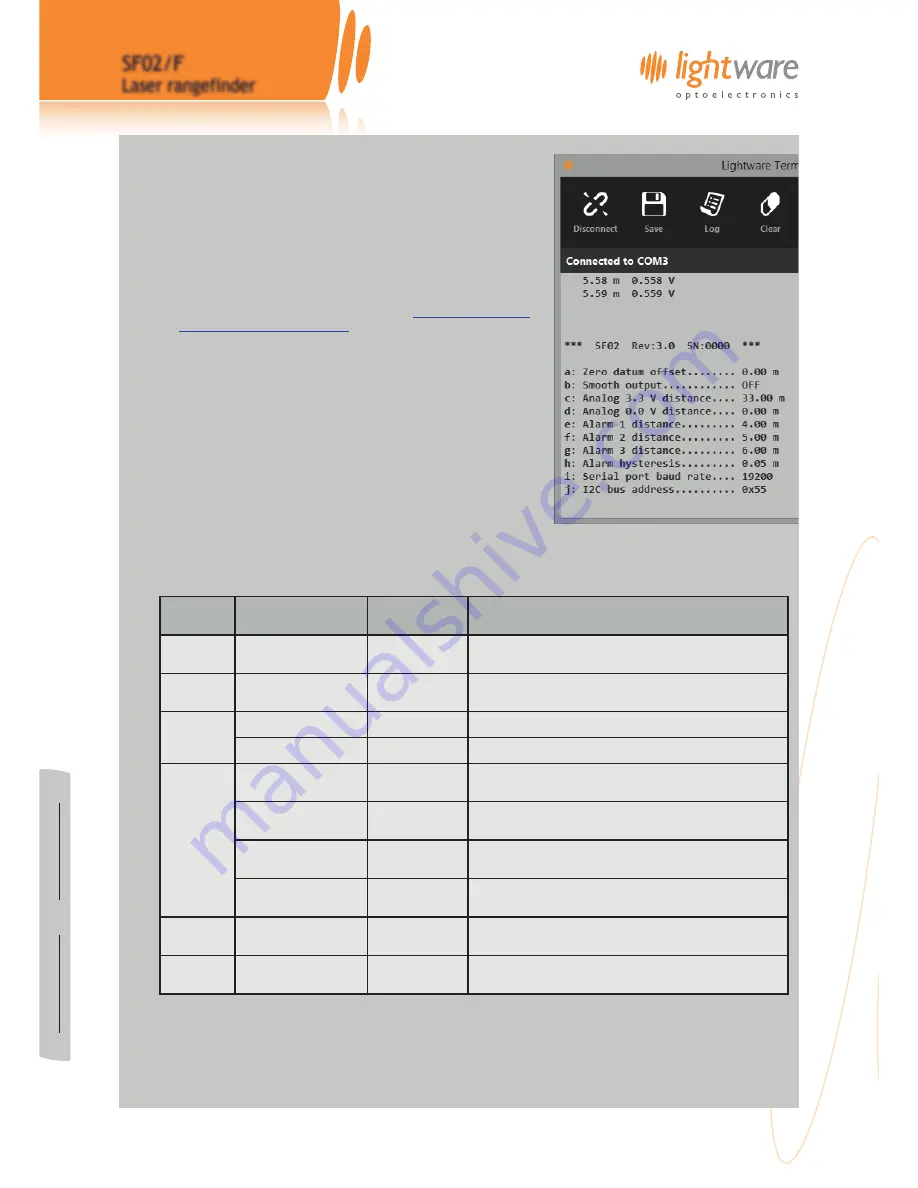
4. Start the
LightWare Terminal
software and click the “Connect /
Disconnect” icon to open a communications port. The distance
measurements should begin to scroll in the Terminal window. If the
connection isn’t made automatically then click the “Laser” icon and
select the correct port from the list shown.
5. The configuration menu is accessed by pressing the
<SPACE>
bar on
your keyboard. This stops the measurements and displays a list of
settings along with a brief description of what each one does. To
modify a setting, type the letter displayed beside the item in the
menu. Pressing the
<SPACE>
bar again restarts measuring.
6. A summary of the settings is given below:
7. Once you have confirmed your settings, make sure the SF30 is measuring correctly then click the “Disconnect” icon and
disconnect the USB cable from the SF02/F.
8. There are several power supply and interface options available. These connections are used to integrate the SF02/F into
your system and details of all the options are explained later in this document.
Section
Setting
Range of values
Description
Zero
calibration
a: Zero datum offset
-10.00m to
+10.00m
Adjusts the point from which measurements are taken
Data
smoothing
b: Smooth output
ON or OFF
Switches on a filter to smooth the distance readings
Analog
voltage
output
c: Analog 3.3 V distance
0.00m to 50.00m Sets the distance at which the voltage output will show 3.3V
d: Analog 0.0 V distance
0.00m to 50.00m Sets the distance at which the voltage output will show 0.0V
Alarms
e: Alarm 1 distance
0.00m to 50.00m Sets the distance at which the first alarm activates
f: Alarm 2 distance
0.00m to 50.00m
Sets the distance at which the second alarm activates
(available on the digital expansion port only)
g: Alarm 3 distance
0.00m to 50.00m
Sets the distance at which the third alarm activates
(available on the digital expansion port only)
h: Alarm hysteresis
0.00m to 5.00m
Creates a deadband between the on and off points of the
alarms
Auxiliary
UART
i: Serial port baud rate
4800 ... 115200
Selects the baud rate of the auxiliary serial port UART
channel
Auxiliary bus j: I2C bus address
0 … FF
Sets the auxiliary I2C address (available on the digital
expansion port only)
SF02/F Laser Rangefinder - Product Manual - Revision 10
of
© LightWare Optoelectronics (Pty) Ltd, 2016
4
17


