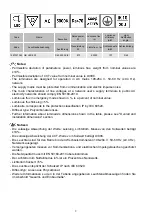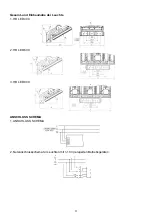
1. Tools needed.
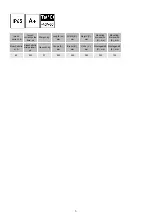
2. Unpack the luminaire. Remove bracket from the luminaire and attach it to mounting surface.
ATTENTION! For safety reasons all 5 fastening points (holes) should be used.
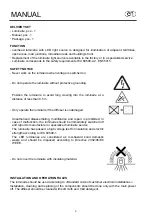
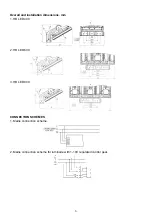
3. Set the luminaire on the bracket into desired position using included hardware: screws,
washers, nuts (see A). Tightening torque - 9 Nm. Luminaire tilt angle interval - 18º. ATTENTION!
2 workers needed to mount the luminaire.
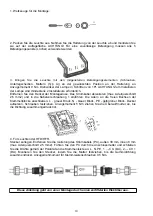
Remove junction box cover. Strip mains cable (wire crossection 2.5 mm2 max) and put it through
cable gland. Connect wires to free terminals: L - grey terminal, N - blue terminal, PE -
yellow-green terminal. Replace cover back and tighten the screws. Tightening torque - 5 Nm.
Tighten cable gland nut until sealing is fully pressed against cable.
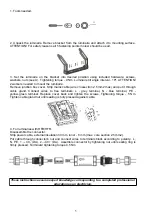
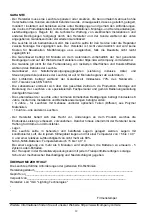
4. For luminaries with HFD/HFR.
Disassemble the connector.
Strip power cable, external insulation 30 mm, inner - 8 mm (max. core section 2.5 mm2).
Put cable through connector's nut and connect wires to terminals block according to polarity: L,
N, РЕ, 1 → C0- (DA), 2 →C0+ (DA). Assemble connector by tightening nut until sealing ring is
firmly pressed. Terminals' tightening torque 0.5 Nm.
These instructions assume expert knowledge corresponding to a completed professional
education as an electrician.
5


