Re Fitness Collection
11
ASSEMBLY NOTES
• Assemble the X-FlexCycle Plus on flat, clean floor.
• Make sure you have at least a 6-by-6-foot space to complete the
assembly. Ensure the space is free of obstructions.
CAUTION:
Take care when lifting or moving the bike. Always use proper
lifting techniques and use assistance if needed.
1
10
X-FlexCycle Plus User Manual Lifepro
Re Fitness Collection
11
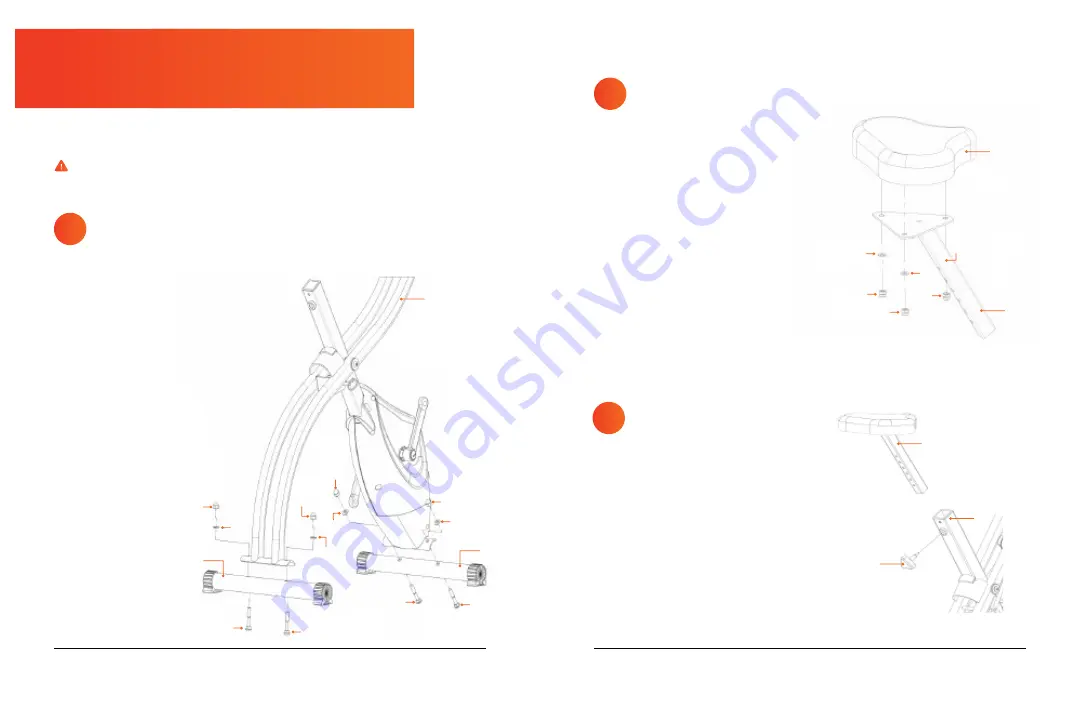
SECURE THE SEAT TO THE
SEAT POST
1. Attach the seat
(9)
to the seat
adjustment post
(10)
. There are
three studs on the bottom of the
seat which insert through the
holes on the top of the seat post.
2. Secure the seat to the seat post
using three flat washers
(11)
and
three lock nuts
(12)
.
3. Use a wrench to tighten the lock
nuts.
2
3
ATTACH THE FRONT AND
REAR STABILIZERS
1. Attach the front stabilizer
(4)
to the main bike body
(1)
using
two M8×50 bolts
(6)
, two curved
washers
(7)
, and two M8 cap
nuts
(8)
.
2. Attach the rear stabilizer
(5)
to
the main bike body
(1)
using two
M8×50 bolts
(6)
, two curved
washers
(7)
, and two M8 cap
nuts
(8)
.
3. Tighten all four cap nuts with a
wrench.
SECURE THE SEAT TO THE
BIKE FRAME
1. Insert the seat post
(10)
into the
main bike frame
(1)
.
2. Secure the seat to the bike frame
using the seat adjustment knob
(13)
.
3. Screw the knob in clockwise to
tighten.
NOTE:
Adjust the seat to your
desired height after the bike is fully
assembled.
1
10
11
8
8
7
8
5
6
7
9
7
9
13
13
12
12
13
9
9
8
12
7
11
1
14


