7.
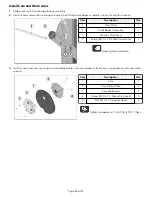
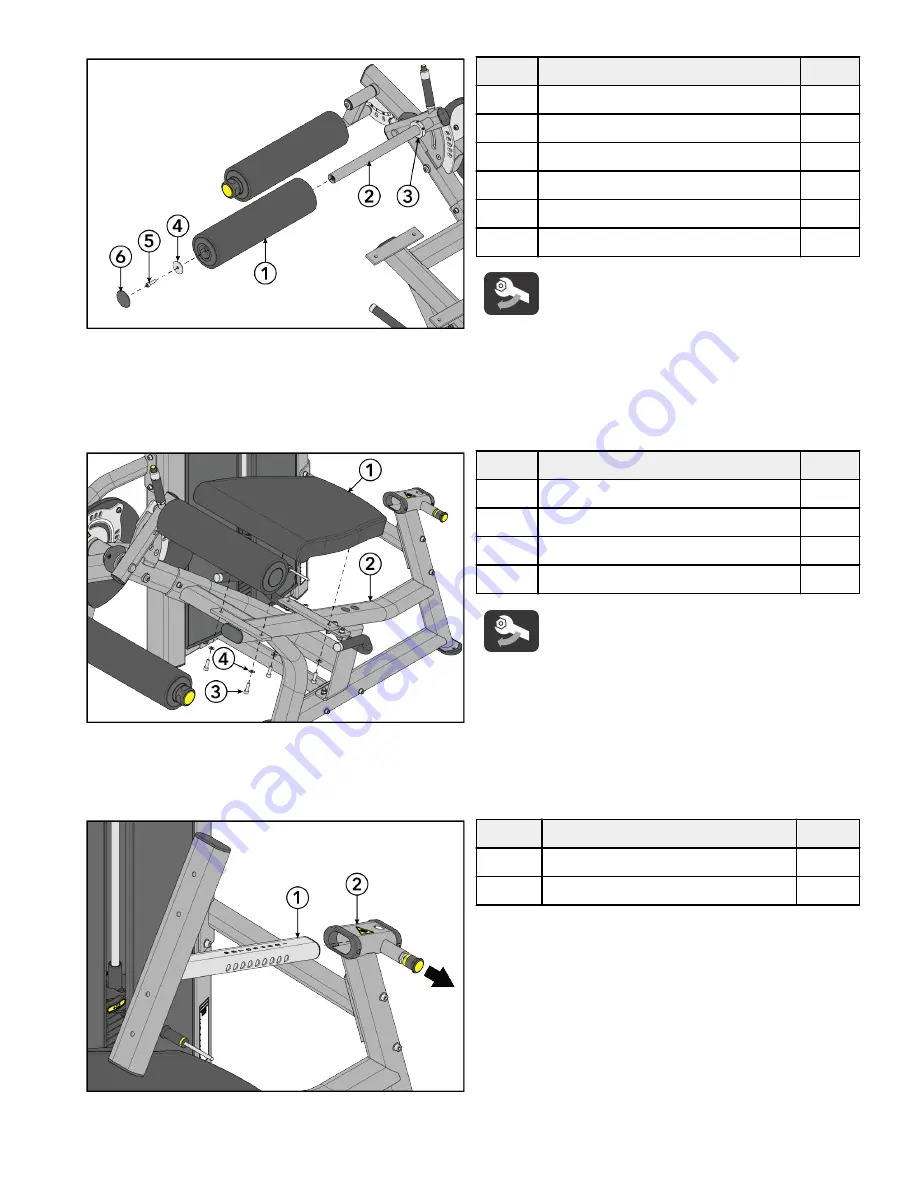
Slide shaft collar and roller pad assembly onto the thigh pad assembly.
Item
Description
Qty.
1
Roller Pad Assembly
1
2
Thigh Pad Assembly
1
3
Shaft Collar
1
4
Roller Pad Plate
1
5
Screw, M10 x 1.5, 35mm
1
6
Bearing Housing Cap
1
Tighten hardware to 40-50 in-lb (4.5-5.6 Nm).
8.
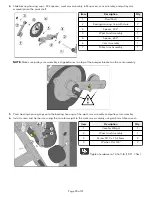
Install screw and plate securing the roller pad assembly to the thigh pad assembly using an 8mm Allen wrench.
9.
Install bearing housing cap to the roller pad assembly using a rubber mallet.
10.
Tighten set screws in the shaft collar to 8-10 ft-lb (10.8-13.5 Nm) using a 4mm Allen wrench.
11.
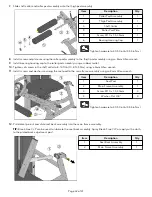
Install screws and washers securing the seat pad to the main frame assembly using an 8mm Allen wrench.
Item
Description
Qty.
1
Seat Pad
1
2
Main Frame Assembly
1
3
Screw, M10 x 1.5, 30mm
4
4
Washer, Flat 3/8"
4
Tighten hardware to 40-50 in-lb (4.5-5.6 Nm).
12.
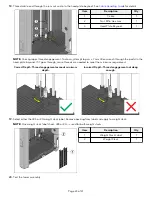
Pull detent pin out and slide seat back assembly into the main frame assembly.
TIP: Break-Free CLP can be used to lubricate the seat back assembly. Spray Break-Free CLP, or apply with a cloth,
to the plated back adjustment post.
Item
Description
Qty.
1
Seat Back Assembly
1
2
Main Frame Assembly
1
Page 32 of 41
Содержание Axiom OP-SLCE
Страница 1: ...Axiom Series Seated Leg Curl Extension OP SLCE Assembly Instructions 1015206 0001 REV AA ...
Страница 2: ......
Страница 8: ...Product Labels General Warning Serial Number Pinch Hazard Page 6 of 41 ...
Страница 43: ...Foot Dimensions Use below image to determine foot specifications Page 41 of 41 ...
Страница 44: ......


