background image

2. Select 

Icon

 or 

List

 and press [OK]. 

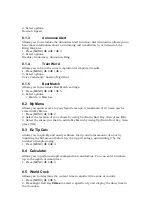
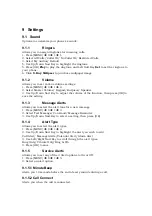
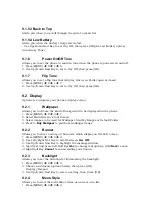
9.2.5 Languages 

Allows you to use the bilingual feature according to your preference. Choose 

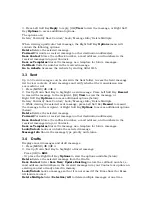
between English and Spanish. 
1. Press [MENU] 

Î

 9 

Î

 2 

Î

 5. 

2. Use Up/Down Navi Key to select 

English

 or 

Spanish

, then press [OK]. 

9.2.6 

Clocks & Calendar 

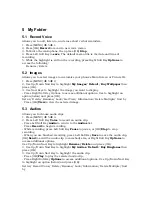
Allows you to select the type of clocks displayed on the main LCD. 
1. Press [MENU] 

Î

 9 

Î

 2 

Î

 6. 

2. Choose a Main Screen / Front Screen 
Switch between the options (below) for Main Screen using Up/Down Nav Key. 

Normal Clock/ Analog Clock/ Digital Clock/ Dual Clock/   
Calendar/Clock & Keymap 
Switch between the options (below) for Front Screen using Up/Down Nav Key. 

Minimize/ Digital Clock 
3. Press [OK] 

OK

 to set. 

9.2.7 Font 

Settings 

Allows you to select the type of font displayed on LCD. 
1. Press [MENU] 

Î

 9 

Î

 2 

Î

 7. 

2. Choose a sub-menu and press [OK]. 
Font Type/ Dial Font Size 
3. Use Up/Down Navi Key to highlight an option, then press [OK]. 

Options for Font Type 
LG Gothic/ LG Secret/ LG Lavender / LG Greentea 
Options for Dial Font Size 
Normal/ Large 


9.3 Security 

The Security menu allows you to secure the phone electronically. 

9.3.1 Lock 

Phone 

Keeps your phone from unauthorized use. Once the phone is locked, it is in 
restricted mode until the lock code is entered. You can still receive phone calls and 

make emergency calls. You can modify the lock code by setting a New Lock code 
within the Security menu. 

1. Press [MENU] 

Î

 9 

Î

 3 

2. Enter the four-digit lock code and press [OK]. 
The default lock code is commonly the last 4 digits of your phone number. 

3. Press [1] 

Lock Phone

4. Use Up/Down Navi Key to select an option, then press [OK]. 

Unlock

 The phone is never locked (Lock mode can be used). 

Lock

 The phone is always locked. When locked, you can receive incoming calls and 

make only emergency calls. 

On Power Up

 The phone is locked when it is turned on. 

Содержание TFLG220CB

Страница 1: ...Date February 28 2009 LG Electronics Inc TFLG220CB Draft User Manual ...

Страница 2: ... installed and used in accordance with the instructions may cause harmful interference to radio communications However there is no guarantee that interference will not occur in a particular installation If this equipment does cause harmful interference or television reception which can be determined by turning the equipment off and on the user is encouraged to try to correct the interference by on...

Страница 3: ...ny interference received including interference that may cause undesired operation Body worn Operation This device has been tested for typical body worn operations with the distance of 0 79inches 2 0cm from the user s body To comply with FCC RF exposure requirements a minimum separation distance of 0 79inches 2 0cm must be maintained from the user s body Additionally Belt clips holsters other body...

Страница 4: ...ays the amount of airtime by the unit and due date information MENU Î 1 Î 4 1 5 Airtime Display Airtime Display allows you to disable enable the display of idle screen prepaid related information MENU Î 1 Î 5 1 6 Serial Number Serial Number simply displays the information of your phone s MEID MENU Î 1 Î 6 1 7 Code Entry Mode Code Entry Mode will allow the phone to accept Tracfone related codes in ...

Страница 5: ...Speed Dial Press OK View to view the contact s information Press Left Soft Key New to store new contact information 2 3 Groups Allows you to view your grouped Contacts add a new group change the name of a group or delete a whole group 1 Press MENU Î 2 Î 3 2 Choose from the following options Use Up Down Navi Key to highlight a group then press View to view the contacts in the selected group Press L...

Страница 6: ... phone numbers 1 Press MENU Î 2 Î 5 2 Use Up Down Navi Key to highlight the feature you wish to edit and press Left Soft Key Edit 3 Edit the information as desired and press OK Note You cannot edit the default Mobile1 number but you can add and edit additional phone numbers and other contact info ...

Страница 7: ...your message and press OK to send it or go to Options while entering text to Save it Customize Your Text Message Using Options While you are composing the text of a message you can insert customized text 1 Press MENU Î 3 Î 1 2 Enter the recipient s address 3 Use Up Down Navi Key or press OK to highlight the Message window 4 Press Right Soft Key Options 5 Use Up Down Navi Key to highlight an option...

Страница 8: ...ditional options below Delete Forward Save Contact Lock Message Info Delete Multiple 3 While viewing the selected sent message press Left Soft Key Resend to resend the message to the recipient or Right Soft Key Options to access additional options below Delete Deletes the selected message Forward Forwards a received message to other destination address es Save Contact Stores the callback number e ...

Страница 9: ...o Save Auto Delete Callback Entry Mode Signature Speed Messaging then press OK 3 Use Up Down Navi Key to highlight one of the settings and press OK to select it Messaging Settings Sub Menu Descriptions 1 Auto Save Auto Save Prompt Do Not Save With this feature on messages are automatically saved in the Sent folder when transmitted 2 Auto Delete On Off With this feature on read messages are automat...

Страница 10: ... your Inbox Sent or Drafts message folders You can also erase all messages at the same time 1 Press MENU Î 3 Î 8 2 Use Up Down Navi Key to highlight an option Inbox Sent Drafts All Messages then press OK 3 Use Up Down Navi Key to highlight Yes No and press OK ...

Страница 11: ... Down Navi Key to highlight an entry 4 2 Received Calls Allows you to view the list of incoming calls up to 40 entries 1 Press MENU Î 4 Î 2 2 Use Up Down Navi Key to highlight an entry 4 3 Dialed Calls Allows you to view the list of ougoing calls up to 40 entries 1 Press MENU Î 4 Î 3 2 Use Up Down Navi Key to highlight an entry 4 4 All Calls Allows you to view the list of missed received and diale...

Страница 12: ...List View Information Delete Multiple Sort by Press OK View to view the selected image 5 3 Audios Allows you to choose audio clips 1 Press MENU Î 5 Î 3 2 Press Left Soft Key Voice to record an audio clip Press Left Soft Key Audio to return to the Audios list Press Record to begin recording While recording press Left Soft Key Pause to pause or OK Stop to stop recording When you are finished recordi...

Страница 13: ...nternet content Access and selections within this feature are dependent upon your service provider 6 1 Start Browser Allows you to view Internet content 1 Press MENU Î 6 Î 1 6 2 Web Messages Allows you to view Web messages 1 Press MENU Î 6 Î 2 ...

Страница 14: ... set alarm will sound the tone of your choice and an alarm message will be displayed on the LCD screen 1 Press MENU Î 7 Î 2 2 Use Up Down Navi Key to highlight the alarm you wish to set then press OK to select it 3 Press Left Soft Key Set to set the alarm time 4 Use Up Down Navi Key to highlight Repeat recurrence setting 5 Press Left Right Navi Key to select one of the following Once Daily Mon Fri...

Страница 15: ... Say the name as it is saved in your Contact List or say the number 8 1 1 2 Voicemail 1 Press MENU Î 8 Î 1 Î 1 Î 2 2 The phone will announce any new Voicemail s 8 1 1 3 Missd Calls You can ear details about missed calls 1 Press MENU Î 8 Î 1 Î 1 Î3 8 1 1 4 Messages This voice command feature will read out information from messages received 1 Press MENU Î 8 Î 1 Î 1 Î 4 8 1 1 5 Time Date This voice c...

Страница 16: ... favorite menus A maximum of 12 items can be stored in My Menu 1 Press MENU Î 8 Î 2 2 Select the location of your choice by using Up Down Navi Key then press OK 3 Select the menu you wish to add to My Menu by using Up Down Navi Key then press OK 8 3 Ez Tip Calc Allows you to quickly and easily estimate the tip and total amount of a bill by inputting the bill amount before tip the tip percentage an...

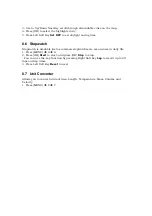
Страница 17: ... is available just as common stopwatches we see and use in daily life 1 Press MENU Î 8 Î 6 2 Press OK Start to start and press OK Stop to stop You can use the Lap function by pressing Right Soft Key Lap to record up to 20 laps and lap times 3 Press Left Soft Key Reset to reset 8 7 Unit Converter Allows you to convert units of Area Length Temperature Mass Volume and Velocity 1 Press MENU Î 8 Î 7 ...

Страница 18: ...hen press OK to save the setting 9 1 3 Message Alerts Allows you to select the alert tone for a new message 1 Press MENU Î 9 Î 1 Î 3 2 Select Text Message Voicemail Message Reminder 3 Use Up Down Navi Key to select a setting then press OK 9 1 4 Alert Type Allows you to select the alert types 1 Press MENU Î 9 Î 1 Î 4 2 Use Up Down Navi Key to highlight the alert you wish to edit Call Alert Message ...

Страница 19: ...ackground to be displayed on the phone 1 Press MENU Î 9 Î 2 Î 1 2 Select Main Screen Front Screen 3 Select images to be used for Wallpaper from My Images or Default Folder 4 Press 3 Buy Wallpaer to purchase wallpaper image 9 2 2 Banner Allows you to enter a string of characters which display on the LCD screen 1 Press MENU Î 9 Î 2 Î 2 2 Use Left Right Nav Key to scroll between On Off 3 Use Up Down ...

Страница 20: ...ess OK Font Type Dial Font Size 3 Use Up Down Navi Key to highlight an option then press OK Options for Font Type LG Gothic LG Secret LG Lavender LG Greentea Options for Dial Font Size Normal Large 9 3 Security The Security menu allows you to secure the phone electronically 9 3 1 Lock Phone Keeps your phone from unauthorized use Once the phone is locked it is in restricted mode until the lock code...

Страница 21: ...isplayed message and press OK to continue 5 A message will pop up that says Preference settings will be set to factory defaults Press OK to continue Press OK 6 Use Up Down Navi Key to highlight an option below and press OK Revert Cancel 9 4 Call Settings The Call Settings menu allows you to designate how the phone handles both incoming and outgoing calls 9 4 1 Answer options Allows you to determin...

Страница 22: ...Y 1 Press MENU Î 9 Î 4 Î 6 2 Read the displayed message and press OK to continue 3 Use Up Down Navi Key to select a setting then press OK TTY Full TTY Talk TTY Hear TTY Off 9 5 Bluetooth 9 5 1 Paired Devices Pairing is the process that allows the handset to locate establish and register 1 to 1 connection with the target device For pairing new Bluetooth device 1 Press MENU Î 9 Î 5 Î 1 2 Follow the ...

Страница 23: ...s 4 Press OK to save and exit or Right Soft Key Cancel to cancel editing 9 5 5 My Bluetooth Info Allows you to view the information of the Bluetooth function 1 Press MENU Î 9 Î 5 Î 5 9 6 System The System menu allows you to designate specific system network settings 9 6 1 Network 9 6 1 1 System Select Allows you to set up the phone producer s management environment Leave this setting as the defaul...

Страница 24: ...d atmospheric and environmental conditions indoors etc 9 7 Phone Menmory Allows you to check out the memory status of your phone 1 Press MENU Î 9 Î 7 2 Use Up Down Navi Key to highlight Reserved Memory Mulimedia and press OK 9 8 Phone Info The Phone Info menu provides you with specific information pertaining to your phone model 1 Press MENU Î 9 Î 8 2 Use Up Down Navi Key to highlight an option and...

Страница 25: ...ens to be vulnerable to interference you may not be able to use a rated phone successfully Trying out the phone with your hearing device is the best way to evaluate it for your personal needs M Ratings Phones rated M3 or M4 meet FCC requirements and are likely to generate less interference to hearing devices than phones that are not labeled M4 is the better higher of the two ratings T Ratings Phon...

Страница 26: ... and digital wireless phones FCC Hearing Aid Compatibility and Volume Control http www fcc gov cgb dro hearing html Gallaudet University RERC http tap Gallaudet edu DigWireless KS DigWirel ess htm Hearing Loss Association of America HLAA http www hearingloss org learn cellphonetech asp The Hearing Aid Compatibility FCC Order http hraunfoss fcc gov edocs_public attachmatch FCC 03 168A1 pdf ...

Отзывы: