background image

2

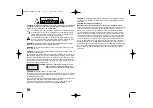
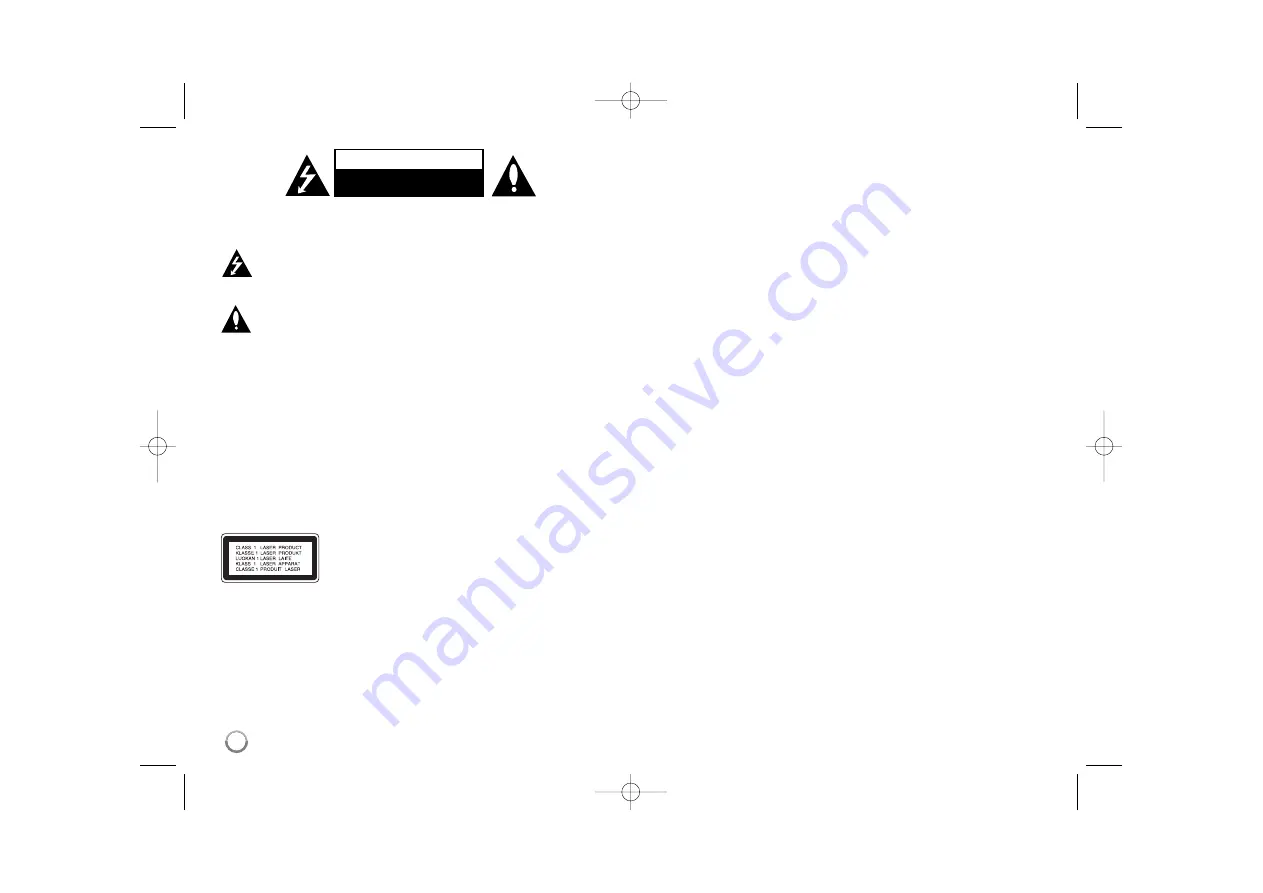
CAUTION: 

TO REDUCE THE RISK OF ELECTRIC SHOCK DO NOT REMOVE

COVER (OR BACK) NO USER-SERVICEABLE PARTS INSIDE REFER SER-
VICING TO QUALIFIED SERVICE PERSONNEL.

This lightning flash with arrowhead symbol within an equilateral triangle
is intended to alert the user to the presence of uninsulated dangerous
voltage within the product’s enclosure that may be of sufficient magni-

tude to constitute a risk of electric shock to persons. 
The exclamation point within an equilateral triangle is intended to alert
the user to the presence of important operating and maintenance (serv-
icing) instructions in the literature accompanying the product.

WARNING:

TO PREVENT FIRE OR ELECTRIC SHOCK HAZARD, DO NOT

EXPOSE THIS PRODUCT TO RAIN OR MOISTURE.

WARNING: 

Do not install this equipment in a confined space such as a book

case or similar unit.

CAUTION: 

Do not block any ventilation openings. Install in accordance with the

manufacturer's instructions.
Slots and openings in the cabinet are provided for ventilation and to ensure reli-
able operation of the product and to protect it from over heating. The openings
should be never be blocked by placing the product on a bed, sofa, rug or other
similar surface. This product should not be placed in a built-in installation such
as a bookcase or rack unless proper ventilation is provided or the manufactur-
er's instruction has been adhered to.

CAUTION:

CLASS 3B VISIBLE AND INVISIBLE LASER 
RADIATION WEN OPEN AND INTERLOCKS
DEFEATED AVOID EXPOSER TO THE BEAM.

CAUTION: 

This product employs a Laser System.

To ensure proper use of this product, please read this owner’s manual carefully
and retain it for future reference. Should the unit require maintenance, contact
an authorized service center.
Use of controls, adjustments or the performance of procedures other than those
specified herein may result in hazardous radiation exposure. 
To prevent direct exposure to laser beam, do not try to open the enclosure.
Visible laser radiation when open. DO NOT STARE INTO BEAM.

CAUTION: 

The apparatus should not be exposed to water (dripping or splash-

ing) and no objects filled with liquids, such as vases, should be placed on the
apparatus.

CAUTION concerning the Power Cord
Most appliances recommend they be placed upon a dedicated circuit;

That is, a single outlet circuit which powers only that appliance and has no addi-
tional outlets or branch circuits. Check the specification page of this owner's
manual to be certain. Do not overload wall outlets. Overloaded wall outlets,
loose or damaged wall outlets, extension cords, frayed power cords, or dam-
aged or cracked wire insulation are dangerous. Any of these conditions could
result in electric shock or fire. Periodically examine the cord of your appliance,
and if its appearance indicates damage or deterioration, unplug it, discontinue
use of the appliance, and have the cord replaced with an exact replacement
part by an authorized service center. Protect the power cord from physical or
mechanical abuse, such as being twisted, kinked, pinched, closed in a door, or
walked upon. Pay particular attention to plugs, wall outlets, and the point where
the cord exits the appliance. To disconnect power from the mains, pull out the
mains cord plug. When installing the product, ensure that the plug is easily
accessible.

CAUTION

RISK OF ELECTRIC SHOCK 

DO NOT OPEN

RH38AH-W-BSGPLLK-ENG  4/2/12  4:29 PM  Page 2

Содержание RH589H

Страница 1: ...OWNER S MANUAL HDD DVD RECORDER MODEL RH589H Please read this manual carefully before operating your set and retain it for future reference ENGLISH Cover_RH38AH W BSGPLLK ENG indd 1 12 04 02 4 22 ...

Страница 2: ... read this owner s manual carefully and retain it for future reference Should the unit require maintenance contact an authorized service center Use of controls adjustments or the performance of procedures other than those specified herein may result in hazardous radiation exposure To prevent direct exposure to laser beam do not try to open the enclosure Visible laser radiation when open DO NOT STA...

Страница 3: ... prohibited CONSUMERS SHOULD NOTE THAT NOT ALL HIGH DEFINITION TELEVI SION SETS ARE FULLY COMPATIBLE WITH THIS PRODUCT AND MAY CAUSE ARTIFACTS TO BE DISPLAYED IN THE PICTURE IN CASE OF 625 PROGRESSIVE SCAN PICTURE PROBLEMS IT IS RECOMMENDED THAT THE USER SWITCH THE CONNECTION TO THE STANDARD DEFI NITION OUTPUT IF THERE ARE QUESTIONS REGARDING OUR TV SET COMPATIBILITY WITH THIS MODEL 625p HDD DVD R...

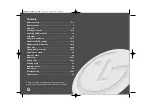
Страница 4: ...isc Information 18 19 Play a disc 19 20 Playing DivX movie files 21 22 Listening to a music 23 Viewing a photo 24 Recording 25 27 Editing a title 27 30 Dubbing a title 31 Language Codes 32 Area Codes 32 Troubleshooting 33 34 Specifications 35 Before connecting operating or adjusting this product please read this instruction booklet carefully and completely RH38AH W BSGPLLK ENG 4 2 12 4 29 PM Page ...

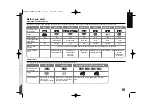
Страница 5: ...ode VR mode Auto Auto Auto Yes Limited Yes Yes Limited Limited Yes The player must be compatible with corresponding media and the media has to be finalized Mitsubishi 8x 16x Mitsubishi 4x Mitsubishi 3x Mitsubishi 8 16x Mitsubishi 2 4x 8x Mitsubishi 4x Verbatim 8x 16x Verbatim 4x Maxell 5x Verbatim 8x 16x HP 4x JVC 4x Verbatim 4x Maxell 4x Ricoh 4x RW R R RAM RWVideo RWVR R HDD DVD Audio CD Data di...

Страница 6: ... company has no right to grant such permission Permission should always be sought from the copy right owner Availability of copying or moving feature From To MP3 WMA JPEG DivX Title 1 HDD DISC Yes DISC HDD Yes Yes Yes Yes USB drive HDD Yes Yes Yes 1 The title is recorded from this unit Restrictions on copying Some video material is copy once protected Such material cannot be copied to HDD or DVD Y...

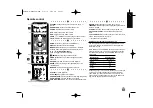
Страница 7: ...IP Go to next or previous chapter track file d REPEAT Repeat sequence chapter track title all TIMESHIFT Activates pause live TV playback timeshift for a live TV program CLEAR Removes a track number on the Program List 0 9 numerical buttons Selects numbered options in a menu TV Control Buttons You can control the sound level input source and power switch of your TV This button is not available Sett...

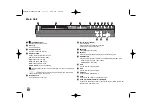
Страница 8: ...e control here f N X PLAY PAUSE Starts playback Pause playback or recording temporarily press again to exit pause mode g x STOP Stops playback or recording h z REC Starts recording Press repeatedly to set the recording time i RESOLUTION Sets the output resolution for HDMI and COMPONENT OUTPUT jacks HDMI 576i 576p 720p 1080i 1080p COMPONENT 576i 576p j DVD Set the recorder s mode to DVD k HDD Set t...

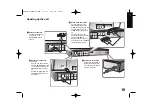
Страница 9: ...IN jack to your TV monitor c Audio Video connection Connect one end of the video yellow cable to the VIDEO OUTPUT jack on the unit and other end to the VIDEO INPUT jack on your TV Connect one end of the audio cables red and white to the analog AUDIO OUTPUT jacks on the unit and other ends to the AUDIO INPUT jacks on your TV d Power cord connection Connect the mains lead to the AC IN terminal on th...

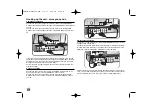
Страница 10: ...ssive signal S Video connection Connect one end of the S Video cable to the S VIDEO OUTPUT jack on the unit and the other end to the S VIDEO INPUT jack on your TV Connect one end of the audio cables red and white to the analog AUDIO OUTPUT jacks on the unit and the other ends to the AUDIO INPUT jacks on your TV Digital audio connection Connecting to an amplifier receiver Dolby Digital MPEG DTS dec...

Страница 11: ...em If your TV is not equipped with Dolby Digital and MPEG decoder set the Dolby Digital and MPEG options to PCM on the setup menu See page 16 If your TV is not equipped with DTS decoder set the DTS options to OFF on the setup menu See page 16 To enjoy DTS multi channel surround you must connect this unit to a DTS compatible receiver via one of this unit s digital audio outputs If there is noise or...

Страница 12: ...Flash Drive Withdraw the USB Flash Drive carefully when the connected USB Flash Drive is in use Notes on USB Flash Drive The contents on the disc or HDD cannot be moved or copied to a USB Flash Drive Keep the USB Flash Drive out of reach of children If swallowed seek med ical advice immediately This unit supports only USB Flash Drive with FAT16 or FAT32 format The USB Flash Drives which require ad...

Страница 13: ...Program Edit option on the left side of the channel editing screen PR Indicates the selected channel position Seek Searches for a channel automatically Searching stops when the unit tunes in a channel Ch Changes the channel number MFT Fine tunes the channel to obtain a clearer picture NICAM Sets the channels for the NICAM broadcast OK Confirm the settings and return to the channel list menu Using ...

Страница 14: ...ist menu which shows music files on the USB Flash Drive page 23 Easy Menu SETUP Displays SETUP menu page 14 Rec Mode Displays Record Mode Set option in the SETUP Menu page 17 Dubbing Dubs a currently playing title from a finalized DVD R or a DVD ROM title without copy protection page 31 TV HDD Returns to live TV viewing in HDD mode Pressing the HDD button on the remote control will also allow you ...

Страница 15: ...mode when the power is turned off This option is not available when a timer recording is set ON The front panel display is off and only signals arriving at the antenna input are passed through when the unit is turned off OFF Turns off the Power Save Mode Initialization You can reset the unit to its original factory settings and format the HDD Factory Set You can reset the unit to all its factory s...

Страница 16: ...l karaoke DVDs only Adjust the lock settings To access the DVD Rating Password or Area Code options you must enter the 4 digit password If you have not yet entered a password you are prompted to do so Enter a 4 digit password Enter it again to verify If you make a mistake while entering number press CLEAR to delete numbers If you forget your password you can reset it Display the SETUP menu Input 2...

Страница 17: ... added automatically in every specified interval 5 10 or 15 min Disc Record Mode When recording a signal from analog or the DV input you can choose a color system NTSC or PAL Normally set to PAL because this recorder s color system is PAL Set this option to NTSC to view or record NTSC signals form external inputs AV1 2 or DV Time Shift Setting this option to ON activates the Time Shift function au...

Страница 18: ... keyboard menu appears by pressing ENTER while Edit is selected Disc Protect This function allows you to protect discs from accidental recording erasure and editing by setting this option to ON The DVD R and Video mode formatted DVD RW are not available to protect PBC Playback control Playback control provides special navigation features that are available on some discs Select On to use this featu...

Страница 19: ... to display the playback menu Use v V to select the angle option then use b B to select desired angle Selecting a sound mode This unit can produce a 3D Surround effect which simulates multi channel audio playback from two conventional stereo speakers instead of the five or more speakers normally required to listen to multi channel audio from a home theater system During playback press DISPLAY twic...

Страница 20: ...g speed While playback is paused press SCAN bb or BB to slow down forward or reverse playback You can change the various playback speeds by pressing SCAN m or M repeatedly Press PLAY N N to continue play at normal speed Viewing the Title menu Press TITLE to display the title menu or disc menu If the current DVD title has a menu the title menu appears on the screen Otherwise the disc menu may not a...

Страница 21: ...hin 32 48kHz WMA Bit rate within 8 320kbps MP3 within 32 192kbps WMA CD R Format ISO 9660 and JOLIET DVD R RW Format ISO 9660 UDF Bridge format Maximum Files Disc Less than 1999 total number of files and folders Notes on DivX format The DivX subtitle file name has to be identified with the DivX file name to be display on the unit If the subtitle file does not display properly change the language c...

Страница 22: ...rd menu appears by pressing ENTER while Rename option is selected Copying file s or folder s to the HDD You can copy file s or folder s to the HDD Select file s or folder s you would like to copy then press ENTER Select Edit option then press ENTER to show sub options The Copy menu appears by pressing ENTER while Copy option is selected Select a directory that you would like to copy to Select the ...

Страница 23: ...99 total number of files and folders Creating your own program You can play the contents in the order you want by arranging the order of the music files The program is cleared when exiting the Music List screen To add or erase music on the program list press MENU LIST to display the Program List Select a desired music file from the Music List then press ENTER If you want to select multiple files t...

Страница 24: ...e show of all files Speed option Sets the Slide Show speed to Slow Normal or Fast Listening to music during slide show You can view photos as a slide show while listening to MP3 WMA music files on HDD Press ENTER while Simultaneous Music play option is selected on the Slide Show menu The music file selection menu appears on the screen Press MARKER at the desired files to play then press ENTER whil...

Страница 25: ...st menu Use v v V V to select New and press ENTER to display Timer Record menu Adjust each field as described below using v v V V b b B B Media Choose a media to record to HDD or DVD PR Choose a memorized program number or one of the external inputs from which to record You cannot select DV input Date Choose a date up to 1 month in advance Start Time Set the start time End Time Set the end time Re...

Страница 26: ...nts while copying or dubbing The DivX file cannot be played while recording When you are recording on a DVD other contents on the DVD cannot be played Time Slip You can watch the title that you are currently recording to HDD with this func tion After the recording is progressed over 15 seconds press PLAY to playback the title that you are currently recording If you stop playback the title returns ...

Страница 27: ...V inputs to a recordable DVD disc Load a recordable DVD disc formatted in NTSC Set Disc Record Mode option to NTSC on the setup menu see page 17 Press DVD button and press AV INPUT repeatedly to select an external NTSC input AV1 2 or DV Press REC to start recording and press STOP to stop recording You cannot record the NTSC signal on the DVD disc formatted in PAL You cannot use the dubbing copying...

Страница 28: ...he Original still remains However if you delete a chapter or title from Original the title or chapter deleted from the Original are also removed from PlayList Select a title or chapter that you want to delete and press ENTER Select Delete option from the menu on the left of the screen and press ENTER to confirm HDD You can delete multiple files using MARKER button Press MARKER at the desired files...

Страница 29: ...that you want to divide and press ENTER Select Divide in the Edit option from the menu on the left of the screen and press ENTER to display the Divide menu Find the point you want to divide a title using PLAY SCAN PAUSE STEP buttons and press ENTER while Divide option is selected The playback screen shows the divided point Select Done option and press ENTER to divide You cannot select dividing poi...

Страница 30: ...chapter thumbnails Press ENTER to combine indicated two chapters This function is not available in conditions as listed below There is only one chapter within the title The first chapter is selected The chapters that you want to combine are created by deleting a part from an Original title The chapters that you want to combine are created from different titles One of the playlist chapters that you...

Страница 31: ... desired titles to select multiple titles and press ENTER to display the menu on the left of the screen Select Dubbing option from the menu on the left of the screen and press ENTER to display the Dubbing menu Use v v V V b b B B to select Start icon then press ENTER to confirm Dub a currently playing title This feature copies a single title to the HDD in real time When you start copying playback ...

Страница 32: ...n 8377 Sanskrit 8365 Scots Gaelic 7168 Serbian 8382 Serbo Croatian 8372 Shona 8378 Sindhi 8368 Singhalese 8373 Slovak 8375 Slovenian 8376 Spanish 6983 Sudanese 8385 Swahili 8387 Swedish 8386 Tagalog 8476 Language Code Tajik 8471 Tamil 8465 Telugu 8469 Thai 8472 Tonga 8479 Turkish 8482 Turkmen 8475 Twi 8487 Ukrainian 8575 Urdu 8582 Uzbek 8590 Vietnamese 8673 Volapük 8679 Welsh 6789 Wolof 8779 Xhosa...

Страница 33: ...es in the remote control are exhausted Playback The unit does not start playback b Insert a playable disc Check the disc type colour system and regional code b Place the disc with the playback side down b Place the disc on the disc tray correctly inside the guide b Clean the disc b Cancel the Rating function or change the rating level Cannot play a disc recorded using this unit on other player b F...

Страница 34: ... may result in no picture being output b Not all HDCP compatible DVI devices will work with this unit The connected HDMI device does not output sounds b Some HDMI compatible devices do not output sounds check the manual that came with the connected device b If your TV is not capable of handling 96 kHz sampling frequency set the Sampling Freq option to 48 kHz on the setup menu When this choice is m...

Страница 35: ...48kHz Compression format Dolby Digital Playback Frequency response DVD PCM 48 kHz 8 Hz to 22 kHz CD 8 Hz to 20 kHz DVD PCM 96 kHz 8 Hz to 44 kHz Signal to noise ratio More than 90 dB AUDIO OUT connector Harmonic distortion Less than 0 02 AUDIO OUT connector Dynamic range More than 95 dB AUDIO OUT connector Inputs ANTENNA IN Antenna input 75 ohms VIDEO IN 1 0 Vp p 75 ohms sync negative RCA jack x 2...

Страница 36: ...Cover_RH38AH W BSGPLLK ENG indd 2 12 04 02 4 22 ...

Отзывы: