10
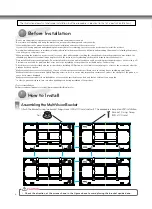
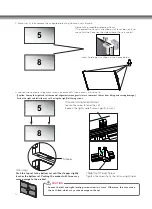
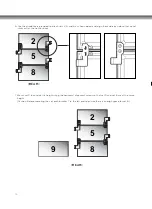
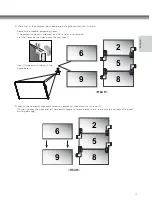
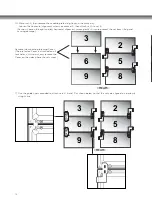
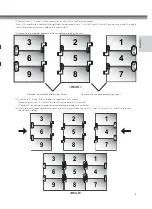
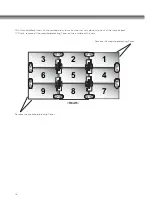
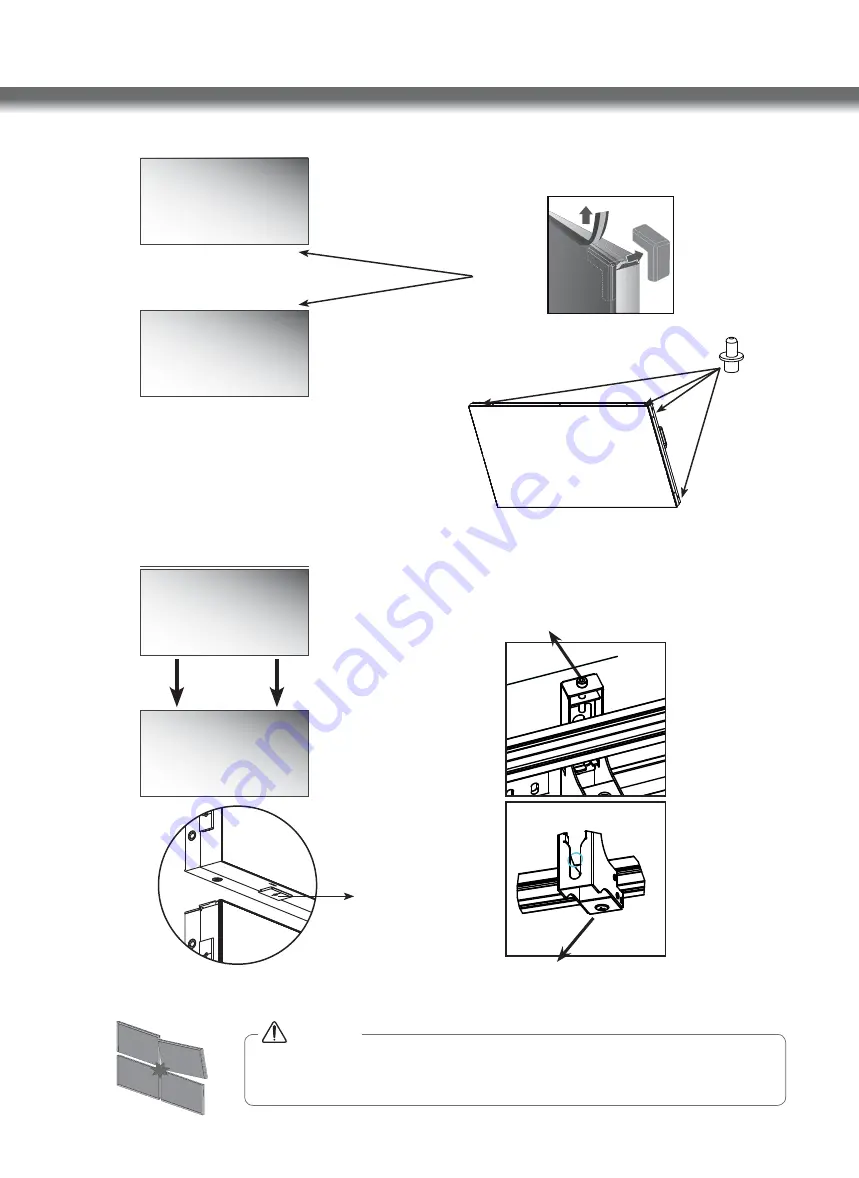
2. Mount set 5, then remove the module-protecting Cover on sets 8 and 5.
Insert Guide pins as shown in the fi gure below.
3. Loosen the horizontal alignment screws on bracket 5, then attach set 5 to set 8.
(Caution: Loosen the right and left horizontal alignment screws gently in turn to prevent the set from tilting and causing damage.)
Fasten the right and left slides of set 5 using the right/left fi xing screws.
Remove the module-protecting Cover.
(The protective Cover is attached on all four sides; only re-
move fi rst the Cover on the sides where the sets meet.)
5
5
8
8
<Horizontal Alignment Screw>
Loosen the screw to lower the set.
(Loosen the right and left screws gently in turn.)
<Right/Left Fixing Screw>
Tighten the screws to fix the left and right slides.
Stopper
<Warning>
Push the top set to the bottom set until the stopper slightly
touches the bottom set. Pushing the product with force may
cause damage to the product.
4
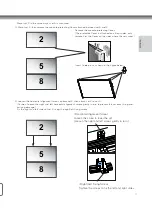
CAUTION
Loosen the left and right leveling screws slowly in turns. Otherwise, this may make
the set tilted, which may cause damage to the set.

