2-8
uSING yOuR RANGE
4) Preheating Alarm Light On/Off
1. Press and Hold the Start Time for three seconds.
2. Press Start Time repeatedly until PrE Appears in the display
3. Press plus(+) or minus(-) to turn the function on/off.
4. Press Start to accept the change.
5) Beeper Volume
1. Press and Hold the Start Time for three seconds.
2. Press Start Time repeatedly until BEEP Appears in the display
3. Press plus(+) or minus(-) to select the desired volume.
4. Press Start to accept the change.
6) Temperature Unit(℉ or ℃)
1. Press and Hold the Start Time for three seconds.
2. Press Start Time repeatedly until Unit Appears in the display
3. Press plus(+) or minus(-) to select ℉(Fahrenheit) or ℃(Centigrade).
4. Press Start to accept the change.
7) Hour Mode
1. Press and Hold the Start Time for three seconds.
2. Press plus or minus to set the desired hour mode on the clock
3. Press plus or minus to set the desired hour mode on the clock
4. Press Start to accept the change.
8) Adjusting Cooktop On Alert Volume
1. Press and hold Start Time for 3 seconds. Then press Start Time
repeatedly until CtOP appears in the display.
2. Press plus (+) or minus (-) to select Hi, Lo, Off.
3. Press Start to accept the change.
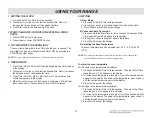
6. TImEd COOk, dELAyEd TImEd COOk
(For the upper & Lower Bake, Lower CONv. Bake & Roast)
BAKE
CONV. BAKE
CONV. ROAST
Desired
temperature
START
COOK
TIME
Desired time
START
START
TIME
Desired
start time
START
or
or
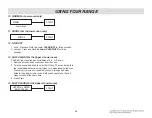
7. BROIL (For both the upper & Lower oven)
START
SPEED BROIL :
Press plus(+) or minus(-) to select Hi or Low
Upper oven
BROIL :
Press plus(+) or minus(-) to select Hi or Low
Lower oven
8. CONvECTION BAkE (For the Lower oven only)
CONV.
BAKE
Desired
Temp.
START
9. CONvECTION ROAST (For the Lower oven only)
CONV.
ROAST
Desired
Temp.
START
Содержание LUTE4619SN
Страница 68: ...5 3 Lower Selfclean Oven Lamp Bridge Cook top Element CR Cook top Element ...
Страница 69: ...5 4 RR Cook top Element RF Cook top Element Upper BROIL EASY Clean Lower Broil ...
Страница 70: ...5 5 Upper BAKE WARM Clock Display On ...
Страница 71: ...6 1 COMPOSITION OF CONTROL Wiring Diagram ...
Страница 74: ...6 4 COMPOSITION OF CONTROL P N EBR80595411 Oven Relay PCB CN53 CN52 CN51 ...
Страница 75: ...6 5 COMPOSITION OF CONTROL SMPS PCB Touch PCB P N EBR80595701 P N EBR82864102 CN02 CN01 CN1 ...
Страница 104: ...UPPER DOOR PARTS EV 1021 1009 170R 1035 1035 170L 1015 1020 173U 173U 1008 102S 102S 102L W243 1000 W222 1801 ...
Страница 105: ...LOWER DOOR PARTS EV 1041 1009 1115 1120 102L 1018 173L 102U W243 W222 W222 1100 1704 1704 102L 173L 102U W101 W101 1801 ...
Страница 107: ...COOKTOP PARTS EV 330M 3204 3204 3204 3204 3204 3215 3056 3079 3022 330H 330S 5700 3014 3016 ...
Страница 110: ......


