24
Tip:
If you select the [Movie], [Photo] or [Music] option when a USB Flash Drive
is connected and a disc is inserted simultaneously, the menu for selecting
a media will appear. Select a media then press OK (
).
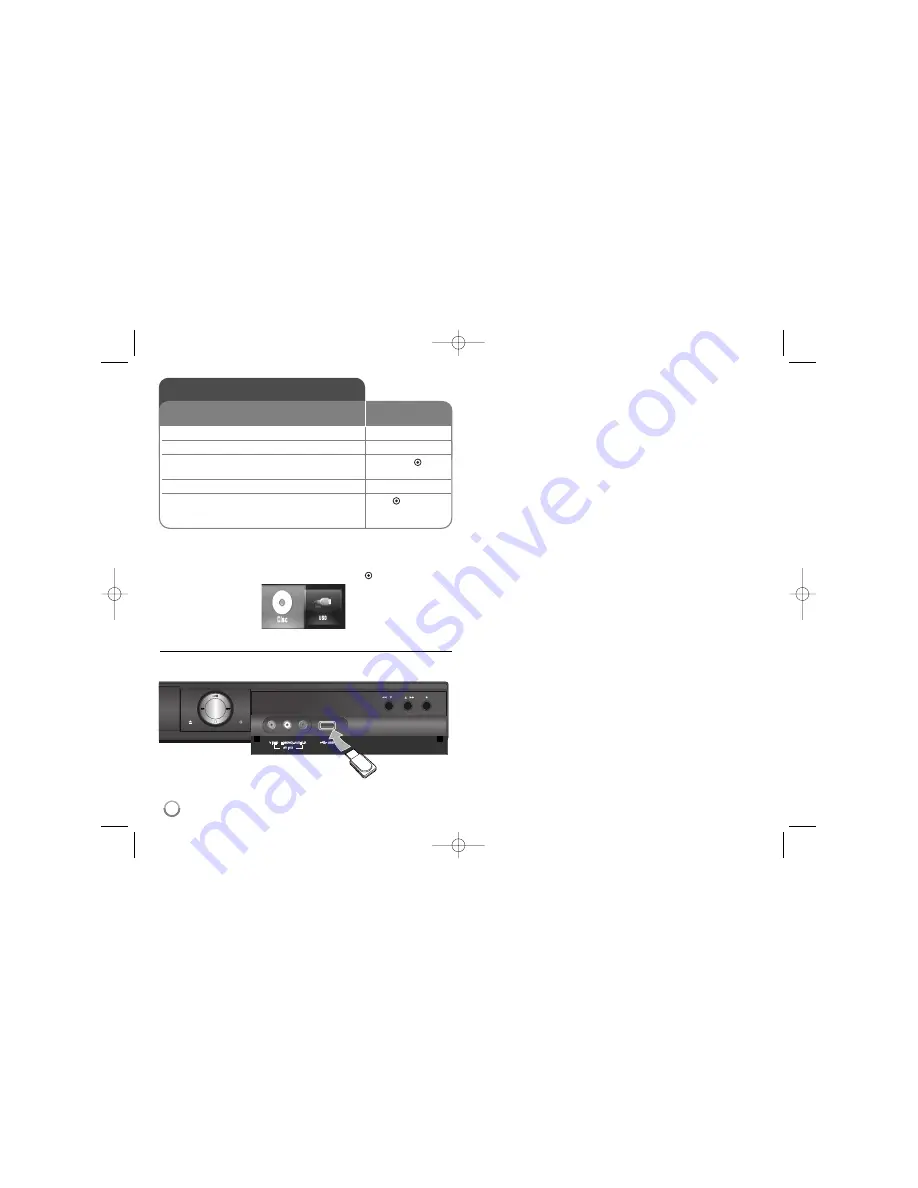
Insert/Remove a USB Flash Drive
Inserting a USB Flash Drive –
Insert straight-in until it fits into place.
Removing a USB Flash Drive –
Withdraw the USB Flash Drive carefully.
Notes:
• This unit supports only USB Flash Drive with FAT16 or FAT32 format.
• The USB Flash Drive can be used for the local storage for enjoying
BD-Live discs with Internet
• Do not extract the USB Flash Drive during operation (play, etc.).
• A USB Flash Drive which requires additional program installation when
you have connected it to a computer is not supported.
• USB Flash Drive: USB Flash Drive that support USB1.1 and USB2.0.
• Movie Files (DivX), Music files (MP3/WMA) and photo files (JPEG/PNG)
can be played. For details of operations on each file, refer to relevant
pages.
• Regular back up is recommended to prevent data loss.
• If you use a USB extension cable or USB HUB, the USB Flash Drive
may not be recognized.
• Some USB Flash Drives may not work with this unit.
• Digital camera and mobile phone are not supported.
• USB Port of the unit cannot be connected to PC. The unit cannot be
used as a storage device.
PROG.
(
(
(
(
Using a USB Flash Drive
This unit can play the movie, music and photo
files contained on the USB Flash Drive.
ON REMOTE
1 Inserts a USB Flash Drive to the USB port:
–
2 Displays the [Home Menu]:
–
3 Selects a main option:
b
b B
B
, OK (
)
[Music], [Photo] or [Movie] option
4 Selects the [USB] option:
b
b B
B
5 Displays corresponding menu list:
OK (
)
[MOVIE], [MUSIC] or [PHOTO] menu appears.
Details for the menu are on pages 50-54.
Front of this unit
USB Flash Drive
HR407M-P_BGBRLLK_ENG 8/9/04 4:49 AM Page 24


