10
ENG
ENGLISH
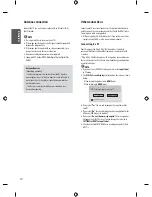
Antenna connection
Connect the TV to a wall antenna socket with an RF cable (75 Ω)
(Not Provided).
NOTE
•
Use a signal splitter to use more than 2 TVs.
•
If the image quality is poor, install a signal amplifier properly to
improve the image quality.
•
If the image quality is poor with an antenna connected, try to
realign the antenna in the correct direction.
•
An antenna cable and converter are not supplied.
•
Supported DTV Audio: MPEG, Dolby Digital, Dolby Digital Plus,
HE-AAC
Antenna Booster
(Depending on model)
• This feature improves the sensitivity to weak RF Signal in
poor reception areas. LG’s built-in booster is auto-activated at
weak signal level. It strengthens signal level and minimizes
picture colour noise.
• This feature is auto-controlled by processor and no user
intervention required.
Other connections
Connect your TV to external devices. For the best picture and audio
quality, connect the external device and the TV with the HDMI cable.
Some separate cable is not provided.
•
USB port supports 0.5 A electric current. If you need more electric
current in case of HDD, use the separate power adaptor.
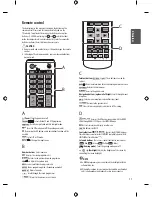
Connecting to a PC
Your TV supports the Plug & Play* feature and has the built-in
speakers with Virtual Surround that reproduces sound clearly with
a rich bass.
* Plug & Play: The function when a PC recognizes a connected device
that users connect to a PC and turn on, without device configuration
or user intervention.
NOTE
•
If you want to use HDMI-PC mode, you must set the
Input Label
to PC mode.
•
The
OSD (On Screen Display)
is displayed on the screen as shown
below.
-
When turning the product on in
HDMI
input.
-
When switching to
HDMI
input.
Is the input connected to your PC?
Do not show message again
Yes
No
•
If you select "
Yes
" the size and image quality are optimised for
your PC.
•
If you select "
No
" the size and image quality are optimised for the
AV device (DVD player, set-top box).
•
If you select "
Do not show message again
" this message does
not appear until the TV is reset. You can change the set value in
SETTINGS INPUT Input Label
.
•
The values set for HDMI1/HDMI2 are saved independently. (Only
MT57*)
Содержание 24MT47V
Страница 2: ...Front Back Eng P No 2 19 Pagination sheet ...


