196
Setup and Upgrade
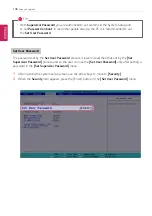
TIP
•
With
Supervisor Password
, you are authorized to set all items in the System Setup and
to set
Password on boot
. In case other people also use the PC, it is recommended to set
the
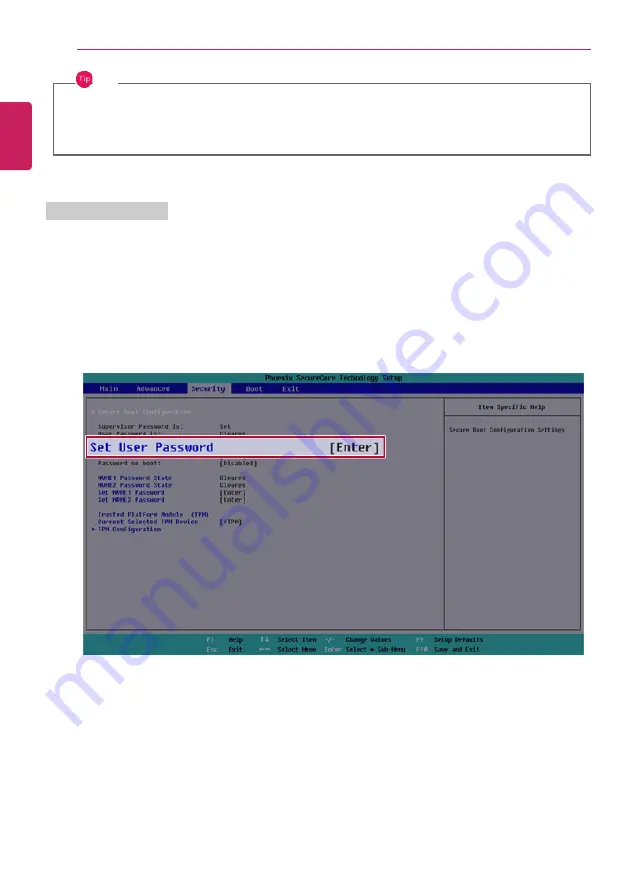
Set User Password
.
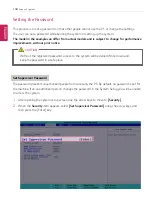
Set User Password
The password set by the
Set User Password
process is lower in level than that set by the
[Set
Supervisor Password]
process, and so the user can use the
[Set User Password]
only after setting a
password in the
[Set Supervisor Password]
menu.
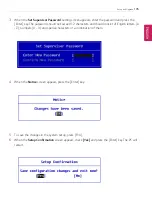
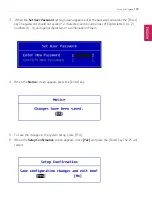
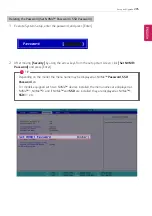
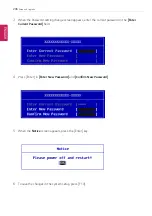
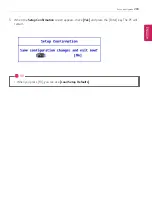
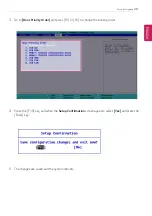
1
After opening the system setup screen, use the arrow keys to move to
[Security]
.
2
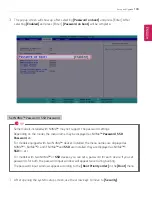
When the
Security
item appears, press the [Enter] button in the
[Set User Password]
menu.
ENGLISH
Содержание 17Z95P Series
Страница 1: ...LG EASY GUIDE NOTEBOOK 17Z95P Series www lg com Copyright 2021 LG Electronics Inc All rights reserved ...
Страница 22: ...22 Instruction Safety Information Regulatory Notices ENGLISH ...
Страница 23: ...Instruction Safety Information 23 ENGLISH ...
Страница 24: ...24 Instruction Safety Information ENGLISH ...
Страница 25: ...Instruction Safety Information 25 ENGLISH ...
Страница 26: ...26 Instruction Safety Information ENGLISH ...
Страница 27: ...Instruction Safety Information 27 ENGLISH ...
Страница 28: ...28 Instruction Safety Information ENGLISH ...
Страница 29: ...Instruction Safety Information 29 ENGLISH ...
Страница 30: ...30 Instruction Safety Information ENGLISH ...
Страница 31: ...Instruction Safety Information 31 ENGLISH ...
Страница 32: ...32 Instruction Safety Information ENGLISH ...
Страница 33: ...Instruction Safety Information 33 ENGLISH ...
Страница 34: ...34 Instruction Safety Information ENGLISH ...
Страница 35: ...Instruction Safety Information 35 ENGLISH ...
Страница 36: ...36 Instruction Safety Information ENGLISH ...
Страница 37: ...Instruction Safety Information 37 ENGLISH ...
Страница 38: ...38 Instruction Safety Information ENGLISH ...
Страница 39: ...Instruction Safety Information 39 ENGLISH ...
Страница 40: ...40 Instruction Safety Information ENGLISH ...
Страница 41: ...Instruction Safety Information 41 ENGLISH ...
Страница 42: ...42 Instruction Safety Information ENGLISH ...
Страница 43: ...Instruction Safety Information 43 ENGLISH ...
Страница 44: ...44 Instruction Safety Information ENGLISH ...
Страница 45: ...Instruction Safety Information 45 ENGLISH ...
Страница 46: ...46 Instruction Safety Information ENGLISH ...
Страница 47: ...Instruction Safety Information 47 ENGLISH ...
Страница 48: ...48 Instruction Safety Information ENGLISH ...
Страница 49: ...Instruction Safety Information 49 ENGLISH ...
Страница 50: ...50 Instruction Safety Information ENGLISH ...
Страница 51: ...Instruction Safety Information 51 ENGLISH ...
Страница 52: ...52 Instruction Safety Information ENGLISH ...
Страница 53: ...Instruction Safety Information 53 ENGLISH ...
Страница 54: ...54 Instruction Safety Information ENGLISH ...
Страница 55: ...Instruction Safety Information 55 ENGLISH ...
Страница 56: ...56 Instruction Safety Information ENGLISH ...
Страница 57: ...Instruction Safety Information 57 ENGLISH ...
Страница 58: ...58 Instruction Safety Information ENGLISH ...
Страница 59: ...Instruction Safety Information 59 ENGLISH ...
Страница 60: ...60 Instruction Safety Information ENGLISH ...
Страница 61: ...Instruction Safety Information 61 ENGLISH ...
Страница 62: ...62 Instruction Safety Information ENGLISH ...
Страница 63: ...Instruction Safety Information 63 ENGLISH ...
Страница 64: ...64 Instruction Safety Information ENGLISH ...
Страница 74: ...74 Using Windows 11 3 The app is added to the Start Screen or taskbar ENGLISH ...
Страница 100: ...100 Using the PC 3 In the Keyboard Backlight option set the keyboard lighting and off time ENGLISH ...
Страница 110: ...110 Using the PC 3 Check Turn on ClickLock and select Settings 4 Set the duration of ClickLock operation ENGLISH ...
Страница 114: ...114 Using the PC 3 Change the settings as needed on the Touchpad item ENGLISH ...
Страница 119: ...Using the PC 119 5 Once the wireless display device is connected it outputs the PC screen and its sound ENGLISH ...
Страница 127: ...Using the PC 127 2 Select Bluetooth devices Add device ENGLISH ...
Страница 130: ...130 Using the PC 2 Connect the wired LAN cable to the LAN port ENGLISH ...
Страница 147: ...Using Software 147 1 Select the All List Update needed menu item ENGLISH ...
Страница 149: ...Using Software 149 1 Select the Notification Setting menu 2 Set Auto Update Search to ON or OFF ENGLISH ...
Страница 159: ...Using Software 159 3 Select Android or iPhone and then click the Next button ENGLISH ...
Страница 160: ...160 Using Software 4 Follow the instructions to connect your smartphone and PC Android iPhone ENGLISH ...
Страница 170: ...170 Using Software 1 Select file s on your smartphone using a file browser and then tap the Share menu item ENGLISH ...
Страница 178: ...178 Using Software ENGLISH ...
Страница 179: ...Using Software 179 2 When registration is complete it is displayed on the settings list ENGLISH ...
Страница 180: ...180 Using Software 3 Press OK to complete the setup ENGLISH ...
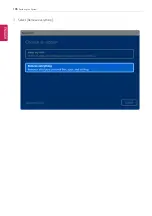
Страница 186: ...186 Restoring the System 1 Select Remove everything ENGLISH ...
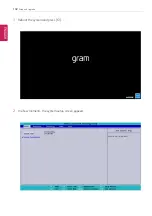
Страница 192: ...192 Setup and Upgrade 1 Reboot the system and press F2 2 In a few moments the system setup screen appears ENGLISH ...
Страница 213: ...Setup and Upgrade 213 3 Boots using the selected device ENGLISH ...
Страница 227: ...FAQ 227 1 Select Remove everything ENGLISH ...

