FAQ
225
4
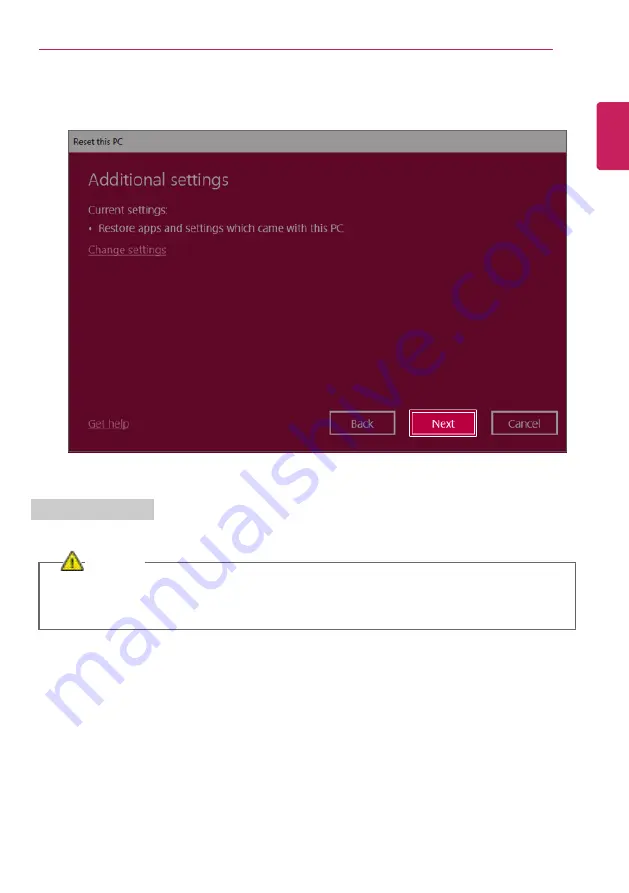
Press [Next] to proceed with installation as guided.
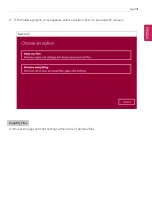
Remove everythings
Removes all items from the system and restores the system to its initial pre-purchase state.
CAUTION
All data is lost during the initialization, so you must backup all critical data in advance.
It may take about 5 hours or longer depending on the system conditions.
ENGLISH
Содержание 14Z90N Series
Страница 1: ...LG EASY GUIDE NOTEBOOK 14Z90N Series www lg com Copyright 2020 LG Electronics Inc All rights reserved ...
Страница 22: ...22 Introduction Important Safety Precautions Regulatory Notices ENGLISH ...
Страница 23: ...Introduction Important Safety Precautions 23 ENGLISH ...
Страница 24: ...24 Introduction Important Safety Precautions ENGLISH ...
Страница 25: ...Introduction Important Safety Precautions 25 ENGLISH ...
Страница 26: ...26 Introduction Important Safety Precautions ENGLISH ...
Страница 27: ...Introduction Important Safety Precautions 27 ENGLISH ...
Страница 28: ...28 Introduction Important Safety Precautions ENGLISH ...
Страница 29: ...Introduction Important Safety Precautions 29 ENGLISH ...
Страница 30: ...30 Introduction Important Safety Precautions ENGLISH ...
Страница 31: ...Introduction Important Safety Precautions 31 ENGLISH ...
Страница 32: ...32 Introduction Important Safety Precautions ENGLISH ...
Страница 33: ...Introduction Important Safety Precautions 33 ENGLISH ...
Страница 34: ...34 Introduction Important Safety Precautions ENGLISH ...
Страница 35: ...Introduction Important Safety Precautions 35 ENGLISH ...
Страница 36: ...36 Introduction Important Safety Precautions ENGLISH ...
Страница 37: ...Introduction Important Safety Precautions 37 ENGLISH ...
Страница 38: ...38 Introduction Important Safety Precautions ENGLISH ...
Страница 39: ...Introduction Important Safety Precautions 39 ENGLISH ...
Страница 40: ...40 Introduction Important Safety Precautions ENGLISH ...
Страница 41: ...Introduction Important Safety Precautions 41 ENGLISH ...
Страница 42: ...42 Introduction Important Safety Precautions ENGLISH ...
Страница 43: ...Introduction Important Safety Precautions 43 ENGLISH ...
Страница 44: ...44 Introduction Important Safety Precautions ENGLISH ...
Страница 45: ...Introduction Important Safety Precautions 45 ENGLISH ...
Страница 46: ...46 Introduction Important Safety Precautions ENGLISH ...
Страница 47: ...Introduction Important Safety Precautions 47 ENGLISH ...
Страница 48: ...48 Introduction Important Safety Precautions ENGLISH ...
Страница 49: ...Introduction Important Safety Precautions 49 ENGLISH ...
Страница 50: ...50 Introduction Important Safety Precautions ENGLISH ...
Страница 51: ...Introduction Important Safety Precautions 51 ENGLISH ...
Страница 52: ...52 Introduction Important Safety Precautions ENGLISH ...
Страница 53: ...Introduction Important Safety Precautions 53 ENGLISH ...
Страница 54: ...54 Introduction Important Safety Precautions ENGLISH ...
Страница 55: ...Introduction Important Safety Precautions 55 ENGLISH ...
Страница 56: ...56 Introduction Important Safety Precautions ENGLISH ...
Страница 71: ...Using Windows 10 71 3 Click the New Desktop tile 4 Desktop 1 and Desktop 2 are created ENGLISH ...
Страница 88: ...88 Using Windows 10 3 To change the detailed settings of the PC press the All Settings tile ENGLISH ...
Страница 101: ...Using the PC 101 3 Go to Keyboard Backlight and select your desired options ENGLISH ...
Страница 104: ...104 Using the PC 2 The on screen picture turns to a headphone icon when you connect a headphone or earphones ENGLISH ...
Страница 106: ...106 Using the PC TIP A warning message will be displayed if the volume is high while this feature is on ENGLISH ...
Страница 113: ...Using the PC 113 2 When the Settings screen appears select Devices 3 Select Mouse Additional Mouse Options ENGLISH ...
Страница 123: ...Using the PC 123 4 Once the wireless display device is connected it outputs the PC screen and its sound ENGLISH ...
Страница 133: ...Using the PC 133 2 When the Settings screen appears select Devices ENGLISH ...
Страница 135: ...Using the PC 135 4 Select a device to connect to 5 Complete the Bluetooth connection as directed ENGLISH ...
Страница 137: ...Using the PC 137 2 Connect the wired LAN cable to the LAN port ENGLISH ...
Страница 139: ...Using the PC 139 4 Select Network Internet Status Change adapter options ENGLISH ...
Страница 140: ...140 Using the PC 5 Right click Ethernet and select the Properties menu ENGLISH ...
Страница 141: ...Using the PC 141 6 Select Internet Protocol Version 4 TCP IPv4 and then click Properties ENGLISH ...
Страница 145: ...Using the PC 145 3 Select the Access Point you want to connect to and press Connect ENGLISH ...
Страница 159: ...Using Software 159 1 Select the All List Update needed menu item ENGLISH ...
Страница 161: ...Using Software 161 1 Select the Notification Setting menu 2 Set Auto Update Search to ON or OFF ENGLISH ...
Страница 164: ...164 Using Software 1 Press the icon on the taskbar ENGLISH ...
Страница 176: ...176 Restoring the System 1 Select Keep my files ENGLISH ...
Страница 177: ...Restoring the System 177 2 Check the current settings ENGLISH ...
Страница 180: ...180 Restoring the System 1 Select Remove everything ENGLISH ...
Страница 181: ...Restoring the System 181 2 Check the current settings ENGLISH ...
Страница 183: ...Restoring the System 183 4 Press Next to proceed with installation as guided ENGLISH ...
Страница 187: ...Setup and Upgrade 187 1 Reboot the system and press F2 2 In a few moments the system setup screen appears ENGLISH ...
Страница 208: ...208 Setup and Upgrade 3 Boots using the selected device ENGLISH ...
Страница 210: ...210 Setup and Upgrade 2 Select System Display ENGLISH ...
Страница 217: ...FAQ 217 2 Select System Display ENGLISH ...
Страница 222: ...222 FAQ 1 Select Keep my files ENGLISH ...
Страница 223: ...FAQ 223 2 Check the current settings ENGLISH ...
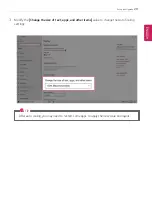
Страница 224: ...224 FAQ 3 If you need to change the settings press Change settings and press the Confirm button ENGLISH ...
Страница 226: ...226 FAQ 1 Select Remove everything ENGLISH ...
Страница 227: ...FAQ 227 2 Check the current settings ENGLISH ...
Страница 228: ...228 FAQ 3 If you need to change the settings press Change settings and press the Confirm button ENGLISH ...
Страница 229: ...FAQ 229 4 Press Next to proceed with installation as guided ENGLISH ...
Страница 235: ...FAQ 235 3 Select the Access Point you want to connect to and press Connect ENGLISH ...

