2
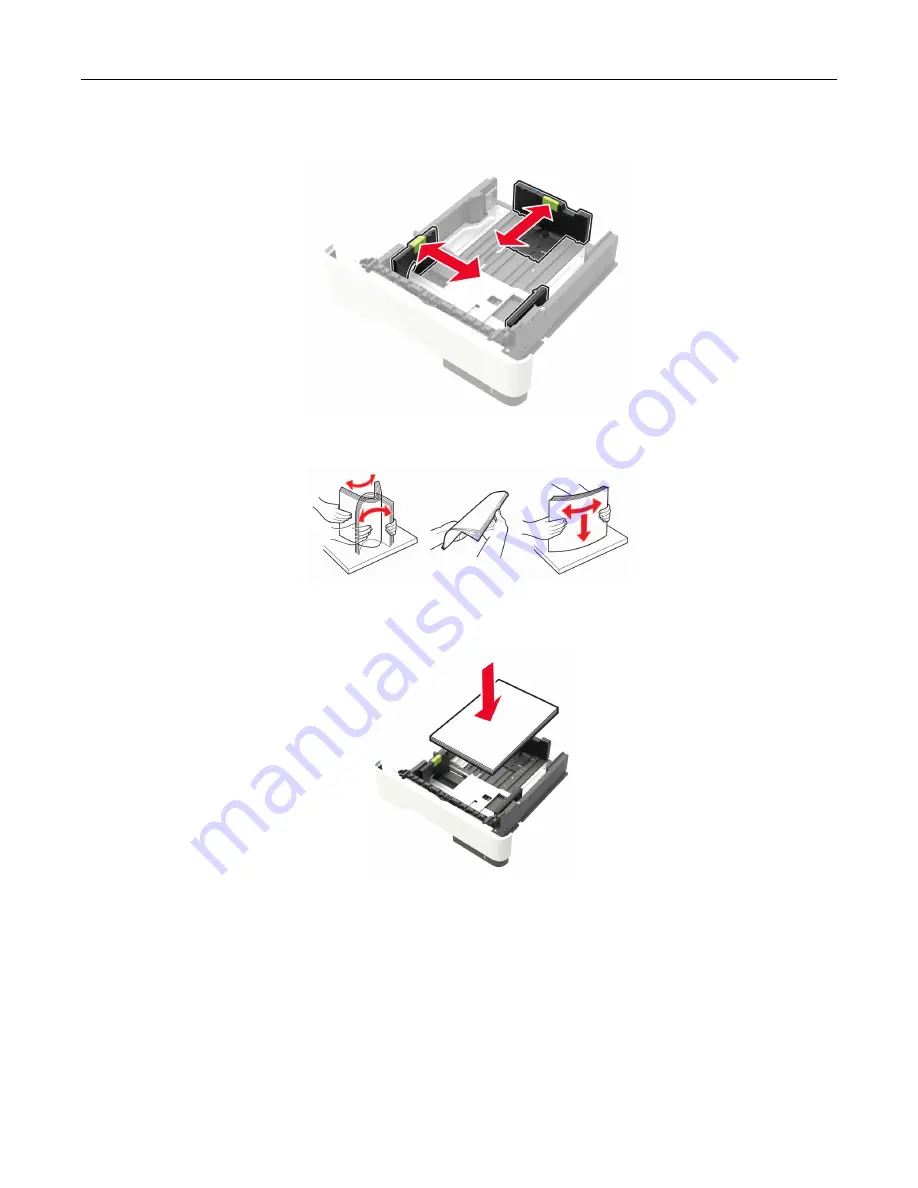
Adjust the paper guides to match the size of the paper that you are loading.
3
Flex, fan, and align the paper edges before loading.
4
Load the paper stack with the printable side facedown, and then make sure that the side guides fit snugly
against the paper.
Notes:
•
Load letterhead facedown with the top edge of the sheet toward the front of the tray for one
‑
sided
printing.
•
Load letterhead faceup with the bottom edge of the sheet toward the front of the tray for two
‑
sided
printing.
•
Do not slide paper into the tray.
•
To avoid paper jams, make sure that the stack height is below the maximum paper fill indicator.
5
Insert the tray.
If necessary, set the paper size and paper type from the control panel to match the paper loaded.
Loading paper and specialty media
29
Содержание XM3250
Страница 160: ... ADF glass pad Scanner glass Scanner glass pad 3 Close the scanner cover Maintaining the printer 160 ...
Страница 170: ...7 Close door A Replacing the staple cartridge 1 Open the stapler access door Maintaining the printer 170 ...
Страница 171: ...2 Remove the staple cartridge 3 Remove the spare staple cartridge Maintaining the printer 171 ...
Страница 173: ...4 Remove the used pick tires one after the other 5 Unpack the new pick tires Maintaining the printer 173 ...
Страница 175: ...Maintaining the printer 175 ...
Страница 177: ...7 Insert the new pick roller assembly 8 Flip the tray base and then insert the tray insert Maintaining the printer 177 ...
Страница 189: ...6 Insert the imaging unit Note Use the arrows inside the printer as guides Clearing jams 189 ...
Страница 198: ...4 Close the staple guard 5 Insert the staple cartridge holder 6 Close the staple access door Clearing jams 198 ...
Страница 262: ...b Connect the ISP extended cable to the ISP connector Upgrading and migrating 262 ...
Страница 263: ...c Install the hard disk Upgrading and migrating 263 ...


