4-30
Service Manual
4080-001
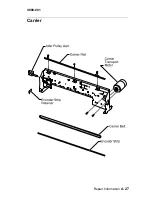
Printhead Carrier Removal
1. Remove the input / output tray assembly.
2. Remove all covers, refer to
“Covers and Doors” on page 4-3
.
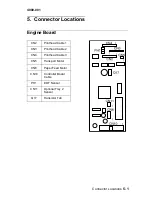
3. Disconnect the three printhead cables from the engine board.
4. Move the carrier assembly to the right side of the printer.
5. Remove the carrier shaft retainer clip from the right side of the
carrier shaft.
6. Remove the screw from the left side of the carrier shaft.
7. Remove the carrier shaft by sliding it to the right.
8. Gently lift up on the printhead carrier, disconnect the carrier belt
and remove the carrier.
Note: When reinstalling the carrier belt, take care not to damage
the encoder strip.
Содержание Optra Color 45
Страница 11: ...xi 4080 001 ...
Страница 12: ...xii Service Manual 4080 001 ...
Страница 22: ...1 10 Service Manual 4080 001 ...
Страница 68: ...3 16 Service Manual 4080 001 ...
Страница 71: ...Repair Information 4 3 4080 001 Covers and Doors ...
Страница 78: ...4 10 Service Manual 4080 001 Frames ...
Страница 82: ...4 14 Service Manual 4080 001 Paper Feed ...
Страница 86: ...4 18 Service Manual 4080 001 Electronics ...
Страница 95: ...Repair Information 4 27 4080 001 Carrier ...
Страница 99: ...Repair Information 4 31 4080 001 Maintenance Station ...
Страница 104: ...6 2 Service Manual 4080 001 ...
Страница 106: ...7 2 Service Manual 4080 001 Assembly 1 Covers ...
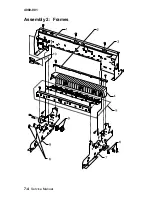
Страница 108: ...7 4 Service Manual 4080 001 Assembly 2 Frames ...
Страница 110: ...7 6 Service Manual 4080 001 Assembly 3 Paper Feed ...
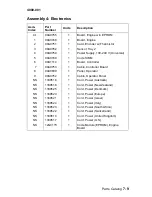
Страница 112: ...7 8 Service Manual 4080 001 Assembly 4 Electronics ...
Страница 114: ...7 10 Service Manual 4080 001 Assembly 5 Carrier ...
Страница 116: ...7 12 Service Manual 4080 001 Assembly 6 Carrier Transport ...
Страница 118: ...7 14 Service Manual 4080 001 Assembly 7 Maintenance Station ...


