background image

T

HE


TONER


CARTRIDGE


MAY


BE


DEFECTIVE


OR


LOW


ON


TONER

Remove the toner cartridge and shake it from side to side to redistribute the toner, and then reinstall it. If the

problem continues, replace the used toner cartridge with a new one. The printer may also need to be serviced. For

more information, contact Customer Support.

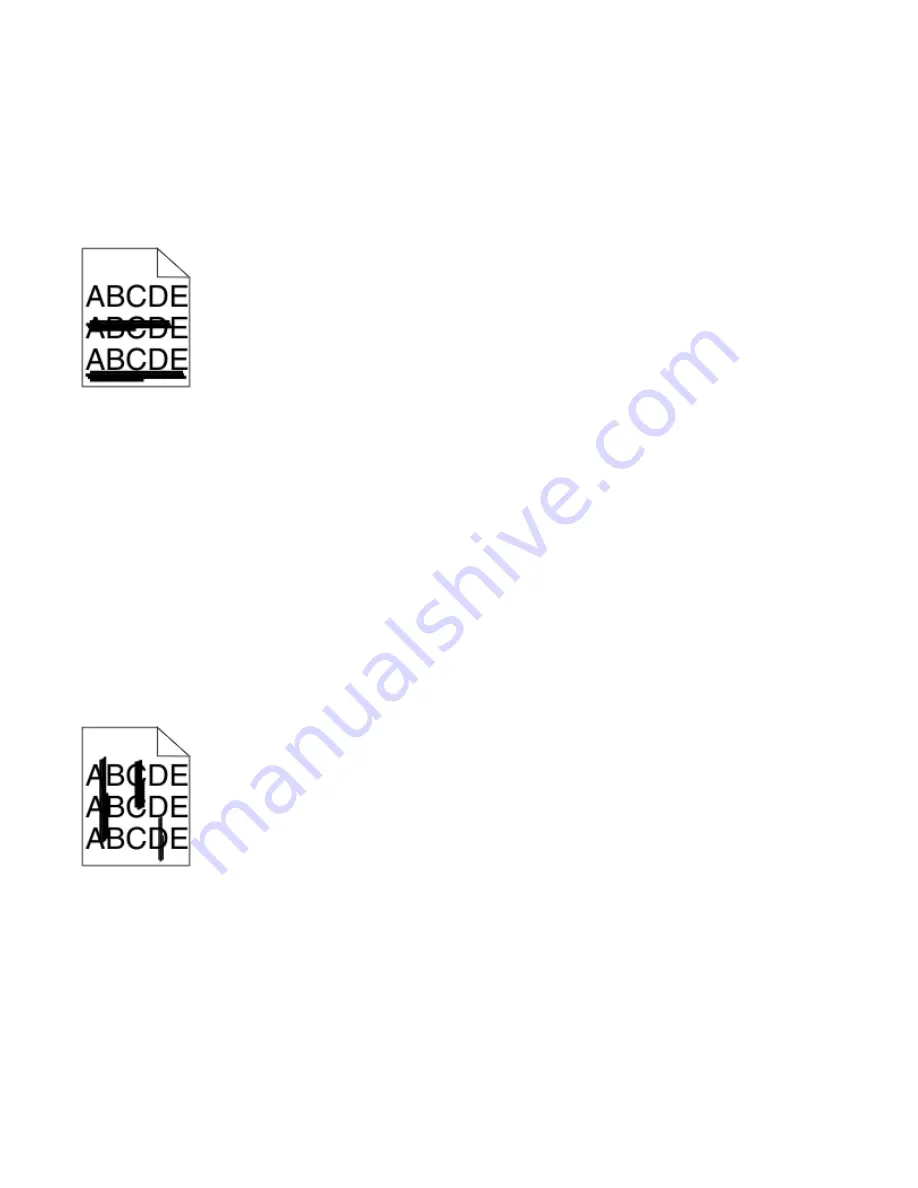
Streaked horizontal lines

These are possible solutions. Try one or more of the following:

T

HE


TONER


CARTRIDGE


MAY


BE


WORN

DEFECTIVE

OR


EMPTY

Replace the toner cartridge.

T

HE


FUSER


MAY


BE


DEFECTIVE

Replace the fuser.

T

HE


PHOTOCONDUCTOR


MAY


BE


DEFECTIVE

Replace the photoconductor.

Streaked vertical lines

These are possible solutions. Try one or more of the following:

T

HE


TONER


MAY


HAVE


SMEARED

Select another tray or feeder to feed paper for the job:

From the printer control panel Paper Menu, select the Default Source.

For Windows users, select the paper source from Print Properties.

For Macintosh users, select the paper source from the Print dialog and pop-up menus.

Troubleshooting

189

Содержание 25A0452 - C 736dtn Color Laser Printer

Страница 1: ...C734 and C736 Series User s Guide January 2010 www lexmark com Machine type s 5026 Model s 210 230 280 410 430 480 ...

Страница 2: ...up 34 Setting up the printer software 35 Setting up wireless printing 37 Installing the printer on a wired network 42 Changing port settings after installing a new network Internal Solutions Port 45 Setting up serial printing 47 Minimizing your printer s environmental impact 49 Saving paper and toner 49 Saving energy 50 Recycling 53 Loading paper and specialty media 54 Setting the paper size and t...

Страница 3: ...pplies menu 79 Paper menu 80 Reports menu 90 Network Ports menu 91 Security menu 106 Settings menu 110 Help menu 130 Maintaining the printer 132 Cleaning the exterior of the printer 132 Cleaning the printhead lenses 132 Storing supplies 134 Checking the status of supplies 134 Ordering supplies 135 Replacing supplies 136 Moving the printer 146 Administrative support 148 Finding advanced networking ...

Страница 4: ... paper jams 156 24x paper jam 158 250 paper jam 159 Troubleshooting 160 Understanding printer messages 160 Solving basic problems 172 Solving printing problems 172 Solving option problems 176 Solving paper feed problems 179 Solving print quality problems 180 Solving color quality problems 193 Contacting Customer Support 195 Notices 197 Product information 197 Edition notice 197 Power consumption 2...

Страница 5: ...stead of trying to lift the drawer and printer at the same time Note Use the handholds located on both sides and rear of the printer to lift it off the optional drawer Use only the power cord provided with this product or the manufacturer s authorized replacement CAUTION SHOCK HAZARD If you are accessing the system board or installing optional hardware or memory devices sometime after setting up t...

Страница 6: ...unted configurations require additional furniture for stability You must use either a printer stand or printer base if you are using a high capacity input tray a duplex unit and an input option or more than one input option If you purchased a multifunction printer MFP that scans copies and faxes you may need additional furniture For more information see www lexmark com multifunctionprinters SAVE T...

Страница 7: ...nter Installing the printer software Setup documentation The setup documentation came with the printer and is also available on the Lexmark Web site at http support lexmark com Additional setup and instructions for using the printer Selecting and storing paper and specialty media Loading paper Performing printing depending on your printer model Configuring printer settings Viewing and printing doc...

Страница 8: ...y country or region In the US See the Statement of Limited Warranty included with this printer or at http support lexmark com Rest of the world See the printed warranty that came with your printer Selecting a location for the printer CAUTION POTENTIAL INJURY The printer weight is greater than 18 kg 40 lb and requires two or more trained personnel to lift it safely When selecting a location for the...

Страница 9: ...1 152 4 mm 6 0 in 2 101 6 mm 4 0 in 3 609 6 mm 24 0 in 4 152 4 mm 6 0 in 5 304 8 mm 12 0 in Learning about the printer 9 ...

Страница 10: ...gurations require additional furniture for stability You must use either a printer stand or printer base if you are using a high capacity input tray a duplex unit and an input option or more than one input option If you purchased a multifunction printer MFP that scans copies and faxes you may need additional furniture For more information see www lexmark com multifunctionprinters Learning about th...

Страница 11: ...2 Paper support 3 Printer control panel 4 Optional 550 sheet specialty media drawer 5 Optional 550 sheet tray 6 Optional 2 000 sheet tray 7 Standard 550 sheet tray Tray 1 8 Multipurpose feeder Learning about the printer 11 ...

Страница 12: ...Once locked the metal plate and the system board cannot be removed Attach a security lock to the printer in the location shown Understanding the printer control panel Control panel item Description 1 Display The display shows messages and pictures that communicate the status of the printer 2 Select Pressing initiates action on a menu item Learning about the printer 12 ...

Страница 13: ...or light Indicates the printer status Off The power is off or the printer is in Eco Mode Blinking green The printer is warming up processing data or printing Solid green The printer is on but idle Solid red Operator intervention is needed 7 Stop Stops all printer activity A list of options is offered once Stopped appears on the display 8 Menus Opens the menus index Note These menus are available o...

Страница 14: ...ed to the printer then turn them off as well and unplug any cables going into the printer You can customize your printer connectivity and memory capacity by adding optional cards Available internal options Memory cards Printer memory Flash memory Fonts Firmware cards Bar Code PrintCryptionTM Printer hard disk LexmarkTM Internal Solutions Ports ISP RS 232 C Serial ISP Parallel 1284 B ISP MarkNetTM ...

Страница 15: ... cord from the wall outlet before continuing If you have any other devices attached to the printer then turn them off as well and unplug any cables going into the printer Note This operation requires a flathead screwdriver 1 Remove the cover a Turn the screws on the cover counterclockwise to loosen them but do not remove them b Slide the cover up until each screw is in the keyhole c Pull the cover...

Страница 16: ...emory devices sometime after setting up the printer then turn the printer off and unplug the power cord from the wall outlet before continuing If you have any other devices attached to the printer then turn them off as well and unplug any cables going into the printer Warning Potential Damage System board electronic components are easily damaged by static electricity Touch something metal on the p...

Страница 17: ...3 Open the memory card connector latches 4 Align the notch on the memory card with the ridge on the connector 1 Notch 2 Ridge Additional printer setup 17 ...

Страница 18: ... devices sometime after setting up the printer then turn the printer off and unplug the power cord from the wall outlet before continuing If you have any other devices attached to the printer then turn them off as well and unplug any cables going into the printer Warning Potential Damage System board electronic components are easily damaged by static electricity Touch something metal on the printe...

Страница 19: ...n the system board 1 Plastic pins 2 Metal pins 4 Push the card firmly into place Notes The entire length of the connector on the card must touch and be flush against the system board Be careful not to damage the connectors 5 Reattach the system board cover Additional printer setup 19 ...

Страница 20: ...devices attached to the printer then turn them off as well and unplug any cables going into the printer Warning Potential Damage System board electronic components are easily damaged by static electricity Touch something metal on the printer before touching any system board electronic components or connectors 1 Access the system board 2 Unpack the ISP and plastic tee Note Avoid touching the compon...

Страница 21: ...rd leaving the cable attached to the printer hard disk To unplug the cable squeeze the paddle at the plug of the interface cable to disengage the latch before pulling the cable out b Remove the screws holding the printer hard disk in place Additional printer setup 21 ...

Страница 22: ... unseat the standoffs d Remove the thumbscrews that attach the printer hard disk mounting bracket to the printer hard disk and then remove the bracket Set the printer hard disk aside 4 Remove the metal cover from the ISP opening Additional printer setup 22 ...

Страница 23: ...e sure each post of the tee has latched completely and the tee is seated firmly on the system board 6 Install the ISP on the plastic tee Angle the ISP over the plastic tee and approach the plastic tee so that any overhanging connectors will pass through the ISP opening in the system board cage Additional printer setup 23 ...

Страница 24: ...lastic tee until the ISP is seated between the guides of the plastic tee 8 Insert the long thumbscrew and turn it clockwise enough to hold the ISP in place but do not tighten the thumbscrew at this time Additional printer setup 24 ...

Страница 25: ...cage 10 Tighten the long thumbscrew Warning Potential Damage Do not overtighten the thumbscrew 11 Insert the plug of the ISP interface cable into the receptacle of the system board Note The plugs and receptacles are color coded 12 Reattach the system board cover Additional printer setup 25 ...

Страница 26: ...the printer Warning Potential Damage System board electronic components are easily damaged by static electricity Touch something metal on the printer before touching any system board electronic components or connectors 1 Access the system board 2 Unpack the printer hard disk Note Avoid touching the components on the card 3 Locate the appropriate connector on the system board Note If an optional IS...

Страница 27: ... the ISP and then press downward on the printer hard disk until the standoffs have seated into place c Insert the plug of the printer hard disk interface cable into the receptacle of the ISP Note The plugs and receptacles are color coded Additional printer setup 27 ...

Страница 28: ...d then press downward on the printer hard disk until the standoffs have seated into place b Attach the two provided screws to secure the printer hard disk mounting bracket c Insert the plug of the printer hard disk interface cable into the receptacle of the system board Note The plugs and receptacles are color coded Additional printer setup 28 ...

Страница 29: ... electrical components are easily damaged by static electricity Touch something metal on the printer before touching any system board electronic components or connectors Note This task requires a flathead screwdriver 1 Align the eight keyholes with the screws to replace the cover Additional printer setup 29 ...

Страница 30: ...2 Slide the cover down and then turn each screw clockwise to tighten Additional printer setup 30 ...

Страница 31: ...urces The C734n C734dn C734dtn and C734dnw model printers support a total of three optional input sources CAUTION POTENTIAL INJURY The printer weight is greater than 18 kg 40 lb and requires two or more trained personnel to lift it safely CAUTION SHOCK HAZARD If you are accessing the system board or installing optional hardware or memory devices sometime after setting up the printer then turn the ...

Страница 32: ...50 sheet specialty media drawer 2 Optional 550 sheet tray 3 Optional 2 000 sheet tray Note Optional trays lock together when stacked Remove stacked trays one at a time from the top down Additional printer setup 32 ...

Страница 33: ...ION POTENTIALINJURY Do not use the fax feature during a lightning storm Do not set up this product ormakeanyelectricalorcablingconnections suchasthefaxfeature powercord ortelephone duringalightning storm Connect the printer to the computer using a USB cable or Ethernet cable Be sure to match the following The USB symbol on the cable with the USB symbol on the printer The appropriate Ethernet cable...

Страница 34: ...e menu settings page lists all the factory default settings Once you select and save other settings from the menus they replace the factory default settings as userdefaultsettings A user default setting remains in effect until you access the menu again choose another value and save it 1 Make sure the printer is on and Ready appears 2 From the printer control panel press 3 Press the up or down arro...

Страница 35: ...rk setup page Setting up the printer software Installing printer software A printer driver is software that lets the computer communicate with the printer The printer software is typically installed during the initial printer setup For Windows users 1 Close all open software programs 2 Insert the Software and Documentation CD 3 From the main installation dialog click Install Printer and Software 4...

Страница 36: ...der Available Options add any installed hardware options 6 Click Apply For Macintosh users In Mac OS X version 10 5 or later 1 From the Apple menu choose System Preferences 2 Click Print Fax 3 Select the printer and then click Options Supplies 4 Click Driver and then add any installed hardware options 5 Click OK In Mac OS X version 10 4 and earlier 1 From the Finder desktop choose Go Applications ...

Страница 37: ...in use on the network by selecting the Default WEP Transmit Key or WPA or WPA2 passphrase WPA includes encryption as an additional layer of security The choices are AES or TKIP Encryption must be set for the same type on the router and on the printer or the printer will not be able to communicate on the network No security If your wireless network does not use any type of security then you will no...

Страница 38: ...d computer are fully on and ready Do not connect the USB cable until instructed to do so on the screen 2 Insert the Software and Documentation CD 3 Click Install Printer and Software 4 Click Agree to agree to the License Agreement 5 Click Suggested and then click Next 6 Click Wireless Network Attach Additional printer setup 38 ...

Страница 39: ...customize your installation 9 To allow other computers on the wireless network to use the wireless printer follow steps 2 through 6 and step 8 for each computer Installing the printer on a wireless network Macintosh Prepare to configure the printer 1 LocatetheprinterMACaddressonthesheetthatcamewiththeprinter WritethelastsixdigitsoftheMACaddress in the space provided below MAC address ___ ___ ___ _...

Страница 40: ...Computer 6 From the main page of the Embedded Web Server navigate to the page where the wireless settings information is stored Configure the printer for wireless access 1 Type the name of your network SSID in the appropriate field 2 Select Infrastructure as your Network Mode if you are using a wireless router 3 Select the type of security you use to protect your wireless network 4 Enter the secur...

Страница 41: ...e Easy Install screen click Install h Type the user password and then click OK All necessary software is installed on the computer i Click Close when installation is complete 2 Add the printer a For IP printing In Mac OS X version 10 5 or later 1 From the Apple menu choose System Preferences 2 Click Print Fax 3 Click 4 Select the printer from the list 5 Click Add In Mac OS X version 10 4 and earli...

Страница 42: ...creen to appear If the CD does not launch after a minute then do the following a Click or click Start and then click Run b In the Start Search or Run box type D setup exe where D is the letter of your CD or DVD drive 2 Click Install Printer and Software 3 Click Agree to agree to the License Agreement 4 Select Suggested and then click Next Note To configure the printer using a static IP address usi...

Страница 43: ...cense agreement and then click Agree to accept the terms of the agreement 6 Select a Destination and then click Continue 7 From the Easy Install screen click Install 8 Type the user password and then click OK All the necessary software is installed on the computer 9 Click Restart when installation is complete b Add the printer For IP printing In Mac OS X version 10 5 or later 1 From the Apple menu...

Страница 44: ... Print Center 4 From the Printer List click Add 5 Choose the Default Browser tab 6 Click More Printers 7 From the first pop up menu choose AppleTalk 8 From the second pop up menu select Local AppleTalk zone 9 Select the printer from the list 10 Click Add Note If the printer doesn t show up in the list you may need to add it using the IP address Contact your system support person for assistance Add...

Страница 45: ...nfigured for a wireless ISP while still attached to a wired connection disconnect the wired connection turn the printer off and then turn the printer back on again This will enable the wireless ISP Only one network connection at a time is active If you want to switch the connection type between wired and wireless you must first turn the printer off connect the cable to switch to a wired connection...

Страница 46: ...Applications b Double click Utilities c Double click Printer Setup Utility or Print Center d From the Printer List click Add e Click IP f Type the IP address of your printer in the Address field g Click Add For AppleTalk printing In Mac OS X version 10 5 a From the Apple menu choose System Preferences b Click Print Fax c Click d Click AppleTalk e Select the printer from the list f Click Add In Mac...

Страница 47: ...ck or click Start and then click Run 2 In the Start Search or Run box type D setup exe where D is the letter of your CD or DVD drive b Click Install Printer and Software c Click Agree to accept the Printer Software License Agreement d Click Custom e Make sure Select Components is selected and then click Next f Select the printer model from the menu and then click Add Printer g Click the beside the...

Страница 48: ...Click Properties e On the Port Settings tab set the serial parameters to the same serial parameters in the printer Look for the printer settings under the serial heading on the menu settings page you printed earlier f Click OK and then close all the windows g Print a test page to verify printer installation When a test page prints successfully printer setup is complete Additional printer setup 48 ...

Страница 49: ...chamber tests for different temperature and humidity conditions Lexmark has found no reason to discourage the use of today s recycled office papers but generally the following property guidelines apply to recycled paper Low moisture content 4 5 Suitable smoothness 100 200 Sheffield units or 140 350 Bendtsen units European Note Somemuchsmootherpapers suchaspremium24lblaserpapers 50 90Sheffieldunits...

Страница 50: ...ect one or more ways to reduce your printer s environmental impact Note See the table for the multiple settings that change when you select an Eco Mode setting Choose To Energy Reduce energy use especially when the printer is idle Printer engine motors do not start until a job is ready to print You may notice a short delay before the first page is printed The printer enters Power Saver mode after ...

Страница 51: ... mode Thealarmcontrolandcartridgealarmsoundsareturned off The printer will ignore the Advance Start command Off Image Photo Note Selecting Photo from the driver may disable Quiet Mode and provide better print quality and full speed printing Use factory default settings This setting supports the performance specifications for your printer 1 Make sure that the printer is on and Ready appears 2 From ...

Страница 52: ... press 7 PresstheupordownarrowbuttontoincreaseordecreasethenumberofminutesbeforetheprinterentersPower Saver mode and then press Adjusting the brightness of the display Using the Embedded Web Server 1 Type the printer IP address into the address field of your Web browser Note If you do not know the IP address of the printer then you can View the IP address on the printer control panel in the TCP IP...

Страница 53: ... energy savings and natural resource savings Lexmark cartons are 100 recyclable where corrugated recycling facilities exist Facilities may not exist in your area The foam used in Lexmark packaging is recyclable where foam recycling facilities exist Facilities may not exist in your area When you return a cartridge to Lexmark you can reuse the box that the cartridge came in Lexmark will recycle the ...

Страница 54: ...ess Paper Type appears 7 Press the left or right arrow button until the correct type appears and then press Submitting selection appears The printer returns to the Paper Size Type menu Loading the paper tray The printer has up to five input sources to select from the standard tray Tray 1 also known as the 550 sheet tray an optional 550 sheet tray an optional 2 000 sheet tray a multipurpose feeder ...

Страница 55: ...osition the guides 2 Squeeze the width guide tabs as shown and then slide the guide to the correct position for the size of paper being loaded Notice the load line on the left side of the paper tray it indicates the maximum height for loading paper Loading paper and specialty media 55 ...

Страница 56: ...ray once a length has been selected slide the button back to the right 4 Flex a stack of paper back and forth to loosen the sheets and then fan them Do not fold or crease the paper Straighten the edges on a level surface 5 Load the paper stack with the recommended print side faceup Load the stack toward the back of the tray as shown When loading preprinted letterhead for simplex printing place the...

Страница 57: ...er control panel For more information see Setting the paper size and type on page 54 Loading the multipurpose feeder The multipurpose feeder accommodates a variety of media types including envelopes Media not kept in a tray can be loaded into the multipurpose feeder 1 Stack height limiter 2 Tray release latch 3 Paper release lever 4 Size indicators Loading paper and specialty media 57 ...

Страница 58: ...repare a media stack for loading Flex sheets of paper back and forth to loosen them and then fan them Do not fold or crease the paper Straighten the edges on a level surface Hold transparencies by the edges and then fan them Straighten the edges on a level surface Note Avoid touching the print side of the transparencies Be careful not to scratch them Loading paper and specialty media 58 ...

Страница 59: ...e printer 6 Make sure the media is as far into the multipurpose feeder as it will go with very gentle pushing Media should lie flat and fit loosely in the multipurpose feeder Note If the media is pushed too far into the multipurpose feeder you must press the paper release lever to remove it 7 From the printer control panel set the Paper Size and Paper Type and then press The multipurpose feeder ca...

Страница 60: ...ize for example letter A4 statement Load a different paper size to change the Paper Size setting for a tray automatically Paper Size settings for the multipurpose feeder are not automatic they must be set manually from the Paper Size menu Warning PotentialDamage Do not assign a Paper Type name that does not accurately describe the type of paper loaded in the tray The temperature of the fuser varie...

Страница 61: ... arrow button until the correct size appears and then press Paper Type appears 7 Press the left or right arrow button until Custom Type x or another custom name appears and then press Submitting selection appears followed by Paper Menu 8 Verify that the correct Paper Type is associated with the custom name Note Plain Paper is the factory default Paper Type associated with all Custom Type x names a...

Страница 62: ...lity If paper is too rough toner cannot fuse to it properly If paper is too smooth it can cause paper feeding or print quality issues Always use paper between 100 and 300 Sheffield points however smoothness between 150 and 200 Sheffield points produces the best print quality Moisture content The amount of moisture in paper affects both print quality and the ability of the printer to feed the paper...

Страница 63: ...2 European Paper weighing less than 60 g m2 16 lb Multiple part forms or documents Selecting paper Using appropriate paper prevents jams and helps ensure trouble free printing To help avoid jams and poor print quality Always use new undamaged paper Before loading paper know the recommended print side of the paper This information is usually indicated on the paper package Do not use paper that has ...

Страница 64: ...sources and the types of paper they support Note To use a paper size that is unlisted configure a Universal Paper Size For more information see the Card Stock Label Guide available on the Lexmark Web site at http support lexmark com Paper sizes supported by the printer Measurements apply to simplex one sided printing only For duplex two sided printing the minimum size is 139 7 x 210 mm 5 50 x 8 27...

Страница 65: ...0 mm to 215 9x355 6mm 5 83 x 8 27 in to 8 5 x 14 in X 76 2 x 127 mm 3 x 5 in to 215 9 x 355 6 mm 8 5 x 14 in X X X X 76 2 x 127 mm 3 x 5 in to 215 9 x 914 4 mm 8 5 x 36 in 1 X X X X X 76 2 x 127 mm 3 x 5 in to 215 9 x 1219 2 mm 8 5 x 48 in 2 X X X X X 7 3 4 Envelop e Monarch 98 4 x 190 5 mm 3 875 x 7 5 in X X X X 9 Envelope 98 4 x 226 1 mm 3 875 x 8 9 in X X X X Com 10 Envelope 104 8x241 3mm 4 12 ...

Страница 66: ...0 in to 8 5 x 14 in X X X X 1 Supported by C734 model printers only 2 Supported by C736 model printers only 3 This size setting formats the envelope for 215 9 x 355 6 mm 8 5 x 14 in unless the size is specified by the software application Paper types and weights supported by the printer The printer engine supports 60 220 g m2 16 58 lb paper weights The duplex unit supports 60 120 g m2 16 32 lb pap...

Страница 67: ... X Glossy paper Envelopes4 X X X X 1 This option is not supported by the duplex unit 2 Do not use inkjet or 3M CG3710 transparencies 3 Paper labels are supported Other media such as vinyl may show print quality defects in some environments and prolonged vinyl label usage may reduce fuser life For more information see the CardStock LabelGuide available on the Lexmark Web site at http support lexmar...

Страница 68: ...int on a specific size or type of paper adjust the paper size or type settings to match the loaded paper or select the appropriate tray or feeder c Click OK and then click OK For Macintosh users a Customize the settings as needed in the Page Setup dialog 1 With a document open choose File Page Setup 2 Choose a paper size or create a custom size to match the loaded paper 3 Click OK b Customize the ...

Страница 69: ...g on transparencies Feed transparencies from any tray or drawer except the Optional 2 000 sheet tray Use transparencies designed specifically for laser printers Check with the manufacturer or vendor to ensure transparencies are able to withstand temperatures up to 170 C 338 F without melting discoloring offsetting or releasing hazardous emissions To prevent print quality problems avoid getting fin...

Страница 70: ...tures up to 190 C 374 F without sealing excessive curling wrinkling or releasing hazardous emissions Label adhesives face sheet printable stock and topcoats can withstand up to 25 psi 172 kPa pressure without delaminating oozing around the edges or releasing hazardous fumes Do not use labels with slick backing material Use full label sheets Partial sheets may cause labels to peel off during printi...

Страница 71: ...rve and Repeat print jobs may be deleted if the printer requires extra memory to process additional held jobs Job type Description Confidential When you send a Confidential print job to the printer you must create a PIN from the computer The PIN must be four digits using the numbers 0 9 The job is held in printer memory until you enter the PIN from the printer control panel and choose to print or ...

Страница 72: ...an invalid PIN the Invalid PIN screen appears To re enter the PIN make sure Try again appears and then press To cancel the PIN press the up or down arrow button until Cancel appears and then press 10 Press the up or down arrow button until appears next to the job you want to print and then press 11 Press the up or down arrow button until appears next to the number of copies you want to print and t...

Страница 73: ...xps and dcx Notes High speed flash drives must support the full speed USB standard Flash drives supporting only USB low speed capabilities are not supported Flash drives must support the FAT File Allocation Tables system Flash drives formatted with NTFS New Technology File System or any other file system are not supported Before printing an encrypted pdf file enter the file password from the print...

Страница 74: ...a 1 Insert one end of the USB cable into the camera Note Use only the USB cable that came with your camera 2 Insert the other end of the USB cable into the USB port on the front of the printer Notes Make sure the PictBridge enabled digital camera is set to the correct USB mode For more information see the camera documentation If the PictBridge connection is successful then a confirmation message a...

Страница 75: ...olate print quality problems 1 Turn the printer off 2 Hold down and the right arrow button while turning the printer on 3 Release the buttons when the clock appears and wait for CONFIG MENU to appear 4 Press the up or down arrow button until Prt Quality Pgs appears and then press The print quality test pages print 5 Press the up or down arrow button until Exit Config Menu appears and then press Re...

Страница 76: ... jobs appears in the printer window 2 Select a job to cancel 3 From the keyboard press Delete For Macintosh users In Mac OS X version 10 5 or later 1 From the Apple menu choose System Preferences 2 Click Print Fax and then double click the printer icon 3 From the printer window select the job to cancel 4 From the icon bar at the top of the window click the Delete icon In Mac OS X version 10 4 and ...

Страница 77: ...d Max Yield settings let you choose between a faster print speed or a higher toner yield Max Yield is the factory default setting MaxSpeed Prints in color mode unless black only is selected by the driver Prints in black only mode if the black only driver setting is selected Max Yield Switches from black to color mode based on the color content found on each page Frequent color mode switching can r...

Страница 78: ...re Setup Page Print Fonts Print Directory Asset Report General Settings Setup Menu Finishing Menu Quality Menu Utilities Menu XPS Menu PDF Menu PostScript Menu PCL Emul Menu HTML Menu Image Menu PictBridge Menu Flash Drive Menu Security Network Ports Help Miscellaneous Security Settings Confidential Print Disk Wiping Security Audit Log Set Date Time Active NIC Standard Network Standard USB Paralle...

Страница 79: ...be reset manually after a photoconductor is replaced Cyan Magenta Yellow or Black Cartridge Early Warning Low Invalid Replace Missing or Defective OK Unsupported Shows the status of the toner cartridges Cyan Magenta Yellow or Black Photoconductor Early Warning Low Replace Missing OK Shows the status of the photoconductors Waste Toner Box Near Full Replace Missing OK Shows the status of the waste t...

Страница 80: ...mpty the job prints using the linked tray Paper Size Type menu Menu item Description Tray x Size A4 A5 JIS B5 Legal Letter Executive Oficio México Folio Universal Specifies the paper size loaded in each tray Notes Letter is the US factory default setting A4 is the international factory default setting For trays with automatic size sensing only the size detected by the hardware appears If the same ...

Страница 81: ...dnamewillappearinsteadofCustomType x Use this menu item to configure automatic tray linking MP Feeder Size A4 A5 A6 Executive Oficio México Folio JIS B5 Legal Letter Statement Universal 7 3 4 Envelope 9 Envelope 10 Envelope DL Envelope C5 Envelope B5 Envelope Other Envelope Specifies the paper size loaded in the multipurpose feeder Notes From the Paper menu Configure MP must be set to Cassette for...

Страница 82: ...rpose feeder Notes From the Paper menu Configure MP must be set to Cassette for MP Feeder Type to appear as a menu item Plain paper is the factory default setting Manual Paper Size A4 A5 A6 JIS B5 Letter Legal Executive Oficio México Folio Statement Universal Specifies the size of the paper being manually loaded Note Letter is the US factory default setting A4 is the international factory default ...

Страница 83: ...ope is the US factory default setting DL Envelope is the international factory default setting Manual Env Type Envelope Rough Envelope Custom Type x Specifies the type of envelope being manually loaded Note Envelope is the factory default setting Note Only installed trays are listed in this menu Configure MP menu Menu item Description Configure MP Cassette Manual Determines when the printer select...

Страница 84: ...h Specifies the relative texture of the card stock loaded Notes Normal is the factory default setting Settings appear only if card stock is supported Transparency Texture Smooth Normal Rough Specifies the relative texture of the transparencies loaded Note Normal is the factory default setting Recycled Texture Smooth Normal Rough Specifies the relative texture of the recycled paper loaded Glossy Te...

Страница 85: ...h Normal Rough Specifies the relative texture of the paper loaded Note Normal is the factory default setting Preprinted Texture Smooth Normal Rough Specifies the relative texture of the paper loaded Note Normal is the factory default setting Colored Texture Smooth Normal Rough Specifies the relative texture of the paper loaded Note Normal is the factory default setting Light Texture Smooth Normal ...

Страница 86: ... Specifies the relative weight of the transparencies loaded Note Normal is the factory default setting Recycled Weight Light Normal Heavy Specifies the relative weight of the recycled paper loaded Note Normal is the factory default setting Glossy Weight Light Normal Heavy Specifies the relative weight of the glossy paper loaded Note Normal is the factory default setting Heavy Glossy Weight Light N...

Страница 87: ...ive weight of the paper loaded Note Normal is the factory default setting Colored Weight Light Normal Heavy Specifies the relative weight of the paper loaded Note Normal is the factory default setting Light Weight Light Normal Heavy Specifies the relative weight of the paper loaded Note Normal is the factory default setting Heavy Weight Light Normal Heavy Specifies the relative weight of the paper...

Страница 88: ...ding direction for all jobs that specify Preprinted as the paper type Note Off is the factory default setting Colored Loading Duplex Off Determines the paper loading direction for all jobs that specify Colored as the paper type Note Off is the factory default setting Light Loading Duplex Off DeterminesthepaperloadingdirectionforalljobsthatspecifyLight as the paper type Note Off is the factory defa...

Страница 89: ...e feeder in order to print from that source Universal Setup menu These menu items are used to specify the height and width of the Universal Paper Size The Universal Paper Size is a user defined paper size setting It is listed with the other paper size settings and includes similar options such as support for duplex printing and printing multiple pages on one sheet Menu item Description Units of Me...

Страница 90: ...rinter control panel language the TCP IP address the status of supplies and the status of the network connection Note The page prints when this item is selected Device Statistics Prints a report containing printer statistics such as supply information and details about printed pages Note The page prints when this item is selected Network Setup Page Prints a report containing information about the ...

Страница 91: ...Printsalistofalltheresourcesstoredonanoptionalflashmemorycardorprinter hard disk Notes Job Buffer Size must be set to 100 The optional flash memory or printer hard disk must be installed correctly and working properly The page prints when this item is selected Asset Report Prints a report containing each piece of printer asset information such as the serial number and model name Note The page prin...

Страница 92: ... printer language specified in the Setup menu if PCL SmartSwitch is set to Off NPA Mode Off Auto Sets the printer to perform the special processing required for bidirectional communication following the conventions defined by the NPA protocol Notes Auto is the factory default setting Changing this setting from the printer control panel and then exiting the menus causes the printer to restart The m...

Страница 93: ...stScript print jobs Notes Auto is the factory default setting The Off setting filters print jobs using the standard protocol The On setting processes raw binary PostScript print jobs Std Network Setup Reports or Network Reports Network Card TCP IP IPv6 Wireless AppleTalk NetWare LexLink Net x Setup Reports or Network Reports Network Card TCP IP IPv6 Wireless AppleTalk NetWare LexLink For descripti...

Страница 94: ...ew Card Status Connected Disconnected Lets you view the connection status of the Network Card View Card Speed Lets you view the speed of a currently active network card Network Address UAA LAA Lets you view the network addresses Job Timeout 0 225 seconds Sets the amount of time in seconds that a network print job can take before it is canceled Notes 90 seconds is the factory default setting A sett...

Страница 95: ...ng Note On is the factory default setting Enable BOOTP On Off Specifies the BOOTP address assignment setting Note On is the factory default setting Enable Auto IP Yes No Specifies the Zero Configuration Networking setting Note Yes is the factory default setting Enable FTP TFTP Yes No Enables the built in FTP server which allows you to send files to the printer using the File Transfer Protocol Note...

Страница 96: ...ded by a router Note On is the factory default setting View Hostname View Address View Router Address Lets you view the current setting Note These settings can be changed only from the Embedded Web Server Enable DHCPv6 On Off Enables DHCPv6 in the printer Note On is the factory default setting Wireless menu Use the following menu items to view or configure the wireless internal print server settin...

Страница 97: ...ame Note The name can be changed only from the Embedded Web Server View Address Shows the assigned AppleTalk address Note The address can be changed only from the Embedded Web Server Set Zone list of zones available on the network Provides a list of AppleTalk zones available on the network Note The default setting is the default zone for the network If no default zone exists the zone marked with a...

Страница 98: ...tandard Network or Network x ª Std Network Setup or Net x Setup ª LexLink menu Menu item Description Activate On Off Activates LexLink support Note Off is the factory default setting View Nickname Lets you view the assigned LexLink nickname Note The LexLink nickname can be changed only from the Embedded Web Server Standard USB menus Menu item Description PCL SmartSwitch On Off Sets the printer to ...

Страница 99: ...y buffered on the disk are printed before normal processing is resumed The USB buffer size value can be changed in 1 k increments The maximum size allowed depends on the amount of memory in the printer the size of the other link buffers and whether the Resource Save setting is On or Off To increase the maximum size range for the USB Buffer disable or reduce the size of the parallel serial and netw...

Страница 100: ...age Notes On is the factory default setting When the Off setting is used the printer does not examine incoming data When the Off setting is used the printer uses PostScript emulation if PS SmartSwitch is set to On It uses the default printer language specified in the Setup menu if PS SmartSwitch is set to Off PS SmartSwitch On Off Sets the printer to automatically switch to PS emulation when a pri...

Страница 101: ...Auto setting buffers print jobs only if the printer is busy processing data from another input port Changingthissettingfromtheprintercontrolpanelandthenexitingthemenus causes the printer to restart The menu selection is updated Advanced Status On Off Enables bidirectional communication through the parallel port Notes On is the factory default setting The Off setting disables parallel port negotiat...

Страница 102: ...menu item is available only if the printer is attached to an external print server through the USB port Serial x menu Menu item Description PCL SmartSwitch On Off Sets the printer to automatically switch to PCL emulation when a print job received through a serial port requires it regardless of the default printer language Notes On is the factory default setting When the Off setting is used the pri...

Страница 103: ...ds on the amount of memory in the printer the size of the other link buffers and whether Resource Save is set to On or Off To increase the maximum size range for the Serial Buffer disable or reduce the size of the parallel serial and network buffers Changingthissettingfromthecontrolpanelandthenexitingthemenuscauses the printer to restart The menu selection is updated Job Buffering Off On Auto Temp...

Страница 104: ...sdonotappearintheSerialOption1 Serial Option 2 or Serial Option 3 menus Data Bits 7 8 Specifies the number of data bits that are sent in each transmission frame Note 8 is the factory default setting Parity Even Odd None Ignore Sets the parity for serial input and output data frames Note None is the factory default setting Honor DSR On Off Determines whether the printer uses the DSR Signal DSR is a...

Страница 105: ... SMTP server Notes Disabled is the factory default setting for Use SSL When the Negotiate setting is used your SMTP server determines if SSL will be used SMTP Server Authentication No authentication required Login Plain CRAM MD5 Digest MD5 NTLM Kerberos 5 Specifies the type of user authentication required Note No authentication required is the factory default setting Device Initiated E mail None U...

Страница 106: ...he factory default setting Remote Login Timeout specifies how long a remote interface for example the Web page can remain idle before automatically logging the user off 10 minutes is the factory default setting Enable Drive Enable Disable Enables or disables support for the front USB port Note Enable is the factory default setting Confidential Print menu Menu item Description Max Invalid PIN Off 2...

Страница 107: ...loaded fonts macros and held jobs Manual Wiping overwrites all disk space that has been used to hold data from a print job that has been processed printed This type of wipe does not erase any information related to an unprocessed print job Notes This menu item appears only if a formatted non defective printer hard disk is installed Do not start now is the factory default setting If the Disk Wiping...

Страница 108: ...disk All permanent data on the printer hard disk is preserved such as downloaded fonts macros and held jobs Bothmanualandscheduledwipingallowthefilesystemtoreusemarkeddiskspace without first having to wipe it Notes This menu item appears only if a formatted non defective printer hard disk is installed Single pass is the factory default setting Highly confidential information should be wiped using ...

Страница 109: ...r 4 is the factory default setting With the security audit log activated the severity value of each event is recorded 4 is the factory default setting Set Date Time menu Menu item Description View Date Time Lets you view the current date and time settings for the printer Set Date Time input date time Note Date Time is set in YYYY MM DD HH MM format Time Zone list of time zones Note GMT is the fact...

Страница 110: ...le for all printers Eco Mode Off Energy Energy Paper Paper Minimizes the use of energy paper or specialty media Notes Off is the factory default setting Off resets the printer to its factory default settings The Energy setting minimizes the power used by the printer Performance may be affected but print quality is not Paper minimizes the amount of paper and specialty media neededforaprintjob Perfo...

Страница 111: ... default setting After completing the setup wizard by selecting Done at the Country select screen the default becomes No Paper Sizes US Metric Notes The initial setting is determined by your Country selection in the initial setup wizard ChangingthissettingalsochangestheUnitsofMeasurement setting in the Universal Setup menu and the default for each input source in the Paper Size Type menu Alarms Al...

Страница 112: ...ing When the timer expires any partially printed page still in the printer is printed and then the printer checks to see if any new print jobs are waiting Print Timeout is available only when using PCL emulation This setting has no effect on PostScript emulation print jobs Timeouts Wait Timeout Disabled 15 6553515 Setstheamountoftimeinsecondstheprinterwaitsforadditional data before canceling a pri...

Страница 113: ...print the whole page On sets the printer to process the whole page so that the entire page prints Factory Defaults Do Not Restore Restore Now Returns the printer settings to the factory default settings Notes Do Not Restore is the factory default setting Do Not Restore keeps the user defined settings Restore Now returns all printer settings to the factory default settings except Network Ports menu...

Страница 114: ...r hard disk is installed This requirement ensures that stored jobs are not deleted if the printer loses power Print Area Normal Whole Page Sets the logical and physical printable area Notes Normal is the factory default setting When attempting to print data in the non printable area defined by the Normal setting the printer clips the image at the boundary The Whole Page setting allows the image to...

Страница 115: ...inter hard disk is installed and working properly It should not be Read Write or Write protected Job Buffer Size should not be set to 100 Changingthissettingfromtheprintercontrolpanelandthen exiting the menus causes the printer to reset The menu selection is updated Resource Save On Off Specifies how the printer handles temporary downloads such as fonts and macros stored in RAM when the printer re...

Страница 116: ...each print job Note 1 is the factory default setting Blank Pages Do Not Print Print Specifies whether blank pages are inserted in a print job Note Do Not Print is the factory default setting Collate Off 1 1 1 2 2 2 On 1 2 1 2 1 2 Stacks the pages of a print job in sequence when printing multiple copies Notes Off is the factory default setting No pages will be collated The On setting stacks the pri...

Страница 117: ...cifies the positioning of multiple page images when using N up pages sides Notes Horizontal is the factory default setting Positioning depends on the number of images and whether the images are in portrait or landscape orientation Orientation Auto Landscape Portrait Specifies the orientation of a multiple page sheet Note Auto is the factory default setting The printer chooses between portrait and ...

Страница 118: ...deissettoBlackOnly asettingof5increasestonerdensityanddarkness to all print jobs If Print Mode is set to Color a setting of 5 is the same as a setting of 4 Enhance Fine Lines On Off Enablesaprintmodepreferableforfilessuchasarchitecturaldrawings maps electrical circuit diagrams and flow charts Notes Off is the factory default setting To set Enhance Fine Lines from the software program with a docume...

Страница 119: ...ner being used for each color Note 0 is the factory default setting Color Samples sRGB Display sRGB Vivid Display True Black Vivid Off RGB US CMYK Euro CMYK Vivid CMYK Off CMYK Prints sample pages for each of the RGB and CMYK color conversion tables used in the printer Notes Selecting any setting prints the sample Color samples consist of a series of colored boxes along with the RGB or CMYK combin...

Страница 120: ...YK Euro CMYK Vivid CMYK Off CMYK Text US CMYK Euro CMYK Vivid CMYK Off CMYK Graphics US CMYK Euro CMYK Vivid CMYK Off Customizes the CMYK color conversions Notes US CMYK is the US factory default setting US CMYK applies a color conversion table that tries to produce output that matches SWOP color output Euro CMYK is the international factory default setting Euro CMYK applies a color conversiontabl...

Страница 121: ...te Removes downloads from the printer hard disk including all held Jobs buffered jobs and parked jobs Job accounting information is not affected Note Delete Now is the factory default setting Job Acct Stat Print Clear Prints a list of all stored job statistics or deletes the information from the printer hard disk Notes A printer hard disk must be installed in the printer and operating properly for...

Страница 122: ...play appear darker XPS menu Menu item Description Print Error Pages Off On Prints a page containing information on errors including XML markup errors Note Off is the factory default setting PDF menu Menu item Description Scale to Fit Yes No Scales page content to fit the selected paper size Note No is the factory default setting Annotations Do Not Print Print Prints annotations in a PDF Note Do No...

Страница 123: ...0 dpi or higher in resolution PCL Emul menu Menu item Description Font Source Resident Disk Download Flash All Specifies the set of fonts used by the Font Name menu item Notes Resident is the factory default setting It shows the factory default set of fonts downloaded into RAM Flash and Disk settings show all fonts resident in that option FlashoptionmustbeproperlyformattedandcannotbeRead Write Wri...

Страница 124: ... space characters per inch cpi Pitch can be increased or decreased in 0 01 cpi increments For nonscalable monospaced fonts the pitch appears on the display but cannot be changed PCL Emulation Settings Orientation Portrait Landscape Specifies the orientation of text and graphics on the page Notes Portrait is the factory default setting Portrait prints text and graphics parallel to the short edge of...

Страница 125: ...n Manual Paper Off None 0 199 Assign Man Env Off None 0 199 Configures the printer to work with printer software or programs that use different source assignments for trays drawers and feeders Notes Off is the factory default setting None is not an available selection It is displayed only when it is selected by the PCL 5 interpreter None ignores the Select Paper Feed command 0 199 allows a custom ...

Страница 126: ...ments Note The Times font is used in HTML documents that do not specify a font Menu item Description Font Size 1 255 pt Sets the default font size for HTML documents Notes 12 pt is the factory default setting Font size can be increased in 1 point increments Scale 1 400 Scales the default font for HTML documents Notes 100 is the factory default setting Scaling can be increased in 1 increments Orien...

Страница 127: ...some images Invert On Off Inverts bi tonal monochrome images Notes Off is the factory default setting This setting does not apply to GIF or JPEG images Scaling Anchor Top Left Best Fit Anchor Center Fit Height Width Fit Height Fit Width Scales the image to fit the selected paper size Notes Best Fit is the factory default setting When Auto Fit is set to On Scaling is automatically set to Best Fit O...

Страница 128: ... value for this setting the camera value always supersedes the printer value Quality Normal Draft Fine Selects the optimal quality Notes Normal is the factory default setting If both the printer and the PictBridge enabled digital camera have a value for this setting the camera value always supersedes the printer value Paper Source MP Feeder Tray x Manual Paper Sets the tray the paper pulls from No...

Страница 129: ...e back of the page is oriented in relation to the printing on the front of the page Notes Long Edge is the factory default setting Long Edge specifies that binding be placed on the left edge of portrait pages and the top edge of landscape pages Short Edge specifies that binding be placed on the top edge of portrait pages and the left edge of landscape pages Orientation Auto Landscape Portrait Spec...

Страница 130: ...ource for separator sheets Notes Tray 1 standard tray is the factory default setting FromthePapermenu ConfigureMPmustbesettoCassetteinorderforManual Feeder to appear as a menu setting Blank Pages Do Not Print Print Specifies whether blank pages are inserted in a print job Note Do Not Print is the factory default setting Help menu The Help menu consists of a series of Help pages that are stored in ...

Страница 131: ...itional information Connection Guide Provides information about connecting the printer locally USB or to a network Moving Guide Provides instructions for safely moving the printer Supplies Guide Provides part numbers for ordering supplies Understanding printer menus 131 ...

Страница 132: ...move paper from the standard exit bin 3 Dampen a clean lint free cloth with water Warning Potential Damage Do not use household cleaners or detergents as they may damage the finish of the printer 4 Wipe only the outside of the printer making sure to include the standard exit bin Warning Potential Damage Using a damp cloth to clean the interior may cause damage to your printer 5 Make sure the paper...

Страница 133: ...han 10 minutes 2 Remove all four toner cartridges Do not remove the photoconductor units for this procedure 3 Locate the four printhead lenses 4 Clean the lenses using a can of compressed air Warning Potential Damage Do not touch the printhead lenses 5 Reinstall the four toner cartridges Maintaining the printer 133 ...

Страница 134: ...vy dust Checking the status of supplies A message appears on the display when a replacement supply item is needed or when maintenance is required Checking the status of supplies from the printer control panel 1 Make sure the printer is on and Ready appears 2 From the printer control panel press the up or down arrow button until Status Supplies appears and then press 3 Press the up or down arrow bu...

Страница 135: ...agenta cartridge low 88 Yellow cartridge low or 88 Black cartridge low appears order a new cartridge When 88 Replace Cyan cartridge 88 Replace Magenta cartridge 88 Replace Yellow cartridge or 88 Replace Black cartridge appears you must replace the specified cartridge Estimated cartridge yield is based on the ISO IEC 19798 standard with about 5 coverage per color Extremely low print coverage less t...

Страница 136: ...place waste toner box appears you must replace the waste toner box Note Waste toner box reuse is not recommended Part name Part number Waste Toner Box C734X77G Replacing supplies Replacing a toner cartridge When 88 Replace color cartridge 88 color cartridge nearly low or 88 color cartridge low appears on the printer control panel or when print becomes faded try to extend the life of the specified ...

Страница 137: ...2 Pull up and out on the green tabs of the specified cartridge to remove it from the printer 3 Shake the cartridge front to back and side to side to redistribute the toner Maintaining the printer 137 ...

Страница 138: ...emain faded When printed text and graphics remain faded replace the specified cartridge Repeat steps 1 and 2 and then follow the steps below 6 Unpack a new cartridge 7 Place the old cartridge in the replacement cartridge shipping box and then attach the return label to the box for shipping Maintaining the printer 138 ...

Страница 139: ...e the new cartridge front to back and side to side to evenly distribute the toner 9 Remove the red packing strip from the new cartridge 10 Insert the new cartridge into the printer Maintaining the printer 139 ...

Страница 140: ... also issue the message Close front door If either of these messages appears follow these steps to clear the printer control panel message and continue printing 1 Open the front door 2 Remove the specified cartridge 3 Reinstall the specified cartridge 4 Close the front door 5 Check the printer control panel to see if it is clear of messages 6 Repeat as needed for additional toner cartridge replace...

Страница 141: ...uctor can be used with any color Replacingaphotoconductorisatwo partprocess First completetheillustratedstepstoreplacethephotoconductor and then reset the life count and clear printer messages 1 Open the front door Warning Potential Damage To avoid overexposing the photoconductors do not leave the door open for more than 10 minutes 2 Pull the specified photoconductor up and then slide it to the ri...

Страница 142: ...hiny area on the photoconductor drum Touching it could damage the photoconductor 4 Align and insert the left end of the photoconductor and then press the right end until it clicks into place 5 Remove the red packing strip from the top of the photoconductor Maintaining the printer 142 ...

Страница 143: ...tton until Supply Replaced appears and then press Note Failure to reset the life count may result in degraded print quality Replaced color photoconductor appears Yes appears 9 Press to clear the message If you are prompted to replace only one photoconductor then the Ready screen appears and the task is complete If you are prompted to replace additional photoconductors repeat steps 1 to 9 for each ...

Страница 144: ...t replaced 5 Press color photoconductor replaced appears Yes appears 6 Press 7 Press until Ready appears Replacing the waste toner box Replace the waste toner box when 82 Replace waste toner box or 82 Waste toner box nearly full appears The printer will not continue printing until the waste toner box is replaced 1 Unpack the replacement waste toner box and remove it from its shipping box 2 Locate ...

Страница 145: ...al off the waste toner box 5 Place the sealed waste toner box in the recycling bag 6 Place the bag into the shipping box you just removed the replacement part from 7 Peel the recycling label off and place it on the shipping box 8 Insert the new waste toner box into the printer Maintaining the printer 145 ...

Страница 146: ...instead of trying to lift the drawer and printer at the same time Note Use the handholds located on both sides and rear of the printer to lift it off the optional drawer Warning Potential Damage Damage to the printer caused by improper moving is not covered by the printer warranty Moving the printer to another location The printer and options can be safely moved to another location by following th...

Страница 147: ... clearance around it as shown 1 152 4 mm 6 0 in 2 101 6 mm 4 0 in 3 609 6 mm 24 0 in 4 152 4 mm 6 0 in 5 304 8 mm 12 0 in Shipping the printer When shipping the printer use the original packaging or call the place of purchase for a relocation kit Maintaining the printer 147 ...

Страница 148: ...orks as an actual display would work on a printer control panel showing printer messages To access the Embedded Web Server type the printer IP address into the address field of your Web browser Note If you do not know the IP address of the printer then you can View the IP address on the printer control panel in the TCP IP section under the Networks Ports menu Print a network setup page or the menu...

Страница 149: ...he IP address on the printer control panel in the TCP IP section under the Networks Ports menu Print a network setup page or the menu settings pages and locate the IP address in the TCP IP section 2 Click Reports and then click the type of report you want to view Restoring the factory default settings If you want to retain a list of the current menu settings for reference then print a menu setting...

Страница 150: ...trol panel in the TCP IP section under the Networks Ports menu Print a network setup page or the menu settings pages and locate the IP address in the TCP IP section 2 Click Copy Printer Settings 3 To change the language select a language from the drop down list and then click Click here to submit language 4 Click Printer Settings 5 Enter the IP addresses of the source and target printers Note To a...

Страница 151: ... Make sure the stack height does not exceed the indicated maximum height Make sure the guides in the tray or the multipurpose feeder are properly positioned and are not pressing too tightly against the paper or envelopes Push the tray in firmly after loading paper Paper recommendations Use only recommended paper or specialty media Do not load wrinkled creased damp bent or curled paper Flex fan and...

Страница 152: ...In the printer Remove Tray 1 open the front door and then remove any jams 24x In the paper trays Open each tray and then remove any jams 250 In the multipurpose feeder 1 Remove all media from the multipurpose feeder 2 Flex and stack the media 3 Reload the multipurpose feeder 4 Adjust the paper guide 200 201 paper jams CAUTION HOT SURFACE The inside of the printer might be hot To reduce the risk of...

Страница 153: ... paper is lodged too tightly under them b Remove each photoconductor unit and place it on a flat surface c Remove the jammed paper and then replace each photoconductor unit 4 Close the front door 5 Press 202 paper jam If the paper is visible in the standard exit bin then grasp the paper and pull it away from the bin Clearing jams 153 ...

Страница 154: ...he fuser unit Warning PotentialDamage Toavoidoverexposingthephotoconductors donotleavethefrontdooropenlonger than 10 minutes 1 Open the front door and then open the top cover CAUTION HOT SURFACE The inside of the printer might be hot To reduce the risk of injury from a hot component allow the surface to cool before touching 2 If the paper is jammed behind the fuser then you will need to remove the...

Страница 155: ...paper gently out of the printer or up toward the standard exit bin to remove it 4 Reinstall the fuser unit a Align the fuser unit using the handholds on each side and place it back into the printer b Turn the screws to the right to fasten the fuser unit securely 5 Close the top cover and then close the front door 6 Press Clearing jams 155 ...

Страница 156: ...then open the top cover CAUTION HOT SURFACE The inside of the printer might be hot To reduce the risk of injury from a hot component allow the surface to cool before touching b Grasp the paper on each side and pull it out gently c Close the top cover and then close the front door 3 If the jam is between the front door and Tray 1 a Remove Tray 1 b Open the front door Warning Potential Damage To avo...

Страница 157: ...ight up to remove the jammed paper d Pull out on the release tabs to allow the front door to split e Pull straight out to remove any jammed paper f Close the front door g Reinsert Tray 1 4 Press Clearing jams 157 ...

Страница 158: ...mmed in Tray 1 1 Open Tray 1 and then pull the jammed pages straight up and out 2 Close Tray 1 3 Press Paper jammed in front of Tray 1 1 Open Tray 1 and then pull the jammed pages up and out 2 Close Tray 1 Clearing jams 158 ...

Страница 159: ...nal tray and pull the jammed pages out as illustrated 2 Close the specified optional tray 3 Press 250 paper jam 1 Press the paper release lever and then remove the jammed pages from the multipurpose feeder 2 Load new paper into the multipurpose feeder 3 Press Clearing jams 159 ...

Страница 160: ... the print job The formatted page will print on the paper loaded in the selected tray This may cause clipping of text or images Try one or more of the following To select the paper tray with the correct paper size or type press the up or down arrow button until Paper Changed Continue appears and then press To ignore the message and print from the tray selected for the print job press the up or dow...

Страница 161: ...To cancel the current print job press the up or down arrow button until Cancel job appears and then press For more information press the up or down arrow button until Show me or Tell me more appears and then press Close front door Close the front door to clear the message Close top access cover and front door Close the top access cover and front door to clear the message Disk Corrupted The printer...

Страница 162: ...up or down arrow button until Cancel job appears and then press For more information press the up or down arrow button until Show me or Tell me more appears and then press Load src with size Try one or more of the following Load the specified paper into the specified source to clear the message and continue printing To select the paper tray with the correct paper size or type press the up or down ...

Страница 163: ...button until Automatically select paper appears and then press The current job may not print correctly If the printer finds a source that has paper of the correct type then it uses the paper from that source If the printer cannot find a source with the correct paper type then it prints on the paper that is installed in the default paper source Cancel the print job Press the up or down arrow button...

Страница 164: ... until Show Areas appears and then press Securely clearing disk space The printer hard disk wiping process needs to recover The message clears when all blocks are cleared Restore Held Jobs Press the up or down arrow button until Restore appears and then press to restore all held jobs stored on the printer hard disk Press the up or down arrow button until Do not restore appears and then press No pr...

Страница 165: ... Windows users check the Print Properties settings to make sure the print job is requesting the correct paper size and type For Macintosh users check the Print dialog settings to make sure the print job is requesting the correct paper size and type Check that the paper size is correctly set For example if the MP Feeder Size is set to Universal make sure the paper is large enough for the data being...

Страница 166: ... hard disk Press the up or down arrow button until Continue appears and then press to clear the message 38 Memory full Try one or more of the following Press the up or down arrow button until Continue appears and then press to clear the message Cancel the current print job Press the up or down arrow button until Cancel job appears and then press Install additional printer memory 39 Complex page so...

Страница 167: ...clear the message Turn the printer off and then back on to reset the printer Upgrade flash the network firmware in the printer or print server 55 Unsupported option in slot x x is a slot on the printer system board Try one or more of the following 1 Turn the printer power off 2 Unplug the power cord from the wall outlet 3 Remove the unsupported option card from the printer system board 4 Connect t...

Страница 168: ...on 58 Too many flash options installed Too many optional flash memory cards or too many optional firmware cards are installed on the printer Try one or more of the following Press the up or down arrow button until Continue appears and then press to clear the message and continue printing Remove extra flash options 1 Turn the printer off 2 Unplug the power cord from the wall outlet 3 Remove extra f...

Страница 169: ...63 Unformatted disk Press the up or down arrow button until Continue appears and then press to clear the message and continue printing Format the disk If the error message remains the hard disk may be defective and require replacing 80 xx Fuser near life warning Press the up or down arrow button until Continue appears and then press to clear the message and continue printing Order a replacement fu...

Страница 170: ... into the printer 83 xx Transfer module near life warning Press the up or down arrow button until Continue appears and then press Order a replacement transfer module immediately When print quality is reduced install the new transfer module using the instruction sheet that came with the replacement part 83 xx Transfer module life warning Press the up or down arrow button until Continue appears and ...

Страница 171: ...ment part 84 xx color photoconductor missing Insert the photoconductor into the printer 88 yy color cartridge low When this message appears the toner is low When the print becomes faded replace the specified toner cartridge To clear this message and continue printing press the up or down arrow button until Continue appears and then press 88 1x color cartridge nearly low When this message appears t...

Страница 172: ...er settings are correct Once you have checked each of these possibilities turn the printer off wait for about 10 seconds and then turn the printer back on This often fixes the problem Embedded Web Server does not open These are possible solutions Try one or more of the following CHECK THE NETWORK CONNECTIONS Make sure the printer and computer are turned on and connected to the same network CHECK T...

Страница 173: ... are using the correct printer software If you are using a USB port make sure you are running a supported operating system and using compatible printer software MAKE SURE THE INTERNAL PRINT SERVER IS INSTALLED PROPERLY AND WORKING Make sure the internal print server is properly installed and that the printer is connected to the network For more information about installing a network printer click ...

Страница 174: ...aming each job differently and then send the individual jobs to the printer MAKE SURE THE PRINTER HAS SUFFICIENT MEMORY Free up additional printer memory by scrolling through the list of held jobs and deleting some of them Job takes longer than expected to print These are possible solutions Try one or more of the following REDUCE THE COMPLEXITY OF THE PRINT JOB Eliminate the number and size of fon...

Страница 175: ...R Load the same size and type of paper in each tray to be linked Move the paper guides to the correct positions for the paper size loaded in each tray USE THE SAME PAPER SIZE AND PAPER TYPE SETTINGS Print a menu settings page and compare the settings for each tray If necessary adjust the settings from the Paper Size Type menu Note The standard 550 sheet tray and the multipurpose feeder do not auto...

Страница 176: ...If an option is not functioning then make sure it is selected in the software as well as the printer control panel Option does not operate correctly or quits after it is installed These are possible solutions Try one or more of the following RESET THE PRINTER Turn the printer off wait for about 10 seconds and then turn the printer on CHECK TO SEE IF THE OPTION IS CONNECTED TO THE PRINTER 1 Turn th...

Страница 177: ...be properly installed Reinstall the paper tray For more information see the hardware setup documentation that came with the paper tray or go to http support lexmark com to view the paper tray instruction sheet Solving 2 000 sheet drawer problems Try one or more of the following THE ELEVATOR TRAY IS NOT WORKING PROPERLY Make sure the printer is properly connected to the 2 000 sheet drawer Make sure...

Страница 178: ...rely connected to the correct connector CHECK THE CABLE Make sure you are using the correct cable and that it is securely connected MAKE SURE THE NETWORK SOFTWARE IS CONFIGURED CORRECTLY For information about installing software for network printing see the Networking Guide on the Software and Documentation CD Internal print server If the internal print server does not operate correctly these are ...

Страница 179: ...ted in the tray or on the multipurpose feeder CHECK THE PAPER GUIDES Move the guides in the tray to the correct positions for the paper size loaded THE PAPER MAY HAVE ABSORBED MOISTURE DUE TO HIGH HUMIDITY Load paper from a fresh package Store paper in its original wrapper until you use it Paper jam message remains after jam is cleared 1 Clear jammed paper from the entire paper path 2 Press the up...

Страница 180: ...4 Release both buttons when the clock appears and wait for Config Menu to appear 5 Press the up or down arrow button until Prt Quality Pgs appears and then press The print quality test pages print 6 Press the up or down arrow button until Exit Config Menu appears and then press Resetting the Printer appears briefly followed by a clock and then Ready appears Blank pages These are possible solutions...

Страница 181: ...mation see Adjusting the color alignment on page 181 Note If you have not resolved the issue then recalibrate again If necessary adjust the color alignment again Adjusting the color alignment 1 Make sure that the printer is turned off 2 From the printer control panel press and hold and the right arrow button while turning the printer on 3 Release both buttons when the clock appears The printer per...

Страница 182: ...to the correct positions for the paper size loaded CHECK THE PAPER SIZE SETTING Make sure the paper size setting matches the paper loaded in the tray 1 From the printer control panel Paper menu check the Paper Size setting 2 Before sending the job to print specify the correct size setting For Windows users specify the size from Print Properties For Macintosh users specify the size from the Page Se...

Страница 183: ...ntosh users specify the type from the Print dialog THE PHOTOCONDUCTOR MAY BE DEFECTIVE Replace the photoconductor THE TONER MAY BE LOW Replace the toner cartridge Gray background CHECK THE TONER DARKNESS SETTING Select a lighter Toner Darkness setting From the printer control panel Quality menu change the setting For Windows users change the setting from Print Properties For Macintosh users change...

Страница 184: ...ob to print specify the correct size setting For Windows users specify the size from Print Properties For Macintosh users specify the size from the Page Setup dialog Light colored line white line or incorrectly colored line These are possible solutions Try one or more of the following A TONER CARTRIDGE IS DEFECTIVE Replace the defective toner cartridge A PHOTOCONDUCTOR IS DEFECTIVE Replace the def...

Страница 185: ...til you use it Print irregularities These are possible solutions Try one or more of the following THE PAPER MAY HAVE ABSORBED MOISTURE DUE TO HIGH HUMIDITY Load paper from a fresh package CHECK THE PAPER TYPE AND WEIGHT SETTINGS Make sure the paper type and weight settings match the paper loaded in the tray 1 From the printer control panel Paper menu check the Paper Type and Paper Weight settings ...

Страница 186: ...e RGB Contrast setting is too high Change these settings from the printer control panel Quality menu For Windows users change these settings from Print Properties For Macintosh users change these settings from the Print dialog and pop up menus THE TONER CARTRIDGE MAY BE WORN OR DEFECTIVE Replace the toner cartridge Print is too light These are possible solutions Try one or more of the following RE...

Страница 187: ... finishes CHECK THE PAPER TYPE AND WEIGHT SETTINGS Make sure the paper type and weight settings match the paper loaded in the tray 1 From the printer control panel Paper menu check the Paper Type and Paper Weight settings 2 Before sending the job to print specify the correct type setting For Windows users specify the type from Print Properties For Macintosh users specify the type from the Print di...

Страница 188: ...length and width guides in the tray to the correct positions for the paper size loaded Make sure the guides are not too far from the paper stack Make sure the guides are not pressing too lightly against the paper stack CHECK THE PAPER Make sure you are using paper that meets the printer specifications Solid color pages These are possible solutions Try one or more of the following THE PHOTOCONDUCTO...

Страница 189: ...ollowing THE TONER CARTRIDGE MAY BE WORN DEFECTIVE OR EMPTY Replace the toner cartridge THE FUSER MAY BE DEFECTIVE Replace the fuser THE PHOTOCONDUCTOR MAY BE DEFECTIVE Replace the photoconductor Streaked vertical lines These are possible solutions Try one or more of the following THE TONER MAY HAVE SMEARED Select another tray or feeder to feed paper for the job From the printer control panel Pape...

Страница 190: ...e THE TRANSFER MODULE MAY BE WORN OR DEFECTIVE Replace the transfer module THE PHOTOCONDUCTOR MAY BE WORN OR DEFECTIVE Replace the photoconductor THE FUSER MAY BE WORN OR DEFECTIVE Replace the fuser THERE IS TONER IN THE PAPER PATH The printer may need to be serviced For more information contact Customer Support RECALIBRATE THE PRINTER Perform color adjust from the printer control panel Quality me...

Страница 191: ...rs specify the type from the Print dialog CHECK THE PAPER TEXTURE SETTING From the printer control panel Paper menu make sure the Paper Texture setting matches the paper loaded in the tray If necessary change the Paper Texture setting from Normal to Rough THE FUSER MAY BE WORN OR DEFECTIVE Replace the fuser Toner specks These are possible solutions Try one or more of the following THE TONER CARTRI...

Страница 192: ...menu check the Paper Type setting 2 Before sending the job to print specify the correct type setting For Windows users specify the type from Print Properties For Macintosh users specify the type from the Print dialog Uneven print density These are possible solutions Try one or more of the following A TONER CARTRIDGE MAY BE WORN OR DEFECTIVE Replace the worn or defective toner cartridge A PHOTOCOND...

Страница 193: ...ject information determines the application of color conversion tables For example it is possible to apply one type of color conversion table to text while applying a different color conversion table to photographic images Should I use PostScript or PCL emulation printer software What settings should I use for the best color The PostScript driver is strongly recommended for best color quality The ...

Страница 194: ...lorconversiontables appliedtoeachobjectwhenColorCorrectionissettoAuto generatepreferred colors for the majority of documents To manually apply a different color conversion table 1 From the Quality menu select Color Correction and then select Manual 2 From the Quality menu select Manual Color and then select the appropriate color conversion table for the affected object type Manual Color menu Objec...

Страница 195: ... program does not specify colors with RGB or CMYK combinations Additionally certain situations exist in which the software program or the computer operating system adjusts the RGB or CMYK combinations specified in the program through color management The resulting printed color may not be an exact match of the Color Samples pages What are detailed Color Samples and how do I access them Detailed Co...

Страница 196: ...ormation see the label on the inside top front cover of the printer The serial number is also listed on the menu settings page In the U S or Canada call 1 800 539 6275 For other countries or regions visit the Lexmark Web site at http support lexmark com Troubleshooting 196 ...

Страница 197: ...r changes in the products or the programs described may be made at any time References in this publication to products programs or services do not imply that the manufacturer intends to make these available in all countries in which it operates Any reference to a product program or service is not intended to state or imply that only that product program or service may be used Any functionally equi...

Страница 198: ...eration The FCC Class B limits are designed to provide reasonable protection against harmful interference when the equipment is operated in a residential installation This equipment generates uses and can radiate radio frequency energy and if not installed and used in accordance with the instructions may cause harmful interference to radio communications However there is no guarantee that interfer...

Страница 199: ...ordance with ISO 7779 and reported in conformance with ISO 9296 Note Some modes may not apply to your product 1 meter average sound pressure dBA Printing 55 Ready 33 Values are subject to change See www lexmark com for current values Waste from Electrical and Electronic Equipment WEEE directive The WEEE logo signifies specific recycling programs and procedures for electronic products in countries ...

Страница 200: ...ter is certified in the U S to conform to the requirements of DHHS 21 CFR Subchapter J for Class I 1 laser products and elsewhere is certified as a Class I laser product conforming to the requirements of IEC 60825 1 Class I laser products are not considered to be hazardous The printer contains internally a Class IIIb 3b laser that is nominally a 7 milliwatt gallium arsenide laser operating in the ...

Страница 201: ...to the Sleep Mode The Power Saver Mode saves energy by lowering power consumption during extended periods of inactivity The Power Saver Mode is automatically engaged after this product is not used for a specified period of time called the Power Saver Timeout Factory default Power Saver Timeout for this product in minutes 30 By using the configuration menus the Power Saver Timeout can be modified b...

Страница 202: ...ts of EN 55022 and safety requirements of EN 60950 Regulatory notices for wireless products This section contains the following regulatory information pertaining to wireless products that contain transmitters for example but not limited to wireless network cards or proximity card readers Exposure to radio frequency radiation The radiated output power of this device is far below the radio frequency...

Страница 203: ...et dirigée de manière à n émettre aucun champ HF dépassant les limites fixées pour l ensemble de la population par Santé Canada Reportez vous au Code de sécurité 6 que vous pouvez consulter sur le site Web de Santé Canada www hc sc gc ca rpb Le terme IC précédant le numéro de d accréditation inscription signifie simplement que le produit est conforme aux spécifications techniques d Industry Canada...

Страница 204: ...sions of Directive 1999 5 EC Español Por medio de la presente Lexmark International Inc declara que este producto cumple con los requisitos esenciales y cualesquiera otras disposiciones aplicables o exigibles de la Directiva 1999 5 CE Eesti Käesolevaga kinnitab Lexmark International Inc et seade see toode vastab direktiivi 1999 5 EÜ põhinõuetele ja nimetatud direktiivist tulenevatele muudele asjak...

Страница 205: ...tes and Canada For customers outside the U S refer to the country specific warranty information that came with your product This limited warranty applies to this product only if it was originally purchased for your use and not for resale from Lexmark or a Lexmark Remarketer referred to in this statement as Remarketer Limited warranty Lexmark warrants that this product Is manufactured from new part...

Страница 206: ...nofanyproductorthedurabilityorlongevityofprints produced by any product Warranty service does not include repair of failures caused by Modification or unauthorized attachments Accidents misuse abuse or use inconsistent with Lexmark user s guides manuals instructions or guidance Unsuitable physical or operating environment Maintenance by anyone other than Lexmark or a Lexmark authorized servicer Op...

Страница 207: ...e Agreement is a legal agreement between you either an individual or a single entity and Lexmark International Inc Lexmark that to the extent your Lexmark product or Software Program is not otherwise subject to a written software license agreement between you and Lexmark or its suppliers governs your use of any Software Program installed on or provided by Lexmark for use in connection with your Le...

Страница 208: ... OF THE POSSIBILITY OF SUCH DAMAGES OR FOR ANY CLAIM BYYOUBASEDONATHIRD PARTYCLAIM EXCEPTTOTHEEXTENTTHISEXCLUSIONOFDAMAGESISDETERMINED LEGALLY INVALID THE FOREGOING LIMITATIONS APPLY EVEN IF THE ABOVE STATED REMEDIES FAIL OF THEIR ESSENTIAL PURPOSE 4 U S A STATE LAWS This Software Limited Warranty gives you specific legal rights You may also have other rights that vary from state to state Some sta...

Страница 209: ...th all modifications documentation and merged portions in any form or as otherwise described herein Lexmark may terminate your license upon notice if you fail to comply with any of the terms of this License Agreement Upon such termination you agree to destroy all copies of the Software Program together with all modifications documentation and merged portions in any form 11 TAXES You agree that you...

Страница 210: ...onflict with the terms of this License Agreement any other written agreement signed byyouandLexmarkrelatingtoyourUseoftheSoftwareProgram TotheextentanyLexmarkpoliciesorprograms for support services conflict with the terms of this License Agreement the terms of this License Agreement shall control MICROSOFT CORPORATION NOTICES 1 This product may incorporate intellectual property owned by Microsoft ...

Страница 211: ...arning 170 83 xx Transfer module missing 170 83 xx Transfer module near life warning 170 84 xx color photoconductor low 171 84 xx color photoconductor missing 171 84 xx color photoconductor nearly low 171 84 xx Replace color photoconductor 171 88 1x color cartridge nearly low 171 88 2x Replace color cartridge 171 88 yy color cartridge low 171 A Active NIC menu 91 AppleTalk menu 97 attaching cables...

Страница 212: ...le list printing 74 fuser or transfer module ordering 135 G General Settings menu 110 green settings Eco Mode 50 Quiet Mode 51 H hard disk with adapter troubleshooting 178 held jobs 71 printing from Macintosh computer 72 printing from Windows 72 Help menu 130 HTML menu 126 I Image menu 127 information finding 7 Insert tray x 161 installation wireless network 37 39 installing options in driver 36 p...

Страница 213: ...rawer 31 550 sheet tray 31 firmware card 18 firmware cards 14 flash memory card 18 internal 14 Internal Solutions Port 20 memory card 16 memory cards 14 networking 14 ports 14 printer hard disk 26 ordering fuser or transfer module 135 photoconductors 135 toner cartridges 135 waste toner box 136 P paper characteristics 62 letterhead 63 preprinted forms 63 recycled 49 selecting 63 setting size 54 se...

Страница 214: ...l not be restored 166 38 Memory full 166 39 Complex page some data may not have printed 166 51 Defective flash detected 166 52 Not enough free space in flash memory for resources 167 54 Network x software error 167 54 Standard network software error 167 55 Unsupported option in slot 167 56 Parallel port x disabled 167 56 Serial port x disabled 167 56 Standard USB port disabled 168 57 Configuration...

Страница 215: ...7 Quiet Mode 51 print quality troubleshooting 182 R recycled paper using 49 recycling Lexmark packaging 53 Lexmark products 53 toner cartridges 53 WEEE statement 199 Remove all color supplies 164 Remove Packaging Materials 164 Remove paper from standard output bin 164 Repeat print jobs 71 printing from Macintosh computer 72 printing from Windows 72 reports viewing 149 Reports menu 90 Reserve print...

Страница 216: ...r transparency quality 192 print irregularities 185 print is too dark 186 print is too light 186 print quality test pages 180 repeating defects 187 skewed print 188 solid color pages 188 streaked horizontal lines 189 streaked vertical lines 189 toner fog or background shading 190 toner rubs off 190 toner specks 191 uneven print density 192 troubleshooting printer options 2 000 sheet drawer 177 fla...

Отзывы: