ENGLISH
12
When the installation is completed, a confirmation window will be displayed. Untick
the “Start the application” option and click the “Finish” button to close the window
and go back to the installation menu. Now you can install the camera driver.
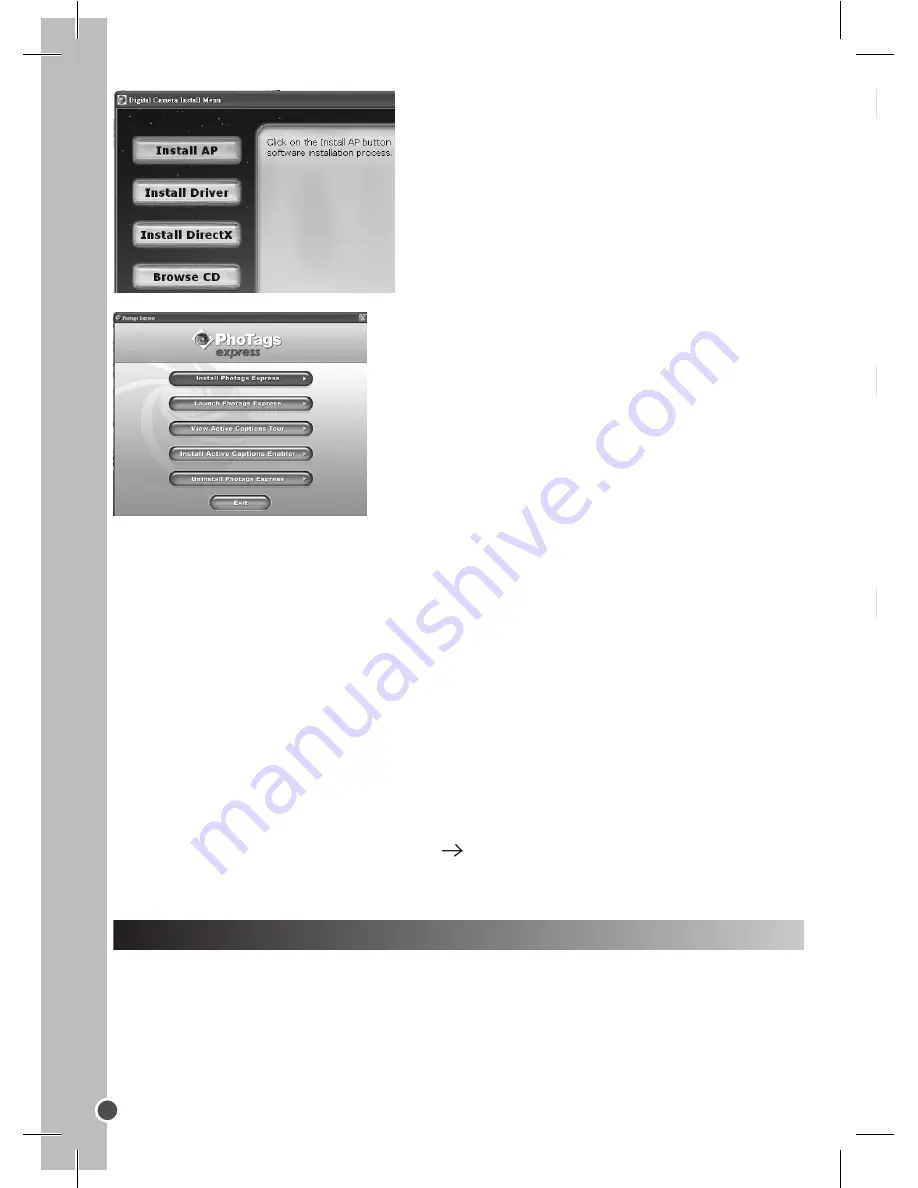
2. Click on “Install Driver”, and then follow the instructions to install it. You will need
to reboot your computer after the driver installation.
Notes:
• You must install the driver before downloading pictures from the camera.
• If you are using Windows VISTA™, please download the driver update from the
Lexibook website at: www.lexibook.com.
• If the CD does not auto run, click Start Run, type in “D:\autorun.exe” in the Run
dialog text box (where D:\ is your CD-ROM drive).
TURNING THE CAMERA ON AND OFF
Press the Shutter button [6] for 5 seconds to turn the camera ON.
Note:
The camera will auto power off after 60 seconds of inactivity.
Click on “Install PhoTags Express” and follow the
instructions to install PhoTags Express and
WebCam Express. PhoTags Express and WebCam
Express software offer many applications for photo
editing and printing.
SELECTING THE PHOTO RESOLUTION
There are 2 resolution modes:
High resolution: pictures of 1280*960 pixels. The camera can store about 90
pictures in this mode.
Low resolution: pictures of 640*480 pixels. The camera can store about 200 pictures
in this mode.
Press the HI/LO/ button [4] to select HI (high) or LO (low) resolution on the upper
left corner of the LCD screen.
TAKING PHOTOS
To take a photo, press and hold the Shutter button [6] for about 2 seconds, until you
hear a “beep” sound. The number of pictures you took is shown on the LCD screen.
Note:
make sure there is a reasonable level of lighting when taking photos. If there
is not enough light, you will hear a “double beep” sound indicating the picture hasn’t
been taken.
DELETING FILES
Deleting the last picture taken
Press the
button [3] to select the lower trash can icon as
shown on the LCD screen. Press the Shutter button [6] within 5
seconds to delete the last picture taken. You will hear a “beep”
sound each time you delete a picture.
Deleting all files
Press the
button [3] twice to select the upper trash can
icon as shown on the LCD screen. Press the Shutter button [6]
within 5 seconds to delete all the pictures stored in the camera.
Note:
if you press the
button by mistake, just wait 5 seconds to cancel this
operation.
Continuous Picture Shots
This mode allows you to take a succession of quick shots which the camera will
save as short video clips in AVI format.
Click on “Install AP” on the “Digital Camera
Install Menu” window and select a language
from the drop down list.
Содержание DJ045_01 Series
Страница 1: ...DJ045_01series Digital Camera User Guide Mode d emploi ...
Страница 2: ...A B C ...
Страница 3: ...A B C 1 2 3 4 5 6 7 8 9 ...


