


10
2.2 Procedure for Hardware Installation
1. Decide where to place your Broadband Router
You can place your FBR-1415TX on a desk or other flat surface, or you can mount it on a wall.
For optimal performance, place your Broadband Router in the center of your office (or your home)
in a location that is away from any potential source of interference, such as a metal wall or
microwave oven. This location must be close to power and network connection.
2.
Setup LAN connection
a.
Wired LAN connection: connects
an Ethernet cable from your computer
’
s Ethernet port to one
of the LAN ports of this product.
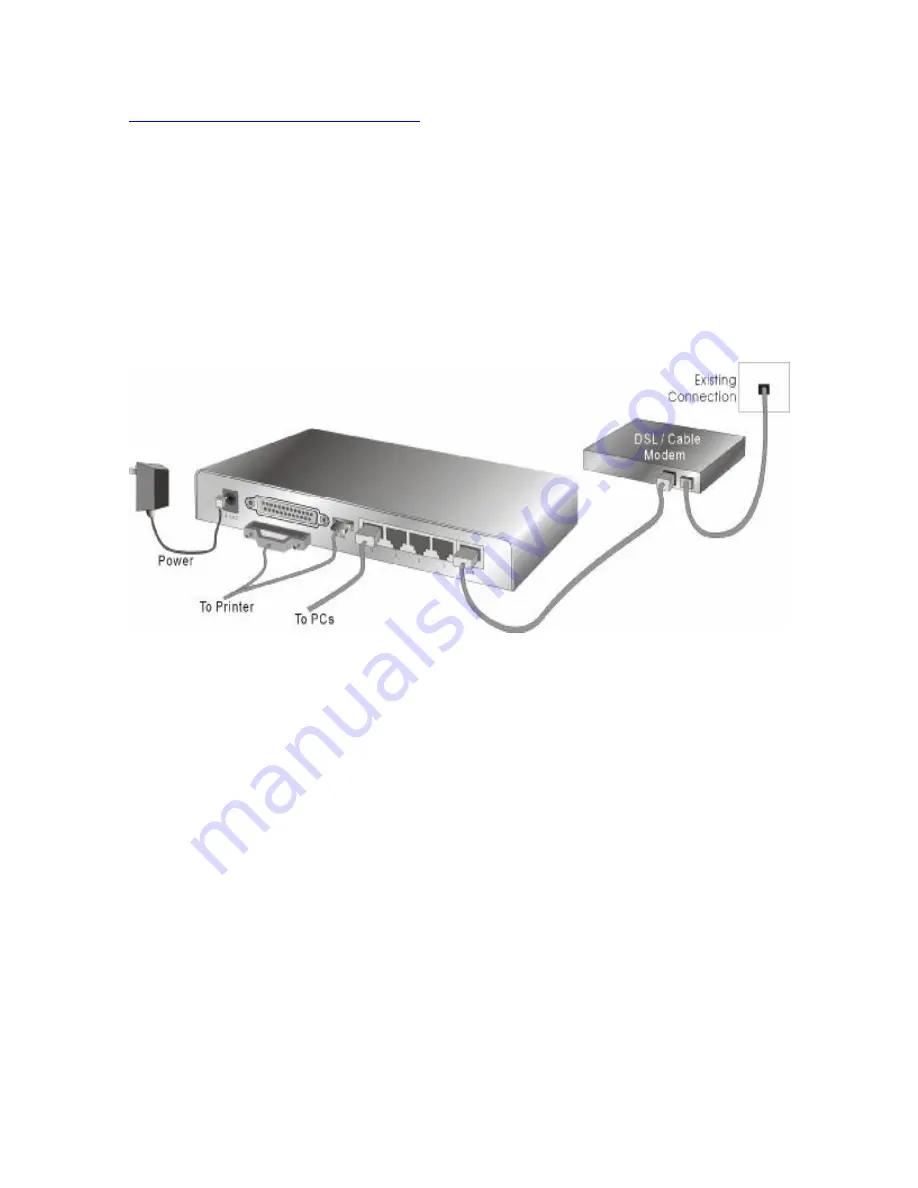
Figure 2-3 Setup of LAN and WAN connections for this product.
3. Setup WAN connection
Prepare an Ethernet cable for connecting this product to your cable/xDSL modem or Ethernet
backbone. Figure 2-3 illustrates the WAN connection.
4. Connecting this product with your printer
Use the printer cable to connect your printer to the printer port of this product.
5.
Power on
Connecting the power cord to power inlet and turning the power switch on, this product will
automatically enter the self-test phase. When it is in the self-test phase, the STATUS Led will be
lighted ON for about 10 seconds, and then STATUS will be flashed 3 times to indicate that the
self-test operation has finished. Finally, the STATUS will be continuously flashed once per second
to indicate that this product is in normal operation.
Содержание NetCon FBR-1415TX
Страница 1: ...1 LevelOne FBR 1415TX Broadband Router w 1USB 1 Parallel Printer Server User s Manual...
Страница 17: ...17 4 3 Wizard Setup Wizard will guide you through a basic configuration procedure step by step Press Next...
Страница 18: ...18 Setup Wizard Select WAN Type For detail settings please refer to 4 4 1 primary setup...
Страница 19: ...19 4 4 Basic Setting 4 4 1 Primary Setup WAN Type Virtual Computers Press Change...
Страница 25: ...25 4 5 Forwarding Rules...
Страница 29: ...29 4 6 Security Settings...
Страница 43: ...43 4 7 Advanced Settings...
Страница 46: ...46 E mail Subject The subject of email alert This setting is optional...
Страница 56: ...56...
Страница 57: ...57 4 8 Toolbox 4 8 1 System Log You can View system log by clicking the View Log button...
Страница 58: ...58 4 8 2 Firmware Upgrade You can upgrade firmware by clicking Firmware Upgrade button...
Страница 66: ...66 2 Select Ports page Click Add Port 3 Select Standard TCP IP Port and then click New Port...
Страница 68: ...68 6 Select LPR type lp lowercase letter in Queue Name And enable LPR Byte Counting Enabled...
Страница 69: ...69 7 Apply your settings...
Страница 71: ...71 1 Enter the Pinter Name Comments then forward 4 Select LPD protocol and then forward...
Страница 72: ...72 5 Enter Router LAN IP Address and the queue name lp Then forward...
Страница 80: ...80 a Select Obtain an IP address automatically in the IP Address tab b Don t input any value in the Gateway tab...


