Lenz Digital plus LH101 Скачать руководство пользователя страница 179

Configuring (programming) decoder settings 

67 


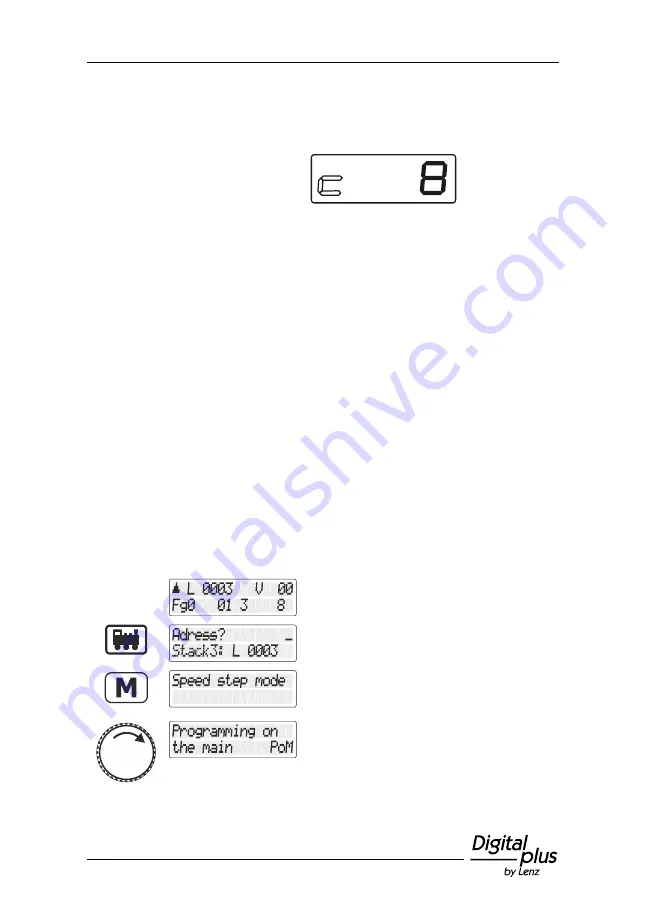
The  LRC120  address  display  shows  the 
value of CV3 for approx. 3 seconds. 
 
"c" flashes at the very left of the display; the 
value is displayed on the right: 


Whenever you enter the number of a CV, a PoM read command is 
sent to the decoder which sends the content of the respective CV via 
RailCom. The LRC120 address display receives this information and 
displays it for approx. 3 seconds. 
 

13.2.6  Setting and deleting bits (switches) using PoM — step by 

step approach


Many CVs do not use numeric values, but individual bits (switches) for 
particular settings. It is much more comfortable to change a feature by 
setting or deleting the corresponding bit (switch) than to calculate the 
corresponding numeric value and to programme it into the CV (which 
is, of course, also possible). 
A particularly good example for a CV for which the deleting and setting 
of bits is the better approach is CV29. 
In the following example we will change CV29 in locomotive address 3 
using PoM. 
 

Action 

Display 

Explanation 


Call  up  the  locomotive  whose  settings  you 
want to change using PoM. 


Press the 'locomotive' key. 


Press the 'M' key. You are offered the option 
last  used  (in  this  example  the  setting  of  the 
speed step mode). 


Turn  the  rotary  knob  until  "Programmieren 
während  des  Betriebs  PoM/Programming  in 
operational mode PoM" is displayed. 

Содержание Digital plus LH101

Страница 1: ...B B 10 0039 01 LH101 Bedienungsanleitung Version 2 0 1 Auflage 10 19 Art Nr 21101 ...

Страница 2: ... den Gebrauch des LH101 leicht machen Für den Start lesen Sie zunächst den Abschnitt Erste Schritte dann kommen Sie am schnellsten zum ersten Fahrvergnügen Danach können Sie den ganzen Funktionsumfang dieses Handreglers Schritt für Schritt kennenlernen und nachvollziehen Wenn Sie noch Fragen haben auf die Sie auch nach Durcharbeit dieser Information keine Antwort finden so helfen wir Ihnen gerne w...

Страница 3: ...kadressen aufrufen 17 5 1 1 Eine neue Loknummer mit der Zehnertastatur eingeben 17 5 1 2 Lokadressen aus dem Stack des LH101 auswählen 18 5 1 2 1Blättern durch den Stack 18 5 1 3 Eine Lokadresse aus dem Zentralenspeicher auswählen 19 5 1 4 Übernehmen einer Lok von einem auf einen anderen Handregler 20 5 2 Geschwindigkeit und Richtung der Lok ändern 21 5 2 1 Normalmodus 22 5 2 1 1Der lokspezifische...

Страница 4: ...tion 51 11 2 Voraussetzungen für eine Mehrfachtraktion 52 11 3 Zusammenstellen einer Mehrfachtraktion MTR 52 11 4 Steuern einer Mehrfachtraktion 54 11 4 1 Geschwindigkeit und Fahrtrichtung der MTR 55 11 4 2 Schalten von Funktionen in der MTR 55 11 5 Anzeigen der Mitglieder einer MTR und wechseln zwischen Loks in der MTR 55 11 6 Löschen einer einzelnen Lok aus einer Mehrfachtraktion 56 11 7 Löschen...

Страница 5: ...ren angeschlossenen Handreglern 80 14 Setup LH101 Geräteeinstellung 81 14 1 Fahrmodus einstellen 81 14 2 Clubmodus einstellen 82 14 2 1 Clubmodus 1 oder 2 einstellen 83 14 2 2 Modus 0 einstellen 84 14 3 Zählweise Bitdarstellung 85 14 4 Helligkeit Display 86 14 5 Kontrast Display 88 14 6 Versionsnummer anzeigen 89 14 7 XpressNet Adresse einstellen 90 14 8 Rücksetzen auf Werkseinstellung 91 14 9 Fah...

Страница 6: ...en LH101 nur an die dafür vorgesehenen Geräte an Welche Geräte dies sind erfahren Sie aus dieser Betriebsanleitung Auch wenn andere Geräte auch anderer Hersteller die gleichen Steckverbindungen verwenden dürfen Sie den LH101 nicht an diesen Geräten betreiben Gleiche Steckverbinder bedeutet nicht automatisch auch erlaubter Betrieb dies gilt auch wenn es sich ebenfalls um Geräte zur Modellbahnsteuer...

Страница 7: ...stellt ebenso die Tasten Wenn im fortlaufenden Text auf Anzeigen Bezug genommen wird so wird sie in doppelten Anführungszeichen dargestellt L 0001 Tasten werden im Text mit einfachen Anführungszeichen gekennzeichnet M Querverweise S 23 Dieser Pfeil weist Sie auf eine bestimmte Seite in dieser Betriebsanleitung hin auf der Sie weitere Informationen zum angesprochenen Thema finden Wichtige Hinweise ...

Страница 8: ... Sie mit dem Drehknopf bis zur Fahrstufe 1 zurück Angehalten wird die Lok durch Druck auf den Drehknopf Lassen Sie die Lok also bis zur gewünschten Stelle herankriechen und drücken Sie dann zum Anhalten auf den Drehknopf Der Vorteil dieses Modus beim Rangieren Sie können ohne auf den Regler schauen zu müssen die Lok auf die kleinste Geschwindigkeit zurückregeln und laufen nicht Gefahr dass die Lok...

Страница 9: ...en Sie den Zustand der Eingänge an Rückmeldebausteinen LR100 101 anzeigen S 60 Einstellen von Decodereigenschaften Adresse Anfahrverzögerung oder andere Eigenschaften eines Lokdecoders werden durch Programmieren verändert Zwei Varianten stehen Ihnen zur Verfügung Programmieren während des Betriebes PoM Sie programmieren die Eigenschaften eines Lokdecoders während die Lok irgendwo auf der Anlage st...

Страница 10: ...ie den LH101 immer unmittelbar am Ort des Geschehens verwenden Nach dem Anschluss zeigt der Handregler die zuletzt gesteuerte Lokadresse an Bei der ersten Inbetriebnahme wird die Adresse 1 angezeigt 3 1 1 Anschluss an die Zentrale LZ100 LZV100 Stecken Sie den 5 poligen DIN Stecker in die 5 polige DIN Buchse an der Rückseite Ihrer LZ100 LZV100 oder sofern Sie bereits eine XpressNet XBUS Verkabelung...

Страница 11: ... Inbetriebnahme des LH101 wird die Lokadresse L0001 angezeigt Geben Sie zuerst die Adresse der Lok 3 ein Aktion Display Erläuterung Drücken Sie die Lok Taste Danach können Sie unmittelbar mit der Eingabe der neuen Lokadresse beginnen Die eingetippte Zahl wird angezeigt Sollten Sie sich vertippt haben so können sie die jeweils letzte eingetippte Zahl mit wieder löschen Mit Druck auf die Lok Taste s...

Страница 12: ... wird im Display angezeigt Die Fahrtrichtung ist lokbezogen d h vorwärts bedeutet bei einer Dampflok z B Schlot voraus fahren egal in welcher Richtung Sie diese Lokomotive auf das Gleis gestellt haben Hat die Lokomotive die Fahrstufe 0 wird bei jedem Druck auf den Drehknopf die Fahrtrichtung geändert 3 2 4 Notaus Aktion Display Erläuterung Drücken Sie auf den Drehknopf und halten Sie ihn gedrückt ...

Страница 13: ...rläuterung Mit der Taste 0 schalten Sie die Funktion 0 im allgemeinen die richtungsabhängige Stirnbeleuchtung der Lokomotive ein und auch wieder aus Ist die Funktion eingeschaltet so wird dies im Display in der unteren Zeile angezeigt Nun haben Sie in Kürze erfahren wie Sie mit dem LH101 eine Lokomotive steuern können ...

Страница 14: ...tastatur eingeben Dabei gilt immer folgende Regel löscht die zuletzt eingegebene Ziffer bricht die komplette Eingabe ab und bringt Sie im Ablauf eine Ebene nach oben 4 2 LH101 während des Betriebs umstecken Mit dem LH101 sind Sie mobil Der Handregler kann während des Betriebes von einer XpressNet Buchse abgezogen und an einer anderen Buchse wieder angesteckt werden Die zuletzt gewählte Lokadresse ...

Страница 15: ...über ein zweizeiliges hinterleuchtetes LCD Display Je nachdem in welchem Betriebszustand Sie sich gerade befinden ist die Darstellung des Display unterschiedlich Die Anzeige der Lokadresse erfolgt immer vierstellig ggf werden Nullen vorangestellt Beispiele typischer Anzeigen beim Loksteuern ...

Страница 16: ...ie Funktionen F21 ist aktiv Die Lok mit der Adresse 1234 befindet sich in einer Mehrfachtraktion Fahrstufe ist 012 von 128 Funktionsgruppe 1 ist eingestellt Aktiv sind die Funktionen F10 F12 und F15 Die Mehrfachtraktion mit der Adresse 33 wird gesteuert Die Fahrstufe ist 04 von 28 Die Lok mit der Adresse 0003 wird im Rangiermodus gesteuert 4 4 Drehknopf des LH101 Beim Wechsel von einer Lok zur and...

Страница 17: ...n Notaus benutzen können 5 1 Lokadressen aufrufen Wenn Sie mit dem Handregler eine Lokomotive steuern möchten so müssen Sie diese Lokomotive zunächst aufrufen Es gibt drei verschiedene Arten eine Lok aufzurufen Sie geben die Nummer der Lok mit der Zehnertastur ein Sie wählen eine Lok aus dem Stack des LH101 Sie suchen aus dem Zentralenspeicher eine Lokadresse heraus 5 1 1 Eine neue Loknummer mit d...

Страница 18: ...n Drehknopf 5 1 2 Lokadressen aus dem Stack des LH101 auswählen Der Handregler LH101 verfügt über einen so genannten Stack für Lokadressen In diesem Stack können Sie 8 Lokadressen speichern und mit dem Drehknopf durch diesen Stack blättern Vergleichbar ist das mit einem Karteikasten mit 8 Karteikarten Sie können jede beliebige Lokadresse auf den Stackplätzen ablegen In der Werkseinstellung sind in...

Страница 19: ... einsetzen und in dessen Stack andere Lokadressen speichern 5 1 3 Eine Lokadresse aus dem Zentralenspeicher auswählen Der Zentralenspeicher ist ein Speicher in der Zentrale nicht im Handregler in dem jedesmal wenn Sie eine Lok aufrufen diese Lokadresse mit den zugehörigen Daten Fahrstufe Funktionsstatus abgelegt wird Alternativ zur direkten Eingabe einer Lokadresse oder der Auswahl aus dem Stack d...

Страница 20: ...teuern aus Aktuelle Geschwindigkeit Fahrstufe und der Funktionszustand der Funktionsgruppe 0 werden angezeigt Sie können wenn nötig auch eine Lokadresse aus dem Zentralenspeicher löschen Näheres dazu im Abschnitt Lokadressen aus dem Zentralenspeicher löschen S 100 Für die Softwareversion 3 6 der LZ100 LZV100 gilt Es können bis zu 100 2 stellige Lokadressen und bis zu 128 4 stellige Lokadressen im ...

Страница 21: ...der Normalmodus Werkseinstellung In diesem Modus können Sie mit dem Drehknopf bis auf Fahrstufe 0 zurückregeln der Rangiermodus Hier regeln Sie mit dem Drehknopf bis zur Fahrstufe 1 zurück Angehalten wird die Lok durch Druck auf den Drehknopf Lassen Sie die Lok also bis zur gewünschten Stelle herankriechen und drücken Sie dann zum Anhalten auf den Drehknopf Der Vorteil dieses Modus beim Rangieren ...

Страница 22: ...fe Drehen gegen den Uhrzeigersinn vermindert die Fahrstufe ggf bis zum Stillstand Bei Fahrstufe 0 ändert Druck auf den Drehknopf die Fahrtrichtung 5 2 1 1 Der lokspezifische Nothalt Aktion Display Erläuterung Ist die Fahrstufe einer Lok nicht 0 und Sie drücken währendessen kurz auf den Drehknopf wird ein Nothalt für die gewählte Lok ausgeführt Die Lok hält ohne die eingestellte Bremsverzögerung an...

Страница 23: ...rstufe 1 zurück Angehalten wird die Lok durch Druck auf den Drehknopf Lassen Sie die Lok also bis zur gewünschten Stelle herankriechen und drücken Sie dann zum Anhalten auf den Drehknopf Der Vorteil dieses Modus beim Rangieren Sie können ohne auf den Regler schauen zu müssen die Lok auf die kleinste Geschwindigkeit zurückregeln ohne Gefahr zu laufen dass die Lok zu früh stehen bleibt Aktion Displa...

Страница 24: ...1 auf den Rangiermodus eingestellt ist wird im Display durch einen kleinen Punkt gekennzeichnet 5 3 Funktionen in Lokempfängern aktivieren Alle Digital plus by Lenz Lokempfänger besitzen eine oder mehrere Zusatzfunktionen Die Funktionen sind nummeriert die Zählweise beginnt bei 0 Insgesamt kann das Digital plus by Lenz System bis zu 28 Funktionen in Lokempfängern ansprechen Diese 28 Funktionen sin...

Страница 25: ...Momentbetrieb konfiguriert werden S 26 5 3 1 Umschalten der Funktionsgruppen Die gerade gewählte Funktionsgruppe wird unten links im Display angezeigt Aktion Display Erläuterung Funktionsgruppe 0 wird angezeigt es sind die Funktionen 0 1 3 und 8 aktiv Kurzes drücken der Taste F wechselt zur nächsten Funktionsgruppe Funktionsgruppe 1 wird angezeigt es sind die Funktionen 12 13 15 17 und 19 aktiv Fu...

Страница 26: ...rd in der Zentrale gespeichert Der Handregler fragt bei Aufruf der Lok die Einstellung bei der Zentrale an Sie können diese Einstellung für jede Funktion und jede Lokadresse getrennt festlegen Aktion Display Erläuterung Rufen Sie die Lokadresse auf deren Funktionseinstellung Sie anzeigen oder ändern wollen Drücken Sie die Taste F und halten Sie sie gedrückt bis die Anzeige wechselt Lassen Sie die ...

Страница 27: ...ndung zwischen Zentrale und Decoder unterbrochen ist Die Abschaltung dieser zyklischen Übertragung einzelner Funktionen kann bei Anlagen mit sehr vielen gleichzeitig fahrenden Lokomotiven Decodern sinnvoll sein um die zeitliche Verzögerung zu reduzieren die sich aus der Summe der je Übertragung notwendigen Zeit typisch 8 ms ergibt Sie können deshalb selbst einstellen welche Funktionsinformationen ...

Страница 28: ...olt Die Funktionen F0 bis F20 werden zyklisch wiederholt Die Funktionen F0 bis F28 werden zyklisch wiederholt Die Funktionen F0 bis F4 werden zyklisch wiederholt Bestätigen Sie Ihre Auswahl durch Drücken des Drehknopfes 5 4 Anzeigen und Ändern des Fahrstufenmodus Der Bereich vom Stillstand bis zur maximalen Geschwindigkeit eines Fahrzeuges ist in Fahrstufen aufgeteilt Je mehr Stufen vorhanden sind...

Страница 29: ...g Rufen Sie die Lokadresse auf deren Funktionseinstellung Sie anzeigen oder ändern wollen Stellen Sie ggf die Fahrstufe der Lok auf 0 Andernfalls kann der Fahrstufenmodus nur eingesehen aber nicht geändert werden Drücken Sie die Lok Taste Wechseln Sie zu den Lok Einstellungen Drehen Sie den Knopf bis zur Anzeige der Option Fahrstufenmodus Nach Druck auf den Drehknopf wird der gegenwärtig eingestel...

Страница 30: ...ählt Die maximale Fahrstufe die deshalb in diesem Modus angezeigt wird ist deshalb 126 5 5 Notaus Aktion Display Erläuterung Drücken Sie auf die Mitte des Drehknopfs und halten Sie diesen gedrückt bis AUS im Display erscheint Die Gleisspannung ist nun ausgeschaltet Um die Gleisspannung wieder einzuschalten drücken Sie erneut auf die Mitte des Drehknopfs bis in der Anzeige wieder die Lokadresse ers...

Страница 31: ... immer gehen Sie vom Loksteuern aus Mit der Taste Weichen Signale wechseln Sie in das Menü zum Schalten von Weichen und Signalen Die gerade benutzte Lokadresse deren Richtung und Fahrstufe bleibt in der oberen Zeile des Displays sichtbar Beginnen Sie mit der Eingabe der Adresse Wenn Sie siche vertippen können Sie mit die letzte Ziffer löschen Fahren Sie fort bis zur letzten Ziffer Erneutes Drücken...

Страница 32: ... nicht rückmeldefähiger Weichendecoder Hier wird der jeweils letzte an den Schaltempfänger gesendete Befehl angezeigt Die Anzeige am LH101 wechselt automatisch wenn von einem zweiten LH101 oder einem anderen XpressNet Gerät die Weichen oder Signalstellung geändert wird 6 1 2 Einsatz rückmeldefähiger Weichendecoder Bei Verwendung des rückmeldefähigen Schaltempfängers LS100 kann die tatsächliche Wei...

Страница 33: ...st dann auf wenn die Umstellung tatsächlich erfolgt ist Ansonsten bleibt die ursprüngliche Anzeige vorhanden Sie können also sofort erkennen ob sich die Weiche umgestellt hat oder nicht Die Anzeige ändert sich auch wenn Sie die Weiche von Hand umstellen Erst wenn die Endlage des Weichenantriebs erreicht ist ändert sich die Anzeige im Display Informationen zur Verdrahtung des Rückmeldebusses entneh...

Страница 34: ...4 Bedienungsanleitung LH101 mit der Esc Taste das Schalten von Weichen und Signalen beenden Informationen über die Anzeige des Zustands an Rückmeldern finden Sie im Abschnitt Rückmeldungen anzeigen S 60 ...

Страница 35: ...gende Weichenstellungen erfolgen Weiche 12 auf Abzweig Weiche 13 auf Gerade Weiche 14 auf Abzweig Statt diese drei Weichen einzeln nacheinander zu stellen können Sie dafür eine Fahrstraße anlegen Fahrstraßen werden im LH101 gespeichert Mit verschiedenen LH101 können also verschiedene Fahrstraßen gespeichert und gestellt werden Im LH101 können maximal 16 Fahrstraßen abgelegt werden Jede dieser Fahr...

Страница 36: ...der Taste Weichen Signale wechseln Sie in das Menü zum Schalten von Weichen und Signalen Drücken der Taste M wechselt zum Anlegen oder Ändern Löschen von Fahrstraßen Wählen Sie mit dem Drehknopf Fahrstrasse neu anlegen Bestätigen Sie die Wahl durch Drücken Rechts oben wird die Nummer der nächsten freien Fahrstraße angezeigt Sie können diese Nummer übernehmen oder durch Drehen eine andere freie Num...

Страница 37: ... Eingaben zu diesem Schritt Der Schritt wird nun gespeichert Es wird der nächste Schritt der Fahrstraße zur Eingabe angeboten Sie können nun zum nächsten Schritt der Fahrstraße gehen und die nächste Weichenadresse eingeben oder mit M die Fahrstraße speichern und zur Eingabe einer weiteren Fahrstraße gehen Anzeige bleibt 2s sichtbar oder mit der Esc Taste das Menü Fahrstraßen verlassen und zum Loks...

Страница 38: ...d wählen Sie mit dem Drehknopf die Fahrstraße aus die Sie bearbeiten wollen Bestätigen Sie Ihre Wahl durch Druck auf den Drehknopf Durch Drehen des Drehknopf wählen Sie nun zwischen diesen Optionen Schritt ändern weiter mit Einen Schritt in einer Fahrstraße ändern Seite 39 Schritt löschen weiter mit Einen Schritt aus einer Fahrstraße löschen Seite 40 und Schritt neu auswählen weiter mit Einen Schr...

Страница 39: ...se dieses Schritts ändern wollen löschen Sie die angezeigte Adresse und beginnen Sie mit der Eingabe der neuen Weichenadresse Drücken der Weiche Signal Taste bestätigt die Eingabe 2 Mit der Taste M ändern Sie die Stellung Bei jedem Druck auf die Taste M wird ein entsprechender Schaltbefehl zur Weiche zum Signal geschickt So können Sie sofort prüfen ob Sie die richtige Weiche und die richtige Stell...

Страница 40: ...ahrstraße bearbeiten Seite 37 vor Wählen Sie dann die Option Schritt löschen und bestätigen Sie Ihre Wahl mit Druck auf den Drehknopf Der erste Schritt in der gewählten Fahrstraße wird angezeigt Blättern Sie zu dem Schritt den Sie löschen möchten Bestätigen Sie die Wahl des Schritts Es erscheint eine Sicherheitsabfrage Sie können nun Mit Drücken auf den Drehknopf den gewählten Schritt endgültig lö...

Страница 41: ...ahrstraße hinzufügen Die Option Schritt neu erscheint nur wenn die maximale Anzahl an Schritten in einer Fahrstraße noch nicht erreicht ist Gehen Sie zunächst wie unter Eine Fahrstraße bearbeiten Seite 37 vor Wählen Sie dann die Option Schritt neu Es wird die nächste freie Schrittnummer angezeigt Gehen Sie nun vor wie unter Einen neue Fahrstraße anlegen Seite 36 beschrieben ...

Страница 42: ... wechselt zum Anlegen oder Ändern Löschen von Fahrstraßen Wählen Sie mit dem Drehknopf Fahrstrasse löschen Bestätigen Sie die Wahl durch Drücken und Wählen Sie die Fahrstraße aus die Sie löschen möchten Mit einem weiteren Druck bestätigen Sie das Löschen Die gewählte Fahrstraße wird gelöscht Sie befinden sich nun wieder im Fahrstraßenmenü Sie können nun eine andere Aktion im Fahrstraßenmenü auswäh...

Страница 43: ... Die Bedienung beginnt daher mit den gleichen Schritten Aktion Display Erläuterung Wie immer gehen Sie vom Loksteuern aus Mit der Taste Weichen Signale wechseln Sie in das Menü zum Schalten von Weichen und Signalen Durch drehen des Drehknopfs blättern Sie durch die angelegten Fahrstraßen sind noch keine Fahrstraßen angelegt wird Speicher leer angezeigt Haben Sie die letzte angelegte Fahrstraße err...

Страница 44: ...ch angezeigt Ist die Fahrstraße fertig gestellt erscheint die Bestätigung Sie können nun durch erneutes Drehen am Drehknopf können Sie nun die nächste Fahrstraße auswählen oder Mit der Taste Adresseingabe einer einzelnen Weiche wechseln oder mit der Esc Taste das Menü Fahrstraßen verlassen und zum Loksteuern zurück kehren ...

Страница 45: ...tion Display Erläuterung Wie immer gehen Sie vom Loksteuern aus Mit der Taste wechseln Sie von der Anzeige des Funktionszustands zur Zeitanzeige und zurück Ist die Modelluhr ausgeschaltet Faktor 0 so wird die Information Uhr ist aus in der unteren Zeile angezeigt Während Sie eine Funktion der Lok ein oder ausschalten also eine der Tasten 0 bis 9 drücken wird die Zeitanzeige kurz ausgeblendet und d...

Страница 46: ...trale sorgt dafür dass die beiden Loks der DTR die selben Fahrdaten zugeschickt bekommen Doppeltraktion funktioniert mit allen DCC Lokdecodern da in den Decodern selbst dazu keine Einstellungen vorgenommen werden Anders formuliert Der Decoder selbst hat keine Ahnung dass er sich in einer Doppeltraktion befindet Dies ist der wesentliche Unterschied zur Mehrfachtraktion S 51 10 2 Voraussetzungen zum...

Страница 47: ...ren Sie sie an die erste Lok heran Auf diese Weise stellen Sie sicher dass Sie beide Lokomotiven auf Ihrem Handregler aufgerufen haben und auch beiden einen Fahrbefehl erteilt haben Vergewissern Sie sich dass beide Lokomotiven in die gleiche Richtung fahren Hierbei kann es natürlich sein dass der Richtungspfeil der einen Lokomotive nach oben der der anderen aber nach unten zeigt da die Fahrtrichtu...

Страница 48: ...ungswechsel auf beide Loks gleichzeitig Die Tasten die Funktionen ein und ausschalten wirken nur auf die Lok deren Adresse im Display angezeigt wird Wollen Sie eine Funktion der zweiten in der Doppeltraktion fahrenden Lokomotive ändern so wählen Sie diese Lok mit der Taste Esc aus 10 4 Zusammenstellung von Lokomotiven mit unterschiedlicher Fahrstufenanzahl zu einer Doppeltraktion Sie können auch L...

Страница 49: ... die Taste M Drehen Sie den ggf Knopf bis zur Anzeige der Option Doppeltraktion Drücken auf den Drehknopf wählt die Option aus Sie erhalten eine Sicherheitsrückfrage und können ggf den Vorgang mit Esc noch abbrechen Durch nochmaliges Drücken führen Sie die Trennung durch alternativ können Sie den Vorgang mit der Taste Esc abbrechen Ist die Doppeltraktion aufgelöst so erscheint im Display wieder ei...

Страница 50: ...cht gefahren oder Sie haben versucht eine konventionelle Lok Adresse 0 in eine Doppeltraktion einzubinden Eine der beiden Lokomotiven die Sie in eine Doppeltraktion einfügen wollten ist von einem anderen Handregler bereits aufgerufen Eine der beiden Lokomotiven die Sie in eine Doppeltraktion einfügen wollten ist bereits in eine andere Doppeltraktion eingebunden Bei einer der beiden Loks war die Ge...

Страница 51: ...rfachtraktionsadresse können Sie eine beliebige Adresse zwischen 1 und 99 wählen Beim Zusammenstellen der MTR bekommt jede Lok in der MTR diese Mehrfachtraktionsadresse mitgeteilt sie wird vom Lokdecoder zusätz lich zur eigenen Adresse gespeichert Ab jetzt hören die Lokdecoder in der MTR nicht mehr auf ihre eigene Adresse sondern nur noch auf die Mehrfachtraktionsadresse Aber keine Angst Die Lokde...

Страница 52: ...mmenstellen wollen Sie müssen jeder Lokomotive mit diesem Handregler einen Fahrbefehl erteilt haben also die Fahrstufe oder die Fahrtrichtung ändern oder eine der Funktionen ein oder ausschalten Die Fahrstufe der Lokomotiven muß beim Zusammenstellen 0 sein 11 3 Zusammenstellen einer Mehrfachtraktion MTR Fahren Sie alle Loks die Sie in die MTR einfügen wollen an die Stelle Ihrer Anlage an der Sie b...

Страница 53: ... Drücken auf den Drehknopf wählt die Option aus Sie sehen die Aufforderung zur Eingabe der Mehrfachtraktionsadresse Tippen Sie die Adresse der MTR ein Der zugelassene Adressbereich ist 1 99 Wenn Sie sich vertippt haben so können Sie mit die letzte Eingabe löschen und korrigieren Bestätigen Sie die Auswahl der MTR Adresse durch Druck auf den Drehknopf Als erstes wird Ihnen die zuletzt aufgerufene L...

Страница 54: ...s in einer Doppel oder Mehrfachtraktion befinden werden Ihnen hier nicht zur Auswahl angezeigt 11 4 Steuern einer Mehrfachtraktion Zum Steuern einer Mehrfachtraktion MTR wählen Sie entweder die Mehrfachtraktionsadresse oder die Adresse einer der Loks die Bestandteil der MTR ist Die Mehrfachtraktionsadresse selbst wird durch ein grosses MTR im Display gekennzeichnet ein kleines m in der Anzeige inf...

Страница 55: ...eige der MTR Adresse M können demnach keine Funktionen geschaltet werden es werden auch keine Funktionen angezeigt Wollen Sie eine Funktion einer in der MTR fahrenden Lokomotive ändern so müssen Sie diese Lok wählen sehen Sie hierzu auch den nächsten Abschnitt Nun können Sie an dieser Lok eine Funktion ein oder ausschalten 11 5 Anzeigen der Mitglieder einer MTR und wechseln zwischen Loks in der MT...

Страница 56: ...n Drehknopf aus 11 6 Löschen einer einzelnen Lok aus einer Mehrfachtraktion Sie können jede Lok die sich innerhalb einer MTR befindet einzeln aus dieser MTR löschen Beim Löschen einer Lok aus einer MTR muss diese Lok auf dem Gleis stehen Nur so können die speziellen MTR Befehle die über das Gleis gesendet werden die Lokdecoder auch erreichen Erreicht der Löschbefehl den Lokdecoder nicht durch schl...

Страница 57: ...en sofort die Option Mehrfachtraktion angeboten Drücken auf den Drehknopf wählt die Option aus Drehen Sie ggf den Drehknopf bis zur Anzeige MTR Loks löschen Nach Druck auf den Drehknopf werden Ihnen die in der MTR vorhandenen Loks angezeigt Wählen Sie durch Drehen des Knopf die Lokadresse aus die Sie aus der MTR löschen möchten Druck auf den Knopf bestätigt Ihre Auswahl die Lok wird aus der MTR en...

Страница 58: ... die Lok vom Gleis genommen haben so wird die MTR Adresse im Lokdecoder nicht gelöscht die Lok kann auf der eigenen Adresse nicht gefahren werden Aktion Display Erläuterung Rufen Sie die Mehrfachtraktion auf die Sie löschen möchten Drücken Sie die Taste M Es wird Ihnen sofort die Option Mehrfachtraktion angeboten Drücken auf den Drehknopf wählt die Option aus Drehen Sie ggf den Drehknopf bis zur A...

Страница 59: ...rbefehl erteilt Sie haben versucht eine konventionelle Lok Adresse 0 in eine MTR einzubinden Error 25 Eine der Lokomotiven die Sie in eine MTR einfügen wollten ist von einem anderen Handregler bereits aufgerufen Error 26 Eine der Lokomotiven die Sie in eine MTR einfügen wollten ist bereits in eine andere MTR eingebunden Error 27 Bei einer der Loks war die Geschwindigkeitsstufe nicht 0 als Sie sie ...

Страница 60: ...ie sehen nun die Aufforderung zur Eingabe der Rückmelderadresse Nehmen wir an sie wollen die 8 Meldestellen der Rückmeldeadresse 39 auf dem Display anzeigen Mit der Taste korrigieren Sie gegebenenfalls Ihre Eingabe Nach Drücken von Enter fragt der Handregler den Zustand des Rück melders bei der Zentrale ab und zeigt das Ergebnis In der oberen Zeile sehen Sie Adresse des ausgelesenen Rückmelders In...

Страница 61: ...t dieser Adresse an den Rückmeldebus angeschlossen ist so sehen Sie diese Anzeige Nach Drücken der Taste können Sie dann die Adresse eines anderen Rückmelders eingeben Der erlaubte Wertebereich für die Eingabe der Rückmeldeadressen ist 1 bis 128 Geben Sie einen kleineren oder größeren Wert ein so erscheint wieder die Aufforderung eine Rückmeldeadresse einzugeben ...

Страница 62: ...rte Nummer 3 die Anfahrverzögerung Also für jede Eigenschaft des Decoders eine Karte Je nach Anzahl der in diesem Decoder verfügbaren Eigenschaften ist der Karteikasten mal größer mal etwas kleiner Auf jeder Karte steht ein Zahlenwert der generelle Wertebereich einer solchen Karte ist 0 bis 255 Da Sie diesen Zahlenwert auf diesen Karteikarten in diesen Speicherplätzen immer wieder verändern können...

Страница 63: ...Schalter vor die ein oder ausgeschaltet werden können Diese Schalter nennen wir Bits Ist der Schalter eingeschaltet so sagen wir das Bit ist gesetzt oder das Bit ist 1 ist der Schalter ausgeschaltet so sagen wir das Bit ist gelöscht oder das Bit ist 0 Beispiel binäre Darstellung der CV29 In dieser CV werden verschiedene Einstellungen gespeichert Ob eine bestimmte Einstellung ein oder ausgeschaltet...

Страница 64: ...Adresse des Empfängers zu wissen Bei diesem Verfahren erhält der Decoder z B den Befehl Schreibe in CV4 den Wert 15 Jeder Decoder der diesen Befehl empfängt wird ihn auch ausführen 13 1 2 Wann benötigen Sie das Programmieren auf dem Programmiergleis Immer dann wenn Sie die Adresse eines Lokdecoders ändern wollen Außerdem gibt es Digital plus by Lenz Decoder die das Verfahren Programmieren während ...

Страница 65: ...resse einer Lok ändern so verwenden Sie das Verfahren Programmieren auf dem Programmiergleis ab Seite 72 13 2 1 Welche Eigenschaften können mit PoM verändert werden Alle in einem Lokdecoder vorhandenen CVs können mit PoM verändert werden Ausnahme sind nur die Basisadresse in CV1 und die erweiterte Adresse in CV17 und CV18 Gehen Sie aus diesem Grund sorgfältig vor da bei versehentlicher Programmier...

Страница 66: ...orgehen Im folgenden Beispiel werden wir die Anfahrverzögerung der Lok mit der Adresse 3 mittels PoM verändern Bevor Sie zu PoM wechseln müssen Sie die Adresse der Lok deren Eigenschaften Sie ändern wollen aufrufen Aktion Display Erläuterung Rufen Sie die Lok auf deren Eigenschaften Sie mit PoM ändern wollen Drücken Sie die Lok Taste Drücken Sie die Taste M Es wird Ihnen die zuletzt verwendete Opt...

Страница 67: ...n oder drehen Sie den Drehknopf um den Wert zu verändern Kann die CV nicht per Railcom ausgelesen werden können Sie direkt den gewünschten Wert eingeben und beenden Sie die Eingabe mit Druck auf die Lok Taste Nun können Sie den gewünschten Wert eingeben in diesem Beispiel den Wert 6 Druck auf Lok Taste bestätigt die Eingabe und startet den Programmiervorgang Alternativ können Sie den Drehknopf drü...

Страница 68: ...n muss im betreffenden Decoder eingeschaltet sein Details zum Anschluss der Adressanzeige LRC120 und den Einstellungen der RailCom fähigen Lokdecoder entnehmen Sie bitte aus den betreffenden Betriebsanleitungen Vorgehensweise Aktion Display Erläuterung Rufen Sie die Lok auf deren Eigenschaften Sie mit PoM ändern wollen Fahren Sie die Lok deren CVs Sie per PoM auslesen wollen in den mit der Adressa...

Страница 69: ...nden CV per RailCom Die Adressanzeige LRC120 empfängt diese Information und bringt sie für ca 3 Sekunden zur Anzeige 13 2 6 Setzen und Löschen von Bits Schaltern mittels PoM schrittweises vorgehen In vielen CVs werden nicht Zahlenwerte sondern einzelne Bits Schalter für bestimmte Einstellungen verwendet Es ist dann wesentlich bequemer die benötigte Einstellung durch setzen und löschen des dafür be...

Страница 70: ...knopf bis zur Anzeige Programmieren während des Betriebs PoM Drücken auf den Drehknopf wählt die Option PoM aus Sie sehen nun die Aufforderung zur Eingabe der CV die Sie per PoM verändern wollen Geben Sie die Nummer der CV mit den Tasten ein und beenden Sie die Eingabe mit Druck auf die Lok Taste Drücken Sie die Taste M Wählen Sie mit dem Drehknopf das Bit aus welches Sie verändern wollen Bestätig...

Страница 71: ...ie die Programmierung durch Drücken Während des Programmierens erscheint diese Anzeige Mit Esc kehren Sie zur Auswahl des Bit zurück ein weiterer Druck auf Esc geht zur Auswahl der CV Wählen Sie nun eine andere CV die Sie verändern wollen oder kehren Sie zum Loksteuern zurück ...

Страница 72: ...u gestalten Programmieren Adresse Dies ist die einfachste Art die Adresse eines Decoders festzustellen und oder zu verändern Sie müssen nicht wissen in welche CVs die Werte für die Adresse geschrieben werden müssen auch ist das Verfahren für alle Adressen identisch Programmieren CV Dieses Menü verwenden Sie für alle anderen CVs an denen Sie Veränderungen vornehmen wollen Programmieren Registermodu...

Страница 73: ...age elektrisch getrenntes Gleisstück Programmiergleis genannt Auf dieses Gleis wird nur die Lok gestellt in deren Decoder Eigenschaften geändert werden sollen 13 3 2 Wo wird das Programmiergleis der Decoder angeschlossen Die Digital plus Zentralen LZ100 LZV100 und LZV200 verfügen über spezielle Anschlussklemmen für das Programmiergleis bzw für die Decoder Diese Anschlüsse haben die Bezeichnung P u...

Страница 74: ...ie die angezeigte Adresse ändern wollen so löschen Sie zunächst die Anzeige Geben Sie nun die gewünschte neue Adresse mit der Tastatur ein mit der Taste können Sie eine falsch eingetippte Ziffer löschen und beenden Sie die Eingabe mit Druck auf die Lok Taste Die gewünschte Adresse wird nun in den Lokdecoder eingeschrieben Nach erfolgtem Schreiben wird die Lokadresse angezeigt Trat beim Schreiben e...

Страница 75: ...erden automatisch vorgenommen Erhalten Sie beim Auslesen der Adresse die Anzeige so ist in den Lokdecoder mit der Adresse 5678 die Mehrfachtraktionsadresse 33 einprogrammiert und die Lok auf Betrieb mit der MTR Adresse 33 eingestellt Wenn Sie in diesem Fall eine neue Adresse eingeben und einschreiben so wird die MTR Adresse gelöscht 13 3 4 Auslesen und Programmieren einer CV Aktion Display Erläute...

Страница 76: ...n löschen und bestätigen Sie die Eingabe mit Druck auf die Lok Taste Die CV wird nun sofort ausgelesen und das Ergebnis angezeigt Sie haben nun folgende Möglichkeiten a Eingabe eines anderen Wertes in die CV oder b Wechseln zur binären Anzeige und Änderung des Wertes oder c Auswahl einer anderen CV oder d Rückkehr zum Loksteuern 13 3 4 1 Binäre bitweise Anzeige des CV Wertes und Änderung Sie haben...

Страница 77: ...s Nachdem das Ergebnis angezeigt wird wechseln Sie zu bitweisen binären Anzeige des dezimalen Zahlenwerts Sie sehen nun in der unteren Zeile des Displays welche Bis gesetzt sind Für den Dezimalwert 10 sind dies die Bits 2 und 4 Zählweise bei 1 beginnend Wenn Sie Änderungen vornehmen wollen so drücken Sie die korrespondierenden Zifferntasten Im folgenden Beispiel soll Bit 1 zusätzlich gesetzt und B...

Страница 78: ...hreiten Sehen Sie ggf in der Betriebsanleitung des Empfängers nach CV7 Versionsnummer und CV8 Herstellerkennung können nur ausgelesen nicht aber geschrieben werden 13 3 5 Auslesen und Programmieren eines Registers Aktion Display Erläuterung Ausgangspunkt ist das Loksteuern Wechseln Sie ins allgemeine Menü Wählen Sie den betreffenden Menüeintrag aus und bestätigen Sie Ihre Wahl Drehen Sie ggf den K...

Страница 79: ... mit Druck auf die Lok Taste Das Register wird nun sofort ausgelesen und das Ergebnis angezeigt Sie haben nun folgende Möglichkeiten a Eingabe eines anderen Wertes in das Register oder b Wechseln zur binären Anzeige und Änderung des Wertes Die Vorgehensweise entspricht der beim Programmieren einer CV oder c Auswahl eines anderen Registers oder d Rückkehr zum Loksteuern Beachten Sie bei der Eingabe...

Страница 80: ...ig angeschlossen oder defekt Error 2 Beim Programmieren oder Auslesen eines Empfängers erfolgte keine Reaktion des Empfängers d h der Empfänger wurde möglicherweise nicht richtig an den Programmierausgang der Zentrale LZ100 LZV100 angeschlossen z B steht die Digitallokomotive nicht richtig auf dem Programmiergleis Drücken Sie anschließend die Taste um die Fehlermeldung zu löschen 13 4 1 Anzeige au...

Страница 81: ...egeln Sie mit dem Drehknopf bis zur Fahrstufe 1 zurück Angehalten wird die Lok durch Druck auf den Drehknopf Lassen Sie die Lok also bis zur gewünschten Stelle herankriechen und drücken Sie dann zum Anhalten auf den Drehknopf Der Vorteil dieses Modus beim Rangieren Sie können ohne auf den Regler schauen zu müssen die Lok auf die kleinste Geschwindigkeit zurückregeln ohne Gefahr zu laufen dass die ...

Страница 82: ...modus Nehmen wir an Sie möchten mit anderen Modellbahnern oder Modellbahnerinnen gemeinsam Betrieb machen Dazu wollen Sie den LH101 jemandem in die Hand geben der das Gerät noch nicht benutzt hat durch ausblenden der meisten Bedienoptionen wird die Bedienung vereinfacht Oder Sie wollen verhindern dass ein Mitspieler eine andere Lok auswählt als die ihm zugeteilte und oder andere Systemeinstellunge...

Страница 83: ...benötigt um wieder zum Modus 0 zurückkehren zu können Notieren Sie das Passwort Wenn Sie das Passwort vergessen ist es nicht mehr möglich den Modus 0 einzustellen Sollten Sie das Passwort vergessen haben und Hilfe benötigen kontaktieren Sie bitte unseren Support 14 2 1 Clubmodus 1 oder 2 einstellen Aktion Display Erläuterung Wählen Sie die Lokadresse aus die im Clubmodus 1 oder 2 bedient werden so...

Страница 84: ...tellige Zahl als Passwort einzugeben Zum Abschluss drücken Sie auf den Drehknopf Der LH101 kehrt nun automatisch zum Loksteuern zurück Es gelten ab jetzt die Einschränkungen des gewählten Modus 14 2 2 Modus 0 einstellen Wenn Sie einen LH101 der sich im Clubmodus 1 oder 2 befindet wieder in den normalen Modus zurücksetzen wollen gehen Sie wie folgt vor Aktion Display Erläuterung Ausgehend vom Lokst...

Страница 85: ...gezeigt Der LH101 bleibt im gewählten Clubmodus und geht zum Loksteuern zurück es wird die Lokadresse oder die Fahrstufe angezeigt Führen Sie die oben genannte Prozedur noch einmal durch und geben Sie das korrekte Passwort ein 14 3 Zählweise Bitdarstellung Im Abschnitt Setzen und Löschen von Bits wird beschrieben wie Sie einzelne Bits in CVs ändern können Dabei werden die Bits von 1 beginnend gezä...

Страница 86: ...e Bitdarstellung Drücken auf den Drehknopf wählt diese Option aus die aktuelle Einstellung wird angezeigt Durch Drehen wählen Sie zwischen den Optionen aus und bestätigen Ihre Wahl durch Drücken zurück zum Setup des LH101 und zum Loksteuern 14 4 Helligkeit Display Mit dieser Option können Sie die Helligkeit der LCD Hinterleuchtung einstellen Aktion Display Erläuterung Ausgehend vom Loksteuern ...

Страница 87: ... Drücken auf den Drehknopf wählt diese Option aus Drehen Sie den Knopf bis zur Anzeige der Option Helligkeit Display Drücken auf den Drehknopf wählt diese Option aus Drehen am Knopf stellt die Helligkeit des Displays ein Sie können das Ergebnis sofort sehen Bestätigen Sie die Einstellung durch Druck auf den Drehknopf ...

Страница 88: ...is zur Anzeige der Option Setup LH101 Drücken auf den Drehknopf wählt diese Option aus Drehen Sie den Knopf bis zur Anzeige der Option Kontrast Display Drücken auf den Drehknopf wählt diese Option aus Drehen am Knopf stellt den Kontrast des Displays ein Sie können das Ergebnis sofort sehen Bestätigen Sie die Einstellung durch Druck auf den Drehknopf ...

Страница 89: ...nopf bis zur Anzeige der Option Setup LH101 Drücken auf den Drehknopf wählt diese Option aus Drehen Sie den Knopf bis zur Anzeige der Option Versionsnummer anzeigen Links unten erscheint die Versionsnummer rechts daneben die Unterversion Mit jedem Drücken der Esc Taste gehen Sie im Menü eine Ebene nach oben bis Sie wieder beim Loksteuern angekommen sind ...

Страница 90: ...bis 31 eingestellt werden Jeder Handregler LH101 ist werkseitig auf die Geräteadresse 04 eingestellt Wenn Sie zwei oder mehr Handregler verwenden wollen müssen Sie daher bei jedem Handregler unterschiedliche Adressen einstellen Aktion Display Erläuterung Ausgehend vom Loksteuern drücken Sie die Taste M Drehen Sie den Knopf bis zur Anzeige der Option Setup LH101 Drücken auf den Drehknopf wählt dies...

Страница 91: ... Aktion Display Erläuterung Ausgehend vom Loksteuern drücken Sie die Taste M Drehen Sie den Knopf bis zur Anzeige der Option Setup LH101 Drücken auf den Drehknopf wählt diese Option aus Drehen Sie den Knopf bis zur Anzeige der Option Rücksetzen auf Werkseinstellung Es erscheint eine Sicherheitsabfrage Sie können mit Esc hier noch abbrechen Ein weiterer Druck löst das Rücksetzen auf Werkseinstellun...

Страница 92: ...e Zentrale gesendet werden Es ist ein Bereich von 250ms 0 25s bis 1500ms 1 5s einstellbar Die Werkseinstellung beträgt 500ms Sollten in einer Fahrstraße einzelne Weichen nicht schalten so erhöhen Sie die Fahrstraßenzeit in Schritten von 100ms Aktion Display Erläuterung Ausgehend vom Loksteuern drücken Sie die Taste M Drehen Sie den Knopf bis zur Anzeige der Option Setup LH101 Drücken auf den Drehk...

Страница 93: ...ion wird kurz bestätigt Mit jedem Drücken der Esc Taste gehen Sie im Menü eine Ebene nach oben bis Sie wieder beim Loksteuern angekommen sind 14 10 Sprachauswahl Diese Menüoption ist ab der Version 1 02 verfügbar In diesem Menü können Sie die Display Sprache des LH101 einstellen Diese Einstellung bleibt dauerhaft bis zum Rücksetzen auf Werkseinstellung gespeichert Aktion Display Erläuterung Ausgeh...

Страница 94: ...s zur Anzeige der Option Sprachauswahl Drücken auf den Drehknopf wählt diese Option aus Drehen Sie am Drehknopf bis zur Anzeige der gewünschten Sprache Drücken auf den Drehknopf wählt die Sprache aus Diese Anzeige sehen Sie für einige Sekunden danach wechselt der LH101 automatisch zurück zum Loksteuern ...

Страница 95: ...n sowie den Zeitfaktor Ist der Zeitfaktor 0 ist die Zeit ausgeschaltet Faktor 1 ist normale Geschwindigkeit Faktor 2 doppelte Geschwindigkeit usw bis zum Faktor 31 Die Modelluhr läuft nur während Ihre LZV200 in Betrieb ist Ist die LZV200 ausgeschaltet ist auch die Modelluhr angehalten Die letzte Modellzeit bleibt in der LZV200 gespeichert War die Modelluhr beim Ausschalten der LZV200 eingeschaltet...

Страница 96: ...t der Zentrale Drücken Sie den Drehknopf um die Einstellung des Wochentags auszuwählen Der Cursor blinkt hinter der Anzeige des Tages Mit dem Drehknopf wählen Sie nun den gewünschten Wochentag aus bestätigen Sie die Wahl durch Drücken des Drehknopfs Wählen Sie nun mit dem Drehknopf die Einstellung der Stunden und bestätigen Sie die Wahl durch drücken des Drehknopfs Stellen Sie durch Drehen die gew...

Страница 97: ...ng des Zeitfaktors aus Drücken Sie den Drehknopf stellen Sie den gewünschten Zeitfaktor ein und bestätigen Sie dies durch Drücken des Drehknopfs Durch Drücken der Taste M werden die Einstellungen in der Zentrale LZV200 gespeichert Am Ende des Schreibvorgangs geht der LH101 zum Menü Zeit stellen zurück Drücken von Esc wechselt zurück zum Setup System ein weiterer Druck dann zum Loksteuern zurück ...

Страница 98: ...len Sie den Modus ein Aktion Display Erläuterung Ausgehend vom Loksteuern wechseln Sie in das allgemeine Menü Drehen Sie den Knopf bis zur Anzeige der Option Setup System und wählen Sie mit Drücken auf den Drehknopf wählt die Option aus Drehen Sie ggf den Drehknopf bis die Option AUTO Modus sichtbar ist Es wird der aktuelle Status des AUTO Modus angezeigt in der Auslieferungseinstellung ist der Mo...

Страница 99: ...n so drücken Sie einfach auf den Drehknopf Wollen Sie dies nicht so Drehen Sie den Knopf und bestätigen Sie die Einstellung Nun werden die Geschwindigkeiten in der LZ100 LZV100 LZV200 gelöscht Die Informationen über Fahrtrichtung und Funktionen bleiben aber erhalten 15 3 Versionsnummer des Systems anzeigen Aktion Display Erläuterung Ausgehend vom Loksteuern drücken Sie die Taste M Drehen Sie den K...

Страница 100: ...cher abgelegten Lokadressen wiederholt die Fahrdaten Um nicht mehr Adressen als nötig zu senden und damit die Reaktionszeit zu optimieren können Sie für den Fahrbetrieb nicht benötigte Lokadressen aus dem Speicher löschen So löschen Sie eine Lokadresse aus dem Zentralenspeicher Aktion Display Erläuterung Ausgehend vom Loksteuern drücken Sie die Taste M Drehen Sie den Knopf bis zur Anzeige der Opti...

Страница 101: ...Sie die Lokadresse die Sie löschen möchten durch Drehen aus und bestätigen Sie Ihre Auswahl durch Drücken Die Bestätigung wird kurz angezeigt Durch mehrfaches Drücken der Esc Taste kommen Sie zum Loksteuern zurück Mögliche Fehlermeldung Sind im Zentralenspeicher noch keine Lokadressen abgelegt so erhalten Sie diese Fehlermeldung Nach kurzer Zeit verschwindet die Meldung automatisch und Sie sind wi...

Страница 102: ...die Baudrate des in der LZV200 integrierten Interface eingestellt werden Welche Service Variablen es gibt und wofür Sie verwendet werden ist in der Betriebsanleitung der LZV200 beschrieben Aktion Display Erläuterung Ausgehend vom Loksteuern drücken Sie die Taste M Drehen Sie den Knopf bis zur Anzeige der Option Setup System Drücken auf den Drehknopf wählt diese Option aus Drehen Sie den Knopf bis ...

Страница 103: ...tigen Sie die Zahleneingabe mit der Lok Taste Die aktuelle Einstellung der SV wird angezeigt Sie können nun den angezeigten Wert löschen und einen neuen Wert eingeben Schließen Sie die Eingabe mit der Lok Taste ab Mit Esc können Sie zurückkehren zur Eingabe einer anderen SV oder Schritt für Schritt zum Loksteuern zurückkehren ...

Страница 104: ... an den Programmierausgang der Zentrale LZ100 LZV100 angeschlossen z B steht die Digitallokomotive nicht richtig auf dem Programmiergleis Error 24 DTR MTR Lok nicht aufgerufen oder Lokadresse 0 Error 25 DTR MTR Lok an einem anderen Gerät aufgerufen Error 26 DTR MTR Lok befindet sich schon in einer DTR MTR Error 27 DTR MTR Geschwindigkeit der Lok ist nicht 0 Error 30 Lok aus Speicher löschen nicht ...

Страница 105: ...hl nicht unterstützt Error 99 Allgemeiner Systemfehler Der Handregler hat auf eine Anfrage oder einen Befehl an die Zentrale nicht die erwartete Antwort bekommen Ursache kann eine Störung auf dem XpressNet sein Überprüfen Sie ob alle Kabel korrekt verbunden sind Weiterhin ist ein Defekt an der Zentrale oder am Handregler möglich Wenden Sie sich ggf an Ihren Fachhändler oder die Fa Lenz ...

Страница 106: ...106 Bedienungsanleitung LH101 16 2 Fahrstraßen Formblatt Fahrstraße Nr _____ Fahrstraße Nr _____ Schritt Adresse Schritt Adresse 1 2 3 4 5 6 7 8 9 10 11 12 13 14 15 16 ...

Страница 107: ...oder ist auf 28 Fahrstufenmodus eingestellt im System ist der betreffenden Adresse der 14 Fahrstufenmodus zugeordnet Ändern Sie den Fahrstufenmodus im System auf 28 Fahrstufen S 28 oder stellen Sie den Lokdecoder auf 14 Fahrstufen ein CV29 Bit 2 löschen Lokdecoder ist auf 14 Fahrstufenmodus eingestellt im System ist der betreffenden Adresse der 128 Fahrstufenmodus zugeordnet Ändern Sie den Fahrstu...

Страница 108: ...cheint AUS blinkend Es wurde von einem anderen Handregler der NOTAUS ausgelöst Beenden Sie den NOTAUS durch Drücken des Drehknopfs Ein Verstärker hat wegen Kurzschluss oder Überlast den NOTAUS ausgelöst Beseitigen Sie den Kurz schluss bei Überlast teilen Sie die Anlage in mehrere Versorgungsabschnitte Lesen Sie hierzu den Abschnitt Stromversorgung einer Modellbahnanlage in der Beschreibung der Zen...

Страница 109: ...konfigurieren Refresh von Funktionen konfigurieren Dauer Momentfunktion einstellen Weichen Signale schalten Fahrstraßen abrufen Fahrstraßen anlegen und bearbeiten Anzeige der Modellzeit Doppeltraktion Mehrfachtraktion Rückmeldungen anzeigen Progammieren a d Programmiergleis Programmieren Lokadresse Programmieren CV Programmieren Register Setup LH101 Fahrmodus einstellen Clubmodus Zählweise Bitdars...

Страница 110: ...t Display Kontrast Display Versionsnummer anzeigen XpressNet Adresse einstellen Rücksetzen auf Werkseinstellung Fahrstraßenzeit Sprachauswahl Setup System Zeit stellen AUTO Modus Versionsnummer System anzeigen Lokadresse aus Speicher löschen ...

Страница 111: ...Anhang 111 ...

Страница 112: ...ung für Schäden und Folgeschäden durch nicht bestimmungsgemäßen Gebrauch Nichtbeachtung dieser Gebrauchsanweisung Betrieb mit nicht für Modellbahnen zugelassenen umgebauten oder schadhaften Transformatoren bzw sonstigen elektrischen Geräten eigenmächtigen Eingriff Gewalteinwirkung Überhitzung Feuchtigkeitseinwirkung u ä ist ausgeschlossen außerdem erlischt der Gewährleistungsanspruch Vogelsang 14 ...

Страница 113: ...B B 10 0040 LH101 Operating Manual Version 1 0 1 st Edition 10 18 Art no 21101 ...

Страница 114: ...this operating manual is to explain the use of the LH101 manual control To get started first read the section First Steps Afterwards you can familiarise yourself step by step with the full range of functions of this manual control and put them to use If you still have questions after reading this operating manual please contact us We will be happy to help you There are four different ways of conta...

Страница 115: ...ng locomotives 17 5 1 Calling up locomotive addresses 17 5 1 1 Entering a new locomotive address using the keypad 17 5 1 2 Choosing locomotive addresses from the stack of the LH101 18 5 1 2 1 Scrolling through the stack 18 5 1 3 Selecting a locomotive address from the command station memory 19 5 1 4 Taking over control of a locomotive from another manual control 20 5 2 Changing the locomotive s sp...

Страница 116: ... 50 10 4 Controlling a multiple traction 52 10 4 1 Speed and direction of the MTR 52 10 4 2 Switching functions in the MTR 53 10 5 Displaying the members of an MTR and switching between locomotives in an MTR 53 10 6 Deleting a locomotive from a multiple traction 54 10 7 Deleting a complete MTR 56 10 8 Error messages relating to multiple tractions 57 11 Displaying feedback 58 12 Configuring program...

Страница 117: ...p device setting 79 13 1 Setting the speed step mode 79 13 2 Setting the club mode 80 13 2 1 Setting club mode 1 or 2 81 13 2 2 Setting mode 0 82 13 3 Counting method for bit representation 83 13 4 Display brightness 84 13 5 Display contrast 86 13 6 Displaying the version number 87 13 7 Setting the XpressNet address 88 13 8 Reset to ex factory setting 89 13 9 Route interval 90 14 System setup 93 1...

Страница 118: ... such connection This operating manual will tell you which devices are suitable Even if other devices including those of other manufacturers are equipped with the same plug connectors you must not operate the LH101 with these devices The same plug connector does not automatically mean that operation is permitted This also applies to other model railway controls Do not expose the LH101 to moisture ...

Страница 119: ...displays these are put in double quotes L 0001 If the text makes reference to keys these are put in single quotes M Cross references p 23 This arrow refers you to a particular page in this operation manual where you will find additional information on a specific subject Important advice Text framed and marked with an exclamation mark contains particularly important information and tips ...

Страница 120: ... slowly approach the desired location then press the rotary knob to stop the locomotive The advantage of this mode while shunting You can decrease the speed until the locomotive stops without having to look at the manual control and without risking that the locomotives stops too early p 23 Fast clock The new LZV200 incorporates a fast clock whose speed can be adjusted over a wide range This model ...

Страница 121: ... decoder features through programming Two methods are available Programming in operational mode PoM You can configure the settings of your locomotive decoder while the locomotive is placed anywhere on the layout For example drive your locomotive in front of a heavy freight train and adjust the starting delay to the train p 63 PoM reading With an LZV200 and the LH101 from version 2 0 it is possible...

Страница 122: ...the LH101 right at the centre of action After connection the manual control will display the locomotive address controlled last During initial operation address 1 will be displayed 3 1 1 Connection to the LZ100 LZV100 command station Plug the 5 pin DIN connector into the 5 pin DIN socket at the back of your LZ100 LZV100 or if you have already installed an XpressNET XBUS wiring on your layout into ...

Страница 123: ...isplayed First enter the address of locomotive 3 Action Display Explanation Press the locomotive key You can now start to enter the new locomotive address The number entered is displayed If you entered the wrong number you can delete the entered digits using the key Press the locomotive key to complete the entry process The direction of travel and the speed step are displayed In this example the d...

Страница 124: ...avel is dependent upon the locomotive i e For a steam engine forward means smokestack forward regardless of the direction in which you have placed this locomotive on the track If the locomotive is set to speed step 0 each pressing of the rotary knob will change the direction of travel 3 2 4 Emergency off Action Display Explanation Press the rotary knob and keep it pressed until AUS OFF is displaye...

Страница 125: ... Action Display Explanation Use the 0 key to switch function 0 usually the direction dependent head light of the locomotive on and off If this function is enabled this is shown in the bottom line of the display This was a summary of how to control a locomotive using the LH101 ...

Страница 126: ...eypad to enter numeric values The following rule applies deletes the last entered digit cancels the entry process and brings you one level up 4 2 Disconnecting and reconnecting the LH100 during operation The LH101 makes you mobile During operation the manual control may be disconnected from one XpressNet socket and reconnected to another XpressNet socket The locomotive address selected last and th...

Страница 127: ...H101 has a two line luminous LCD display Depending on the operating mode you are in the display will look different The locomotive address is displayed using 4 digits If needed zeros are added in front of the address Examples of typical displays while controlling your locomotive ...

Страница 128: ... selected function F21 is enabled The locomotive with address 1234 operates in a multiple traction The speed step is 012 of 128 Function group 1 is set Functions F10 F12 and F15 are enabled The multiple traction with address 33 is being controlled The speed step is 04 of 28 The locomotive with address 0003 is being controlled in the shunting mode 4 4 The rotary knob of the LH101 When switching fro...

Страница 129: ...lling up locomotive addresses If you want to control a locomotive using the manual control you have to call up this locomotive first There are three different ways to call up a locomotive Enter the number of the locomotive using the keypad Select a locomotive from the stack of the LH101 Select an address from the command station memory 5 1 1 Entering a new locomotive address using the keypad The v...

Страница 130: ...esses from the stack of the LH101 The LH101 manual control has a so called stack for locomotive addresses In this stack you can save 8 locomotive addresses Use the rotary knob to scroll through the stack The stack can be compared to an index card box with 8 index cards You can place any locomotive address in the stack slots Ex factory locomotive addresses 1 to 8 are placed in the stack 5 1 2 1 Scr...

Страница 131: ...memory The command station memory is a storage in the command station not the manual control Each time you call up a locomotive the locomotive address and associated data speed step function status are saved in this storage You can either enter a locomotive address or select a locomotive address from the stack of the manual control or from the command station memory Action Display Explanation Pres...

Страница 132: ...ive address from the command station memory For more information see the section Deleting locomotive addresses from the command station memory p 98 For software version 3 6 of the LZ100 LZV100 you can save up to 100 2 digit locomotive addresses and up to 128 4 digit locomotive addresses in the command station memory 5 1 4 Taking over control of a locomotive from another manual control If you call ...

Страница 133: ...omotive Let the locomotive move slowly to the desired location and press the rotary knob to stop the locomotive The advantage of this mode while shunting You can decrease the speed to the slowest setting without risking that the locomotive stops too early and without having to look at the manual control Read the section Setting the speed step mode starting on page 79 to learn how to set the standa...

Страница 134: ...anation If the speed step of a locomotive is not 0 and you briefly press the rotary knob you effect an emergency stop for the selected locomotive The locomotive stops without the set braking delay Press the rotary knob again to change the direction of travel The locomotive specific emergency stop is not available in the shunting mode If you press the rotary knob the locomotive stops with the braki...

Страница 135: ...o the slowest setting without risking that the locomotive stops too early and without having to look at the manual control Action Display Explanation A clockwise turn increases the speed step A counter clockwise turn decreases the speed step to speed step 1 Press the rotary knob to stop the locomotive speed step 0 Press the rotary knob again to change the direction of travel If while in shunting m...

Страница 136: ...ress up to 28 functions in locomotive decoders For the LH101 these 28 functions are divided into 3 function groups Which of these groups is enabled is indicated at the bottom left of the display Depending on the selected function group 0 to 2 the following functions are switched Key Function group 0 0 1 2 3 4 5 6 7 8 9 Function group 1 10 11 12 13 14 15 16 17 18 19 Function group 2 20 21 22 23 24 ...

Страница 137: ...p 0 is enabled 5 3 2 Configuring locomotive decoder functions Functions F1 to F28 can be set to permanent or temporary operation Function F0 is always set to permanent operation Permanent operation Temporary operation Press the key to enable the function press the key again to disable the function Press the key to enable the function release the key to disable the function This setting is saved in...

Страница 138: ... pressing F or Esc 5 3 3 Configuring the refresh of functions By refreshing functions we mean the following In defined regular intervals the command station sends function information via the track to all decoders located on the track This ensures that a decoder does not forget settings even if the connection between command station and decoder is interrupted intentionally due to dead frogs or uni...

Страница 139: ...omotive address you select Press the F key and keep it pressed until the display changes Release the F key and turn the rotary knob until you reach this display Press the rotary knob to display the current refresh setting Functions F0 to F8 are transmitted cyclically Turn the rotary knob to select another refresh setting Functions F0 to F12 are transmitted cyclically Functions F0 to F20 are transm...

Страница 140: ...e 28 speed steps for one locomotive address and the mode 128 speed steps for another locomotive address To display or change the speed step mode Action Display Explanation Call up the locomotive address whose speed step mode you want to display or change Make sure that the locomotive is set to speed step 0 Otherwise the speed step mode can be displayed but not changed Press the locomotive key Chan...

Страница 141: ...op are counted as speed steps The maximum speed step which is therefore displayed in this mode is 126 5 5 Emergency off Action Display Explanation Press the rotary knob and keep it pressed until OFF is displayed The track voltage is now turned off To turn the track voltage back on press the centre of the rotary knob again until the locomotive address is displayed again ...

Страница 142: ...em Action Display Explanation Proceed from Controlling locomotive Use the points signals key to change to the menu for switching points and signals The locomotive address currently used including its direction and speed step are displayed in the top line of the display Start to enter the address If you enter a wrong address use the key to delete the entered digits Continue until you have entered t...

Страница 143: ...splayed The display of the LH101 changes automatically when the point or signal setting is changed by another LH101 or another XpressNet device 6 1 2 Using feedback capable point decoders When using the feedback capable LS100 switch decoder the actual point setting can be displayed Requirements Use of a feedback capable LS100 switch decoder Wiring of the feedback bus R S to the command station End...

Страница 144: ...display also changes if you switch the point manually The display changes only when the final position of the point drive has been reached For information on wiring the feedback bus please refer to the operating manuals of the feedback capable devices If after entering i e the point address 257 you see this display the address is not a switch decoder but a LR100 LR101 feedback module In this case ...

Страница 145: ... For the drive from A to D the following point settings are required Point 12 to turnout Point 13 to straight Point 14 to turnout Instead of setting these three points one after the other you can create a route Routes are saved in the LH101 Use different LH101s to save and set different routes A maximum of 16 routes can be saved in the LH101 A maximum of 16 point addresses steps can be allocated t...

Страница 146: ...s signals key again to change to creating or editing deleting routes Use the rotary knob to select Fahrstrasse neu anlegen Creating route Press the key to confirm your selection The number of the next available route is displayed at the top right You can take over this number or turn the rotary knob to select another available number Press the key to confirm your selection and start to enter the p...

Страница 147: ...er the next point address or press the M key to save the route and to proceed to enter another route The display remains visible for 2 s or press the Esc key to leave the routes menu and return to Controlling locomotive The route will be saved 7 2 Editing a route In this section you will learn how to edit a step in the route delete a step from a route add a new step to a route The beginning of the...

Страница 148: ...firm your selection Turn the rotary knob to select one of the following options Schritt ändern Edit step continue with Editing a step in a route page 37 Schritt löschen Delete step continue with Deleting a step from a route page 38 and select Schritt neu New step continue with Adding a step to a route page 39 The option Schritt neu New step is displayed only if the maximum amount of steps in a rou...

Страница 149: ...ed with 2 1 If you want to change the point address of this step delete the address displayed and start to enter the new point address Press the point signal key to confirm your entry 2 Press the M key to change the setting Press the M key again to send a corresponding switch command to the point signal This way you can verify if you have selected the correct point and the correct setting Press th...

Страница 150: ...lly as described in the section Editing a route page 35 Select the option Schritt löschen Delete step press the rotary knob to confirm your selection The first step of the selected route is displayed Scroll to the step that you want to delete Confirm the selection of the step A security query is displayed You can now press the rotary knob to permanently delete the selected step and select another ...

Страница 151: ...ched Proceed initially as described in the section Editing a route page 35 Select the option Schritt neu New step The next available step number is displayed Proceed as described in the section Creating a new route page 34 7 3 Deleting a route Action Display Explanation Proceed from Controlling locomotive Use the points signals key to change to the menu for switching points and signals Press the M...

Страница 152: ...he key to confirm your selection and select the route that you want to delete Press the key again to confirm the deletion The selected route is deleted You are now back in the routes menu You can now select another action in the routes menu or press the Esc key to return to Controlling locomotive ...

Страница 153: ... Explanation Proceed from Controlling locomotive Use the points signals key to change to the menu for switching points and signals Turn the rotary knob to scroll through the created routes if no routes have been created Speicher leer Storage empty is displayed When you have reached the route created last you will again see the first one Press the rotary knob to set the route The point addresses an...

Страница 154: ...eated a confirmation is displayed You can now turn the rotary knob again to select the next route or press the key to go back up a level so you can switch individual points or press the Esc key to exit the routes menu and return to Controlling locomotive ...

Страница 155: ...n Display Explanation Proceed from Controlling locomotive With the key you change from the display of the function status to the display of the fast clock and back If the model clock is switched off factor 0 the information time stopped is displayed in the lower line While you switch a function of the locomotive on or off i e press one of the keys 0 to 9 the fast clock display disappears briefly a...

Страница 156: ...ve the same operating data All DCC locomotive decoders are DTR capable Configuration of the decoders themselves is not required That is to say The decoder itself does not know that it operates in a double traction In this way a double traction differs from a multiple traction p 49 10 2 Requirements for a double traction You must have called up on the same manual control each of the two locomotives...

Страница 157: ...e that both locomotives are set to run in the same direction It is of course possible that the direction arrow of one locomotive points up and the direction arrow of the other locomotive points down since the direction of travel is locomotive dependent Proceed as follows Action Display Explanation Locomotive no 78 operated last is still shown on the display Turn the rotary know to display the opti...

Страница 158: ... second locomotive operating in the double traction you must select this locomotive using the Esc key 10 4 Assembling locomotives with different speed steps into a double traction You can also add locomotives with different speed steps to a double traction In this case the speed step corresponding to the speed is always displayed Example The locomotive with address 24 has 28 speed steps the locomo...

Страница 159: ...ssembled the display again shows an L in front of the locomotive address You can disassemble a double traction even if the current speed step is not 0 10 6 Error messages when assembling a double traction If you made an error when assembling the double traction you will see one of the following messages on the display The address of the locomotive was not entered in the stack before it was added t...

Страница 160: ...uble reaction has already been called up by another manual control One of the two locomotives that you wanted to add to the double traction is already part of another double traction The speed step of one of the two locomotives was not 0 Press the key to return to Controlling locomotive ...

Страница 161: ...on address The address is saved in the locomotive decoder in addition to the locomotive s own address From now on the locomotive decoder does not listen to its own address but only to the multiple traction address Don t worry The locomotive decoder does not forget its own address it remains saved Speed and direction of travel of an MTR can be controlled using the multiple traction address If a loc...

Страница 162: ...ction or turn a function on or off using this manual control When being added to the multiple traction the speed step of the locomotives must be 0 11 3 Assembling a multiple traction MTR Drive all locomotives that you want to add to the MTR to the location on your layout where you want to start controlling the MTR Ensure that all locomotives are set to run into the same direction If your MTR is me...

Страница 163: ... einfügen Add locomotive Press the rotary knob to select the option You are asked to enter the multiple traction address Enter the TR address 1 99 Use the key to delete or correct your entry Press the rotary knob to confirm the MTR address The locomotive called up last is offered to you first If you want to add this locomotive press the rotary knob Turn the rotary knob to select additional locomot...

Страница 164: ...le traction address itself is indicated by an upper case MU on the display A lower case m indicates that this locomotive address is part of an MTR Examples The locomotive with address 1234 is part of a multiple traction The multiple traction with address 33 is being controlled 11 4 1 Speed and direction of the MTR You can control the MTR just like a normal locomotive using the rotary knob Changes ...

Страница 165: ...ocomotives in an MTR You can display the complete list of locomotives that are part of the MTR as well as the MTR address itself at any time regardless of whether you see the multiple traction address indicted by an upper case M or one of the locomotives that are part of the MTR indicted by a lower case m on the display Action Display Explanation Call up a locomotive that is part of the MTR or the...

Страница 166: ...receive the special MTR commands sent over the track If a command to delete does not reach the locomotive decoder due to bad contact or because you have removed the locomotive from the layout the MTR address saved in the locomotive decoder is not deleted and the locomotive cannot be operated with its own address Action Display Explanation Call up a locomotive that is part of the MTR or the MTR add...

Страница 167: ...elete MTR locomotives is displayed Press the rotary knob to display the locomotives in the MTR Turn the rotary knob to select the locomotive address that you want to delete from the MTR Press the rotary knob to confirm your selection The locomotive is deleted from the MTR ...

Страница 168: ...oved the locomotive from the layout the MTR address saved in the locomotive decoder is not deleted and the locomotive cannot be operated with its own address Action Display Explanation Call up the multiple traction that you want to delete Press the M key You are offered the option Mehrfachtraktion Multiple traction Press the rotary knob to select the option Turn the rotary knob until Mehrfachtrakt...

Страница 169: ...n an operating command You have tried to add a conventional analogue locomotive address 0 to a multiple traction Error 25 One of the locomotives that you wanted to add to the MTR has already been called up by another manual control Error 26 One of the locomotives that you wanted to add to the MTR is already part of another MTR Error 27 The speed step of one of the locomotives was not 0 when you wa...

Страница 170: ...ter the feedback address Let us assume that you want to display the 8 digits of feedback address 39 Use the key to correct your entry if necessary Press Enter The manual control checks the status of the feedback module with the command station and displays the result The top line displays the address of the read out feedback module The bottom line displays the active feedback contacts 1 3 4 6 8 me...

Страница 171: ...dule with that address is connected to the feedback bus you see the following display Press the key to enter the address of another feedback module The valid feedback address range is 1 to 128 If you enter a lower or higher value you will be asked to enter a feedback address ...

Страница 172: ...ue written on it The valid range is 0 to 255 Since you can change the values on these index cards in these memory locations again and again they are also referred to as variables These variables are used to determine or configure settings Hence in the US the term Configuration Variable CV was developed From now on we will no longer refer to index cards but use the correct term CV CVs are used to d...

Страница 173: ...rrow points up Locomotive runs forward when direction arrow points up 2 Locomotive operates in 28 step mode Locomotive operates in 14 step mode 3 Locomotive can also run in analogue operation Locomotive cannot run in analogue operation 4 Not used Not used 5 Decoder uses set speed curve Decoder uses ex factory speed curve 6 Locomotive is controlled with extended address from CV17 and CV18 Locomotiv...

Страница 174: ...ming on the programming track Whenever you want to change the address of a locomotive decoder There are also Digital plus by Lenz decoders that are not capable of Programming in operational mode e g locomotive decoders that were developed before this feature became an NMRA standard or e g switch decoders that do not need this functionality because these receivers can be fully configured before bei...

Страница 175: ... changed using PoM All CVs in a locomotive decoder can be changed using PoM with the exception of the basic address in CV1 and the extended address in CV17 and CV18 For this reason you should be careful as you proceed If you make a mistake in programming the locomotive may not operate In day to day operation you will probably change the CVs for the starting and braking delay most often 13 2 2 Whic...

Страница 176: ...tive whose settings you want to change Action Display Explanation Call up the locomotive whose settings you want to change using PoM Press the locomotive key Press the M key You are offered the option last used in this example the locomotive selection from the command station memory Turn the rotary knob until Programmieren während des Betriebs PoM Programming in operational mode PoM is displayed P...

Страница 177: ...s the locomotive key to complete the entry process You can now enter the desired value in this example value 6 Press the locomotive key to confirm your entry and to start programming Alternatively press the rotary knob The value of the CV is displayed You can now use the rotary knob to change the value The new value is immediately entered into the decoder This is particularly useful if you want to...

Страница 178: ...roceed as follows Action Display Explanation Call up the locomotive whose settings you want to change using PoM Move the locomotive whose CVs you want to read out using PoM to the track section monitored by the LRC120 address display The address display now shows the address of the locomotive Press the M key You are offered the option last used in this example the multiple traction Turn the rotary...

Страница 179: ... particular settings It is much more comfortable to change a feature by setting or deleting the corresponding bit switch than to calculate the corresponding numeric value and to programme it into the CV which is of course also possible A particularly good example for a CV for which the deleting and setting of bits is the better approach is CV29 In the following example we will change CV29 in locom...

Страница 180: ... locomotive key to complete the entry process Press the M key Use the rotary knob to select the bit that you want to change Press the rotary knob to confirm your selection Turn the rotary knob to set the bit 1 or to delete the bit 0 Press the knob to start programming While programming you see this display Press the Esc key to return to selecting the bit press the Esc key again to select the CV ...

Страница 181: ...Configuring programming decoder settings 69 You can now select another CV that you want to change or return to Controlling locomotive ...

Страница 182: ...u want to change Programming register mode This type of programming is used for older decoders that have not yet implemented CV programming 13 3 1 What is a programming track When using Programming on the programming track it is not necessary to know the decoder address The decoder receives a command like Enter value 15 in CV4 To ensure that only one particular decoder receives the programming com...

Страница 183: ...g out a locomotive address Action Display Explanation Proceed from Controlling locomotive Change to the general menu Select Programmieren auf dem Programmiergleis Programming on the programming track and confirm your selection Turn the rotary knob until Programmieren Lokadresse Programming locomotive address is displayed and confirm your selection The locomotive address is read out This takes a fe...

Страница 184: ...ive address is displayed If an error occurred during the entry process you will receive an error message p 78 Now press to enter another locomotive address or to move one step upwards in the menu 2 digit addresses 1 99 are saved in CV1 4 digit locomotive addresses 100 9999 are saved in CV17 and CV18 While in the menu Programmieren Lokadresse Programming locomotive address you do not have to think ...

Страница 185: ...TR address will be deleted 13 3 4 Reading out and programming a CV Action Display Explanation Proceed from Controlling locomotive Change to the general menu Select the relevant menu entry and confirm your selection Turn the rotary knob until Programmieren CV Programming CV is displayed and confirm your selection You are asked to enter the CV whose value you want to read out or change Enter the num...

Страница 186: ...bitwise displaying and changing of the CV value There are two different ways of entering or displaying the desired value in the CV Decimal or bitwise binary You can choose your preferred method However there are CVs for which bitwise entry is easier for other CVs decimal entry is the recommended Example In CV29 decoder settings are configured by setting or deleting bits Here bitwise entry is recom...

Страница 187: ...o make changes press the corresponding number keys In the following example bit 1 is to be set additionally while bit 2 is to be deleted Press key 1 to set the corresponding bit 1 Press key 4 to delete the corresponding bit 4 Press the locomotive key to start programming You can change between the bitwise and the decimal display of the value at any time Decimal display Bitwise display Now you have...

Страница 188: ... the original technique used to make decoder settings in the DCC system This method was replaced more than 20 years ago by better CV programming Action Display Explanation The starting point is locomotive control Switch to the general menu Select the relevant menu item and confirm your selection If necessary turn the knob until Program register appears and confirm your selection You are now prompt...

Страница 189: ...r or b Switch to binary display and change the value The procedure is the same as for programming a CV or c Selection of another register or d Return to locomotive control When entering the numerical value in the register make sure that you do not exceed the permitted value range If necessary refer to the operating instructions of the receiver ...

Страница 190: ...efective Error 2 When programming or reading out a decoder no decoder reaction was detected The decoder may not be correctly connected to the programming output of the LZ100 LZV100 command station e g the digital locomotive may not be properly placed on the programming track Press the key to delete the error message 13 4 1 Display of other connected manual controls While the command station is in ...

Страница 191: ... step to 1 using the rotary knob Press the rotary knob to stop the locomotive Let the locomotive move slowly to the desired location and press the rotary knob to stop the locomotive The advantage of this mode while shunting You can decrease the speed to the slowest setting without risking that the locomotive stops to early and without having to look at the manual control Do not confuse the shuntin...

Страница 192: ...lub mode Let us assume that you want to operate your model railway layout together with other model railway enthusiasts In this context you want to give the LH101 manual control to somebody who has never used that device You can facilitate the use of the manual control by hiding the majority of operating options Or you want to prevent a co player from selecting a locomotive other than the one assi...

Страница 193: ... return to mode 0 Note down the password If you forget the password it is no longer possible to set mode 0 If you have forgotten the password and require help please contact our customer support 14 2 1 Setting club mode 1 or 2 Action Display Explanation Select the locomotive address that you want to operate in club mode 1 or 2 Press the M key Turn the rotary knob until the option Setup LH101 LH101...

Страница 194: ...You are asked to enter a four digit number as password Press the rotary knob to complete the process The LH101 returns to Controlling locomotive The restrictions of the selected club mode are enabled 14 2 2 Setting mode 0 If you want to reset the LH101 that is in club mode 1 or 2 to the standard mode proceed as follows Action Display Explanation Proceed from Controlling locomotive address or speed...

Страница 195: ...e and returns to Controlling locomotive The locomotive address or the speed step are displayed Repeat the above procedure entering the correct password 14 3 Counting method for bit representation The section Setting and deleting bits described how to change individual bits in CVs When doing so bits are counted starting at 1 Some decoders of other manufacturers may start counting bits at 0 To ensur...

Страница 196: ...ob to select this option The current setting is displayed Turn the rotary knob to select an option and press the rotary knob to confirm your selection Return to setup and Controlling locomotive 14 4 Display brightness Use this option to set the brightness of the LCD background lighting Action Display Explanation Select the locomotive address that is to be operated in club mode 1 or 2 Press the M k...

Страница 197: ...Press the rotary knob to select this option Turn the rotary knob until the option Helligkeit Display Display brightness is displayed Press the rotary knob to select this option Turn the rotary knob to set the display brightness You can see the result immediately Press the rotary knob to confirm the setting ...

Страница 198: ...the rotary knob until the option Setup LH101 LH101 setup is displayed Press the rotary knob to select this option Turn the rotary knob until the option Kontrast Display Display contrast is displayed Press the rotary knob to select this option Turn the rotary knob to set the display contrast You can see the result immediately Press the rotary knob to confirm the setting ...

Страница 199: ... club mode 1 or 2 Press the M key Turn the rotary knob until the option Setup LH101 LH101 setup is displayed Press the rotary knob to select this option Turn the rotary knob until the option Versionsnummer anzeigen Displaying versions number is displayed Press the Esc key to move up one level in the menu until you return to Controlling locomotive ...

Страница 200: ...ch LH101 manual control is programmed to device address 01 If you want to use two or more manual controls you must programme different addresses for each manual control Action Display Explanation Select the locomotive address that is to be operated in club mode 1 or 2 Press the M key Turn the rotary knob until the option Setup LH101 LH101 setup is displayed Press the rotary knob to select this opt...

Страница 201: ...Explanation Select the locomotive address that is to be operated in club mode 1 or 2 Press the M key Turn the rotary knob until the option Setup LH101 LH101 setup is displayed Press the rotary knob to select this option Turn the rotary knob until the option Reset to factory defaults is displayed A security query is displayed Press the Esc key to cancel the process Press the key again to reset the ...

Страница 202: ...he ex factory setting is 300ms If individual points in a route do not switch increase the route interval in steps of 100ms Action Display Explanation Select the locomotive address that is to be operated in club mode 1 or 2 Press the M key Turn the rotary knob until the option Setup LH101 LH101 setup is displayed Press the rotary knob to select this option Turn the rotary knob until the option Fahr...

Страница 203: ...ing locomotive 14 10 Select language This menu option is available from version 1 02 onwards In ex factory setting the default language is German Using the menu Select language you can change the language to English This setting will remain stored until the LH101 is reset to the ex factory setting again Action Display Explanation The starting point is locomotive control switch to the general menu ...

Страница 204: ...played Choose this option by pressing the rotary knob Turn the rotary knob until the English language is displayed Press the rotary knob to select the language You will see this display for a few seconds after which the LH101 will automatically switch back to locomotive control ...

Страница 205: ...1 is normal speed factor 2 is double speed etc up to factor 31 The fast clock only runs while your LZV200 is in operation If the LZV200 is switched off the fast clock is also stopped The last model time remains stored in the LZV200 If the fast clock was active while the LZV200 was switched off it is automatically restarted when the LZV200 is switched on again Action Display Explanation The startin...

Страница 206: ... select the day of the week setting The cursor blinks behind the day display Use the rotary knob to select the desired weekday confirm the selection by pressing the rotary knob Now use the rotary knob to select the setting of the hours and confirm the selection by pressing the rotary knob Set the desired hour by turning and press the rotary knob Select the setting of the minutes and press the rota...

Страница 207: ...ary knob Press the M key to save the settings in the LZV200 command station At the end of the write operation the LH101 returns to the clock setting menu Press Esc to return to setup system another pressure brings you back to locomotive control 15 2 Enabling and disabling the AUTO mode The AUTO mode is a special feature of the LZ100 LZV100 LZV200 command stations When enabled the command station r...

Страница 208: ...Press the rotary knob to select this option Turn the rotary knob until the option AUTO Mode The current status of the AUTO mode is displayed ex factory the mode is disabled Turn the rotary knob to change the setting and press the button to confirm the setting Press the ESC key to leave the menu without changing the setting The LH101 returns to Controlling locomotive 15 2 1 System behaviour with AU...

Страница 209: ... is deleted The direction and function information is saved 15 3 Displaying the system version number Action Display Explanation Select the locomotive address that is to be operated in club mode 1 or 2 Press the M key Turn the rotary knob until the option Setup System System setup is displayed Press the rotary knob to select this option Turn the rotary knob until the option Versionsnummer anzeigen...

Страница 210: ...he reaction time you can delete locomotive addresses from the memory that are not required for operation To delete locomotive addresses from the command station memory proceed as follows Action Display Explanation Select the locomotive address that is to be operated Press the M key Turn the rotary knob until the option Setup System System setup is displayed Press the rotary knob to select this opt...

Страница 211: ...o Controlling locomotive Possible error messages If no locomotive addresses are saved in the command station memory you will receive this error message The message will disappear automatically you are back in the system setup Press the Esc key to return to Controlling locomotive Proceed with care when deleting a locomotive address from the command station memory If an address is deleted the comman...

Страница 212: ...rolling a locomotive press the M button Turn the knob until the Setup System option is displayed Pressing the rotary knob selects this option Turn the knob until the Service variable read write option is displayed and confirm your selection by pressing the knob You are prompted to enter the number of the SV you want to read or change write Enter the number of the desired SV in the example SV2 baud...

Страница 213: ...System setup 101 Complete the entry with the Loco key With Esc you can return to the input of another CV or step by step return to locomotive control ...

Страница 214: ...called up or locomotive address 0 Error 25 DTR MTR Locomotive called up by another device Error 26 DTR MTR Locomotive already part of another DTR MTR Error 27 DTR MTR Locomotive speed not 0 Error 30 Locomotive cannot be deleted from command station memory Error 31 Command station memory full Delete one or several locomotive addresses from the command station memory see section Deleting locomotive ...

Страница 215: ...ry or command sent to the command station The cause may be interference on the XpressNET Please check if all wires are connected correctly If this does not solve the problem it is possible that the command station or the manual control are defective Please contact your model railway dealer or Lenz Elektronik ...

Страница 216: ...104 Operating manual LH101 16 2 Routes form Route no _____ Route no _____ Step Address Step Address 1 2 3 4 5 6 7 8 9 10 11 12 13 14 15 16 ...

Страница 217: ...de the corresponding address in the system is set to the 14 speed step mode Change the speed step mode in the system to 28 speed steps p 25 or set the decoder to 14 speed steps clear bit 2 in CV29 The locomotive decoder is set to the 14 speed step mode the corresponding address in the system is set to the 128 speed step mode Change the speed step mode of the locomotive decoder to 28 speed steps se...

Страница 218: ...mergency off was initiated by another manual control Press the rotary knob to cancel the emergency off An amplifier has triggered an emergency off due to a short circuit or a power overload Remove the short circuit In case of a power overload divide the layout into several power sections Read section The power supply of a model railway layout in the operating manual of the LZV100 command station o...

Страница 219: ...nction group Press longer Configure functions Configure refresh of functions Set permanent temporary operation Switch points signals Call up routes Create and edit routes Double traction Multiple traction Display feedback Programming on the programming track Programming locomotive address Programming CV LH101 setup Set operating mode Club mode Counting method bit representation Brightness display ...

Страница 220: ...ing manual LH101 Contrast display Display version number Set XpressNet address Reset to ex factory setting Route interval System setup AUTO mode Display system version number Delete locomotive address from memory ...

Страница 221: ... indirect damage resulting from improper use non observance of instructions use of transformers or other electrical equipment which is not authorised for use with model railways or transformers or other electrical equipment which has been altered or adapted or which is faulty Nor can we accept responsibility when damage results from unsupervised adjustments to equipment or from acts of violence or...

Страница 222: ...B B 10 0041 LH101 Mode d emploi Version 1 0 1 édition 09 18 Art n 21101 ...

Страница 223: ...mploi est destiné à vous faciliter l utilisation du régulateur LH101 Pour la mise en route veuillez consulter tout d abord le chapitre Vos premiers pas après quoi vous pourrez éprouver au plus vite le plaisir de conduire vos locomotives Ensuite vous pourrez apprendre à connaître et à comprendre étape par étape l ensemble des fonctions de ce régulateur Si vous désirez poser des questions à propos d...

Страница 224: ...01 16 5 Pilotage de locomotives 17 5 1 Appel d une adresse de locomotive 17 5 1 1 Introduction d un nouveau numéro de locomotive via le pavé numérique 17 5 1 2 Sélection d une adresse de locomotive dans la pile d adresses du LH101 18 5 1 2 1 Feuilletage de la pile 19 5 1 3 Sélection d une adresse de locomotive dans la mémoire de la centrale 19 5 1 4 Transfert d une locomotive d un régulateur à un ...

Страница 225: ...sition d une double traction 50 10 Multitraction MTR 51 10 1 Qu est ce qu une multitraction 51 10 2 Conditions pour une multitraction 52 10 3 Composition d une multitraction 52 10 4 Pilotage d une multitraction 54 10 4 1 Vitesse et sens de marche d une multitraction 55 10 4 2 Commutations des fonctions dans une MTR 55 10 5 Affichage des membres d une MTR et sélection d une locomotive dans celle ci...

Страница 226: ...Affichage sur l écran d un autre régulateur connecté 80 13 Setup LH101 Réglage des appareils 81 13 1 Réglages du mode pilotage 81 13 2 Réglages du mode Club 82 13 2 1 Paramétrage des modes Club 1 ou 2 83 13 2 2 Paramétrage du mode 0 84 13 3 Mode de comptage des bits 85 13 4 Luminosité de l écran 86 13 5 Contraste de l écran 88 13 6 Affichage du numéro de version 89 13 7 Réglage de l adresse Xpress...

Страница 227: ... garantie Même si d autres appareils provenant d autres fabricants utilisent les mêmes fiches de raccordement vous ne pouvez pas faire fonctionner le LH101 avec ces appareils La similarité des fiches de raccordement ne signifie pas automatiquement la compatibilité opérationnelle Cette remarque vaut aussi dans le cas d appareils de commande pour réseaux miniatures N exposez pas le LH101 à l humidit...

Страница 228: ...rme d image et il en est de même des touches Si dans le texte continu une référence est faite à des annonces celles ci sont citées entre guillemets L 0001 Les touches sont représentées dans le texte par des guillemets simples M Références croisées page 23 Cette flèche vous dirige vers une page particulière de ce manuel sur laquelle vous trouverez plus d informations sur le sujet abordé Remarque im...

Страница 229: ...esse 0 page 22 Mode manœuvre Ici vous revenez au cran de vitesse 1 à l aide du curseur rotatif La locomotive s arrête si vous appuyez sur le curseur Laissez la locomotive se traîner jusqu à la position désirée puis appuyez sur le curseur pour l arrêter L avantage de ce mode est évident lors des manœuvres vous pouvez revenir à la vitesse minimum sans avoir à regarder le curseur rotatif et ainsi ne ...

Страница 230: ...chage d informations de rétrosignalisation Avec cette fonction du régulateur LH101 vous pouvez afficher l état des entrées des modules de rétrosignalisation LR100 101 page 60 Réglage des propriétés des décodeurs L adresse les temporisations d accélération ou autres propriétés d un décodeur de locomotive peuvent être modifiées au moyen de la programmation Deux variantes sont à votre disposition Pro...

Страница 231: ... n 80152 sur votre réseau de sorte que vous pourrez toujours utiliser directement le LH101 à l endroit désiré Une fois la connexion réalisée le régulateur affiche la dernière adresse de locomotive pilotée Lors de la première mise en service c est l adresse 1 qui est affichée 3 1 1 Connexion à la centrale LZ100 LZV100 Insérez la fiche mâle pentapolaire DIN dans la prise pentapolaire femelle située ...

Страница 232: ... Votre première conduite Dans cet exemple nous supposons que vous pilotez une locomotive possédant l adresse 3 adresse d un décodeur encodé en usine 3 2 1 Appel de l adresse de locomotive Lors de la première mise en service du LH101 celui ci indique l adresse L 0001 Entrez d abord l adresse de locomotive 3 Action Ecran Explication Pressez la touche locomotive et tapez immédiatement la nouvelle adr...

Страница 233: ...e marche Mettez la vitesse à 0 si vous désirez inverser le sens de marche Ensuite modifiez le sens de marche Action Ecran Explication Une pression sur le curseur rotatif modifie le sens de marche de la locomotive Le sens de marche modifié apparaît sur l écran Le sens de marche est lié à la locomotive Par exemple dans le cas d une locomotive à vapeur marche avant signifie cheminée en avant quel que...

Страница 234: ...l adresse de locomotive soit de nouveau affichée 3 2 5 Commutation des feux de signalisation dans le décodeur de locomotive Action Ecran Explication Cette touche 0 vous permet de commuter activer et désactiver la fonction 0 en général il s agit des feux de signalisation s inversant en fonction du sens de marche Si cette fonction est activée le symbole de lampe apparaît en bas de l écran à gauche V...

Страница 235: ...numériques à l aide du pavé numérique La règle suivante est toujours d application efface le dernier chiffre encodé abandonne l entrée complète et vous emmène à un niveau plus haut 4 2 Branchement du LH101 pendant l exploitation Le LH101 vous permet d être mobile Pendant l exploitation la fiche du régulateur LH100 peut être retirée de la douille femelle du bus XpressNet et réinsérée dans une autre...

Страница 236: ...ose d un écran à diodes rétroéclairé comportant deux lignes En fonction du statut d exploitation dans lequel vous vous trouvez la représentation de l écran est différente L affichage de l adresse de la locomotive est toujours à quatre chiffres le cas échéant avec un ou des zéros en premier lieu ...

Страница 237: ...upe de fonctions sélectionné est 2 et la fonction F21 est activée La locomotive portant l adresse 1234 se trouve dans une multitraction Le cran de vitesse est 012 sur 128 Le groupe de fonctions sélectionné est 1 et les fonctions F10 F12 et F15 sont activées La multitraction portant l adresse 33 est pilotée Le cran de vitesse est 04 sur 28 La locomotive avec l adresse 0003 est pilotée en mode manœu...

Страница 238: ...rans de vitesse à une adresse de locomotive comment utiliser l arrêt d urgence 5 1 Appel d une adresse de locomotive Lorsque vous désirez piloter une locomotive à l aide d un régulateur vous devez d abord appeler cette locomotive Il existe trois façons différentes d appeler une locomotive vous introduisez le numéro l adresse de la locomotive en vous servant du pavé numérique vous sélectionnez une ...

Страница 239: ...est que celle ci a déjà été appelée par un autre régulateur Vous pouvez évidemment transférer cette locomotive sur votre régulateur personnel Pressez simplement le curseur rotatif 5 1 2 Sélection d une adresse de locomotive dans la pile d adresses du LH101 Le régulateur LH101 dispose de ce qu on appelle une pile hébergeant des adresses de locomotive au nombre de 8 qui y sont enregistrées Le curseu...

Страница 240: ...se de locomotive ici 0003 qui y est entreposée En tournant vous finissez par arriver à la dernière adresse disponible dans la pile En pressant le curseur rotatif vous sélectionnez l emplacement et par conséquent l adresse y entreposée Si vous désirez disposer de davantage d emplacements vous pouvez utiliser un autre LH101 et entreposer dans sa pile d autres adresses de locomotive 5 1 3 Sélection d...

Страница 241: ...hée l option Mémoire centrale Confirmez la sélection C est la première adresse déposée dans la centrale qui apparaît à l écran En tournant le curseur vous feuilletez les adresses de la mémoire de la centrale La lettre précédant l adresse vous permet de reconnaître si s agit d une locomotive dans une multitraction m minuscule ou d une adresse de multitraction M majuscule Si vous pressez le curseur ...

Страница 242: ...et sur l écran apparaîtront les nouvelles données de marche et de fonctions L affichage clignote maintenant sur l écran de l autre régulateur Si vous ne désirez pas transférer la locomotive sur votre régulateur retournez à l aide de la touche Esc au pilotage de la locomotive que vous pilotiez ou choisissez une autre adresse de locomotive 5 2 Modification de la vitesse et du sens de marche de la lo...

Страница 243: ...confondez pas le mode manœuvre du LH101 avec la fonction manœuvre qui est encodé dans le décodeur de locomotive 5 2 1 Mode normal Vous pilotez la locomotive en vitesse et en sens de marche au moyen du curseur rotatif Action Ecran Explication Tourner le curseur dans le sens horaire augmente la vitesse Tourner le curseur dans le sens antihoraire diminue la vitesse éventuellement jusqu à l arrêt Au c...

Страница 244: ...z le curseur la locomotive s arrêtera avec la temporisation de freinage encodée 5 2 2 Mode manœuvre Dans le mode manœuvre vous diminuez la vitesse au moyen du curseur jusqu au cran de vitesse 1 Une pression sur le curseur arrêtera la locomotive Par conséquent vous pouvez laisser la locomotive se traîner jusqu à l endroit désiré et ensuite l arrêter par une simple pression sur le curseur C est l av...

Страница 245: ...temporisation de freinage encodée dans le décodeur Comment activer le mode manœuvre ou le désactiver est décrit dans le chapitre Réglages du mode pilotage à partir de la page 81 Pour voir si le mode manœuvre du LH101 est activé référez vous au petit point sur l écran 5 3 Activation des fonctions du décodeur de locomotive Tous les décodeurs de locomotive Digital plus by Lenz possèdent une ou plusie...

Страница 246: ...on est visible la fonction est activée s il n est pas visible la fonction est désactivée Une fonction peut être configurée pour un fonctionnement continu ou momentané page 26 5 3 1 Commutation entre les groupes de fonctions Le groupe de fonctions sélectionné est affiché en bas à gauche de l écran Action Ecran Explication Le groupe de fonctions 0 est affiché et on voit que ce sont les fonctions 0 1...

Страница 247: ...yennant une seconde pression sur la même touche La fonction est activée aussi longtemps que dure la pression sur la touche concernée Le fait de relâcher la pression sur cette touche désactive la fonction Ce réglage est enregistré dans la centrale Lors de l appel d une locomotive le régulateur demande à la centrale quel est le réglage enregistré Vous pouvez spécifier ce paramètre séparément pour ch...

Страница 248: ...intervalles réguliers et définis par la centrale aux décodeurs se trouvant sur la voie Le but est d être certain que tous les décodeurs n oublient pas l ensemble des réglages même si la liaison entre centrale et décodeur est interrompue temporairement compte tenu d une cause intentionnelle zones sans courant ou non intentionnelle encrassement de la voie des roues ou coupure de courant L interrupti...

Страница 249: ... rafraîchissement Relâchez la touche F et tournez éventuellement le curseur jusqu à ce que cet affichage apparaisse à l écran Pressez le curseur pour faire apparaître le paramètre en cours du rafraîchissement Les fonctions F0 à F8 sont cycliquement répétées En tournant vous pouvez sélectionner un autre paramètre du rafraîchissement Les fonctions F0 à F12 sont cycliquement répétées Les fonctions F0...

Страница 250: ...e Vous pouvez également choisir le mode à 28 crans de vitesse pour une adresse de locomotive et 128 crans pour une autre adresse Voici comment afficher modifier le mode pilotage par crans de vitesse Action Ecran Explication Appelez l adresse de locomotive dont vous désirez afficher ou modifier les réglages Réglez éventuellement le cran de vitesse de la locomotive sur 0 Si ce n est pas le cas le mo...

Страница 251: ... de vitesse 0 et l arrêt d urgence sont comptés comme crans de vitesse Le cran de vitesse maximal qui est donc affiché dans ce mode est par conséquent 126 5 5 Arrêt d urgence Action Ecran Explication Pressez le curseur et maintenez la pression jusqu à ce que ETEINT apparaisse à l écran Le courant est coupé sur la voie Pour rétablir le courant sur la voie pressez de nouveau le curseur jusqu à ce qu...

Страница 252: ...ques et électromagnétiques avec le système Digital plus by Lenz Action Ecran Explication Comme d habitude allez dans le menu Pilotage de locomotive Avec la touche Aiguillages signaux vous passez au menu permettant de commuter aiguillages et signaux L adresse de locomotive son sens de marche et ses crans de vitesse restent visibles sur la ligne supérieure de l écran Commencez par entrer l adresse S...

Страница 253: ... parcours que vous avez défini via la commutation des aiguillages 6 1 6 1 Affichage de la position des aiguillages 6 1 1 Utilisation de décodeurs de commutation sans rétrosignalisation C est le dernier ordre de commutation envoyé au décodeur de commutation qui est affiché L annonce sur le LH101 change automatiquement quand un deuxième LH101 ou un autre périphérique XpressNet modifie la position de...

Страница 254: ...d aiguillage d un décodeur de commutation apte à la rétrosignalisation LS100 Lors de l appel de l aiguillage le signe est par exemple affiché Pressez maintenant la touche pour changer de sorte que l affichage montre maintenant le signe si effectivement le changement a eu lieu Si ce n est pas le cas l affichage d origine reste Vous pouvez ainsi immédiatement reconnaître si l aiguillage a changé de ...

Страница 255: ...as une pression sur la touche n aura aucun effet Vous pouvez introduire une autre adresse d aiguillage en vous servant de la touche ou terminer la commutation d aiguillages et de signaux au moyen de la touche Esc Vous trouverez des informations relatives à l affichage de l état des appareils rétrosignaleurs dans le chapitre Affichage des états rétrosignalés page 60 ...

Страница 256: ...D vous devez effectuer les opérations suivantes Aiguillage 12 sur dévié Aiguillage 13 sur droit Aiguillage 14 sur dévié Au lieu de positionner les 3 aiguillages l un après l autre vous pouvez exécuter un itinéraire à la place Les itinéraires sont enregistrés dans le LH101 Avec plusieurs LH101 vous pouvez enregistrer différents itinéraires et les utiliser Dans le LH101 sont enregistrables 16 itinér...

Страница 257: ...lication Passez d abord au menu Pilotage de locomotive Avec la touche Aiguillages signaux vous passez au menu permettant de commuter aiguillages et signaux Une seconde pression sur la touche Aiguillages signaux vous permet de parvenir au menu de création ou édition suppression d itinéraires Sélectionnez à l aide du curseur l option Nouvel itinéraire Confirmez votre choix par une pression sur le cu...

Страница 258: ...tape est maintenant enregistrée L étape suivante pour l itinéraire est proposée pour une entrée Vous pouvez aller à l étape suivante de l itinéraire et encoder l adresse d aiguillage suivante ou enregistrer l itinéraire avec la touche M et passer à l encodage d un autre itinéraire l affichage reste visible 2 sec ou quitter le menu Itinéraires avec la touche Esc et retourner au menu Pilotage de loc...

Страница 259: ...ne pression sur le curseur et choisissez l itinéraire que vous désirez éditer au moyen du curseur Confirmez votre choix par une pression sur le curseur En tournant le curseur vous sélectionnez maintenant entre ces options Modifier étape voir Modifier une étape dans un itinéraire page 39 Supprimer étape voir Supprimer une étape dans un itinéraire page 40 et sélectionner Nouvelle étape voir Insérer ...

Страница 260: ...esse d aiguillage de cette étape effacez l adresse affichée et commencez par entrer la nouvelle adresse d aiguillage Une pression sur la touche Aiguillages signaux confirme l entrée 2 Vous modifiez la position à l aide de la touche M A chaque pression sur la touche M un ordre de commutation correspondant est envoyé à l aiguillage au signal Vous pouvez ainsi vérifier si vous avez choisi l aiguillag...

Страница 261: ... et confirmez votre choix en pressant le curseur La première étape dans l itinéraire sélectionné est affichée Feuilletez jusqu à l étape où vous voulez effectuer la suppression Confirmez le choix de l étape L écran affiche une question de sécurité Vous pouvez maintenant supprimer définitivement l étape choisie par une pression sur le curseur et choisir une autre étape pour le paramétrage ou avec l...

Страница 262: ...tenant comme dans Créer un nouvel itinéraire page 36 7 3 Supprimer un itinéraire Action Ecran Explication Comme d habitude allez dans le menu Pilotage de locomotive Avec la touche Aiguillages signaux vous passez au menu permettant de commuter aiguillages et signaux Une seconde pression sur la touche Aiguillages signaux vous permet de parvenir au menu de création ou édition suppression d itinéraire...

Страница 263: ...imer Une autre pression sur le curseur confirme la suppression L itinéraire sélectionné est supprimé Vous vous retrouvez maintenant dans le menu itinéraires Vous pouvez maintenant choisir une autre action dans le menu itinéraires ou retourner avec la touche Esc au menu Pilotage de locomotive ...

Страница 264: ... processus commence donc par les mêmes étapes Action Ecran Explication Comme toujours on commence par le menu Pilotage de locomotive Avec la touche Aiguillages signaux vous passez au menu permettant de commuter aiguillages et signaux En tournant le curseur vous feuilletez les divers itinéraires créés auparavant s il n y a aucun itinéraire créé l enregistreur d itinéraires est vide Lorsque vous ave...

Страница 265: ...ées dans l ordre Lorsque l itinéraire est terminé apparaît la confirmation à l écran Vous pouvez maintenant sélectionner l itinéraire suivant en tournant à nouveau le curseur ou utiliser la touche pour modifier l entrée d adresse d un aiguillage oder retourner avec la touche Esc au menu Pilotage de locomotive ...

Страница 266: ...n Aktion Ecran Explication A partir de la commande de la locomotive Avec la touche vous passez de l affichage de l état de la fonction à l affichage de l heure et retour Si l horloge du modèle est désactivée facteur 0 l information horloge est désactivée est affichée sur la ligne inférieure Lorsque vous activez ou désactivez une fonction de la locomotive c à d appuyez sur l une des touches 0 à 9 l...

Страница 267: ...t d une seule La centrale s assure que les deux locomotives de la DTR reçoivent les mêmes données La double traction fonctionne avec tous les décodeurs de locomotive DCC car aucun réglage particulier qui serait contraire n est effectué dans les décodeurs eux mêmes Le décodeur lui même n a aucune idée qu il est dans une double traction C est la différence essentielle avec la traction multiple page ...

Страница 268: ...e façon vous vous assurez que vous avez bien appelé les deux locomotives sur votre régulateur manuel et que vous leur avez conféré un ordre de marche Vérifiez bien que les deux machines ont reçu le même sens de marche Il se peut bien entendu que la flèche directionnelle d une des deux locomotives soit dirigée vers le haut et que celle de l autre machine soit dirigée vers le bas car le sens de marc...

Страница 269: ...nution du cran de vitesse inversion du sens de marche agit simultanément sur les deux locomotives Les touches qui commutent les fonctions agissent uniquement sur la locomotive dont l adresse est affichée sur l écran Si vous désirez modifier une fonction de la seconde locomotive de la double traction sélectionnez cette locomotive avec la touche Esc 10 4 Composition de deux locomotives en une double...

Страница 270: ...locomotives composant la double traction Pressez la touche M Tournez le curseur si nécessaire jusqu à ce que l écran affiche l option Double traction Une pression sur le curseur sélectionne l option Une annonce de sécurité apparaît mais vous pouvez le cas échéant quitter la procédure au moyen de la touche Esc Une autre pression sur la touche vous permet de suivre la procédure mais vous pouvez cepe...

Страница 271: ...avez tenté d introduire une locomotive conventionnelle adresse 0 dans la double traction Une des deux locomotives avec laquelle vous voulez composer la double traction a déjà été appelée par un autre régulateur Une des deux locomotives avec laquelle vous voulez composer une double traction fait déjà partie d une autre double traction Sur une des deux locomotives le cran de vitesse était différent ...

Страница 272: ...action va de 1 à 99 Lors de l assemblage d une multitraction chaque locomotive de la MTR est avisée de l adresse de multitraction celle ci est enregistrée par son décodeur à la place de son adresse propre A partir de maintenant le décodeur de chaque locomotive d une MTR entend non plus sa propre adresse mais bien celle et uniquement celle de la multitraction Mais n ayez crainte le décodeur de chaq...

Страница 273: ...mbler la MTR Vous devez avoir donné à chaque locomotive un ordre de marche avec ce régulateur c à d avoir modifié le cran de vitesse ou le sens de marche ou encore commuté une fonction Le cran de vitesse des locomotives doit être 0 lors de la composition 11 3 Composition d une multitraction Faites rouler toutes les locomotives que vous désirez intégrer dans une MTR jusqu à un endroit du réseau à p...

Страница 274: ...ue l annonce Loco MTR apparaisse Pressez le curseur pour sélectionner l option Vous voyez à l écran l invitation à entrer l adresse de multitraction Tapez l adresse de la MTR Le domaine d adresses autorisées va de 1 à 99 Si vous vous trompez pressez la touche pour corriger la dernière entrée Confirmez la sélection de l adresse de MTR en pressant le curseur En premier lieu la dernière locomotive ap...

Страница 275: ...u LH101 que vous avez déjà insérées dans une double ou une multitraction ne vous sont plus proposées à l écran 11 4 Pilotage d une multitraction Pour piloter une MTR appelez soit l adresse de MTR soit l adresse d une des locomotives faisant partie de la MTR L adresse de MTR elle même est représentée par une grosse annonce MTR en majuscules tandis que la lettre minuscule m vous informe en outre qu ...

Страница 276: ...it de l adresse de MTR lettre majuscule M affichée aucune fonction ne pourra être commutée et donc aucune fonction ne figurera sur l écran Si vous désirez modifier une fonction d une locomotive insérée dans une MTR vous devez d abord appeler celle ci voyez le chapitre suivant à ce sujet Une fois ceci fait vous pourrez activer ou désactiver une ou plusieurs de ses fonctions 11 5 Affichage des membr...

Страница 277: ...ion sur le curseur 11 6 Suppression d une locomotive dans une MTR Vous pouvez supprimer simplement de la MTR chaque locomotive se trouvant dans cette MTR Lors de la suppression d une locomotive dans une MTR cette dernière doit se trouver sur les rails Les ordres spécifiques à une MTR sont envoyés via les rails et ne peuvent donc parvenir aux décodeurs que de cette façon Si l ordre envoyé au décode...

Страница 278: ...édiatement proposée Une pression sur le curseur sélectionne l option Le cas échéant tournez le curseur pour effacer l annonce Supprimer les locomotives MTR Après la pression sur le curseur les locomotives présentes dans la MTR sont affichées En tournant le curseur sélectionnez l adresse de locomotive que vous désirez supprimer de la MTR Une pression sur le curseur confirme votre sélection et la lo...

Страница 279: ...ct ou enlèvement de la locomotive des rails l adresse MTR ne sera pas supprimée dans le décodeur et la locomotive ne pourra pas rouler sous sa propre adresse Aktion Ecran Explication Appelez la multitraction que vous désirez supprimer Pressez la touche M Cela déclenche aussitôt l affichage de l option Multitraction Pressez le curseur pour sélectionner l option Le cas échéant tournez le curseur pou...

Страница 280: ...marche Vous avez tenté d introduire une locomotive conventionnelle adresse 0 dans la MTR Error 25 Une des deux locomotives avec laquelle vous voulez composer une MTR a déjà été appelée par un autre régulateur Error 26 Une des deux locomotives avec laquelle vous voulez composer une MTR fait déjà partie d une autre MTR Error 27 Sur une des deux locomotives le cran de vitesse était différent de 0 au ...

Страница 281: ... corrigez votre entrée au moyen de la touche Après une pression sur le curseur le régulateur interroge la centrale au sujet des états du module de rétrosignalisation et affiche ensuite le résultat Sur la ligne supérieure de l écran apparaît maintenant l adresse 39 du module de rétrosignalisation Sur la ligne inférieure sont affichés les états des 8 entrées Ici on peut constater que les chiffres 1 ...

Страница 282: ...sse l écran vous montrera ceci Si vous pressez la touche vous pourrez alors introduire l adresse d un autre module de rétrosignalisation Le domaine d adresses autorisées pour l encodage des adresses de rétrosignalisation va de 1 à 128 Si vous introduisez une adresse plus petite ou plus grande l écran vous invitera de nouveau à introduire une adresse de rétrosignalisation ...

Страница 283: ...adresse de la locomotive sur la fiche n 1 et la temporisation de démarrage sur la fiche nº 3 Il existe donc une fiche pour chacune des propriétés du décodeur En fonction du nombre de propriétés disponibles dans le décodeur le fichier est donc plus ou moins gros Sur chaque fiche on trouve une valeur de nombre faisant partie d un domaine dont les valeurs vont de 0 à 255 Etant donné que vous pouvez à...

Страница 284: ...euvent être ouverts ou fermés On appelle ces commutateurs des bits Si le commutateur est activé on dit que le bit est inscrit ou que le bit est 1 Si le commutateur est désactivé on dit que le bit est effacé ou que le bit est 0 Exemple représentation binaire de la CV 29 Dans cette CV sont enregistrés divers réglages Si un réglage déterminé est activé ou désactivé un des 8 sélecteurs bits est fixé c...

Страница 285: ...saire de connaître l adresse du décodeur Avec ce procédé le décodeur reçoit par exemple l ordre suivant Ecrivez la valeur 15 dans la CV 4 Tout décodeur qui reçoit cet ordre l exécutera également 13 1 2 Quand faut il programmer sur la voie de programmation Toujours quand vous désirez modifier l adresse d un décodeur de locomotive En outre il existe des décodeurs Digital plus by Lenz qui n acceptent...

Страница 286: ...finiert 13 2 1 Quelles propriétés peut on modifier avec la PoM A l exception de l adresse de base dans la CV 1 et des adresses élargies dans les CV 17 et 18 toutes les CV présentes dans un décodeur de locomotive peuvent être modifiées avec la PoM Procédez avec précaution en tenant compte de ces exceptions car en cas de programmation erronée d une mauvaise CV la locomotive risque de ne plus reparti...

Страница 287: ...locomotive dont vous désirez modifier les propriétés Aktion Ecran Explication Appelez la locomotive dont vous désirez modifier les propriétés au moyen de la PoM Pressez la touche Locomotive Pressez la touche M La dernière option utilisée vous est proposée ici dans l exemple c est le choix de la locomotive dans la mémoire de la centrale Tournez maintenant le curseur pour faire apparaître l annonce ...

Страница 288: ...pouvez introduire la valeur souhaitée soit la valeur 6 dans cet exemple En pressant la touche Locomotive vous confirmez l entrée et retournez au début du processus d encodage Il vous est loisible aussi de presser le curseur Une fois le processus terminé la valeur actuelle de la CV est affichée Vous pouvez maintenant modifier la valeur affichée au moyen du curseur La nouvelle valeur est aussitôt in...

Страница 289: ...ion Quelques conditions sont à respecter utilisation de décodeurs avec la fonctionnalité RailCom intégrée la locomotive concernée doit se trouver dans une section de voie contrôlée par l indicateur d adresse LRC120 l option d envoi de RailCom doit être activée dans le décodeur concerné Vous obtiendrez des compléments d information au sujet des décodeurs de locomotive possédant la fonctionnalité Ra...

Страница 290: ...n pendant l exploitation PoM Pressez le curseur pour sélectionner l option PoM S ensuit une invitation à entrer la CV dont vous désirez modifier la valeur par la PoM Entrez le numéro de la CV via le pavé numérique et terminez l entrée par une pression sur le curseur Sur l indicateur d adresse LRC120 est maintenant affichée la valeur de la CV3 pendant 3 secondes Tout à fait à gauche la lettre c cli...

Страница 291: ...les bits est la CV 29 Dans l exemple suivant nous allons modifier au moyen de la PoM la CV29 dans la locomotive portant l adresse 03 Aktion Ecran Explication Appelez la locomotive dont vous désirez modifier les propriétés au moyen de la PoM Pressez la touche Locomotive Pressez la touche M La dernière option utilisée vous est proposée ici dans l exemple il s agit de l encodage du mode de pilotage p...

Страница 292: ...le curseur pour déterminer si vous voulez inscrire 1 ou effacer 0 le bit Démarrez la programmation par une pression sur le curseur Pendant la programmation apparaît cette annonce En pressant Esc vous retournez au choix du bit une autre pression sur Esc vous propose le choix de la CV Sélectionnez maintenant une autre CV que vous voulez modifier ou retournez au menu Pilotage de locomotive ...

Страница 293: ...en outre ce procédé est valable pour toutes les adresses Programmation de la CV Vous utilisez ce menu pour toutes les autres CV auxquelles vous désirez apporter des modifications Programmation du mode Registre Ce type de programmation est utilisé pour les anciens décodeurs qui n ont pas encore implémenté la programmation CV 13 3 1 Qu est ce qu une voie de programmation Beim Programmieren auf dem P...

Страница 294: ...onnecte la voie de programmation le décodeur Les centrales Digital plus LZ100 LZV100 et LZV200 disposent de bornes de connexion spéciales pour la voie de programmation ou pour le décodeur Ces bornes sont désignées par les lettres P et Q Pour en savoir davantage consultez la notice accompagnant la centrale concernée 13 3 3 Lecture et modification d une adresse de locomotive Procédure pas à pas pour...

Страница 295: ...resse désirée au moyen du pavé numérique avec la touche vous pouvez effacer un chiffre erroné entré par erreur et terminer l encodage en pressant la touche Locomotive L adresse de locomotive souhaitée est maintenant inscrite dans le décodeur de locomotive L écriture étant menée à son terme l adresse est affichée Si une erreur est commise durant l écriture une annonce d erreur est affichée page 80 ...

Страница 296: ... se font automatiquement dans le décodeur de locomotive Lors de la lecture de l adresse si vous obtenez l annonce C est que l adresse de multitraction 33 est programmée dans le décodeur de locomotive avec l adresse 5678 et que la locomotive est exploitée avec l adresse MTR 33 Si dans ce cas vous encodez et inscrivez une nouvelle adresse l adresse MTR sera effacée 13 3 4 Lecture et programmation d ...

Страница 297: ...mer l entrée en pressant la touche Locomotive La CV est aussitôt lue et le résultat affiché Vous avez maintenant les possibilités suivantes a entrer une nouvelle valeur dans la CV ou b passer à l affichage binaire et modification de la valeur ou c sélectionner une autre CV ou d retourner au menu Pilotage de locomotive 13 3 4 1 Affichage binaire au moyen de bits de la valeur de CV et modification V...

Страница 298: ...e binaire bits au lieu de la valeur décimale Vous voyez maintenant sur la ligne inférieure de l écran quels sont les bits inscrits Pour la valeur décimale 10 on peut lire que sont inscrits les bits 2 et 4 on compte à partir de 1 Si vous désirez entreprendre des modifications pressez les chiffres correspondants sur le pavé numérique Dans l exemple suivant le bit 1 doit être inscrit et le bit 2 effa...

Страница 299: ...pas dépasser la plage de valeurs autorisées du décodeur Si nécessaire reportez vous au mode d emploi du décodeur Les CV7 numéro de version et CV8 numéro de fabricant peuvent uniquement être lues mais pas écrites 13 3 5 Lecture et programmation d un registre Aktion Ecran Explication Le point de départ est le contrôle des locomotives Aller au menu général Sélectionner le point de menu correspondant ...

Страница 300: ...re à l aide des touches avec la touché vous pouvez effacer un caractère mal tapé et confirmer l entrée en appuyant sur la touche Lok Le registre est maintenant lu immédiatement et le résultat s affiche Vous disposez maintenant des options suivantes a Entrer une autre valeur dans le registre ou b Passer en affichage binaire et modifier la valeur La procédure est la même que pour la programmation d ...

Страница 301: ...détectée une surcharge de courant court circuit Il est possible que le décodeur soit mal raccordé ou défectueux Error 2 Lors de la programmation ou de la lecture d un décodeur celui ci ne réagit pas c est à dire que le décodeur est éventuellement mal raccordé à la sortie programmation de la centrale LZ100 LZV100 par exemple la locomotive digitale ne se trouve pas sur la voie de programmation Press...

Страница 302: ...vre Ici en tournant le curseur vous revenez jusqu au cran de vitesse 1 L arrêt se fait en pressant le curseur Laissez la locomotive se traîner jusqu à l endroit désiré et pressez le curseur pour l arrêter L avantage de ce mode lors des manœuvres est que vous pouvez sans devoir regarder la position du curseur laisser rouler la locomotive avec la plus petite vitesse sans danger que la locomotive s a...

Страница 303: ...101 à chaque modéliste qui n est pas familiarisé avec ce régulateur vous pouvez occulter la plupart des options pour faciliter le maniement Ou encore vous voulez empêcher un coéquipier de sélectionner une locomotive différente de celle qui peut lui être assignée et ou encore régler d autres paramètres du système Vous avez à votre disposition trois modes différents dans ce but Mode 1 Il est seuleme...

Страница 304: ...ode 0 Notez le mot de passe Si vous oubliez le mot de passe il n est plus possible de parvenir au mode 0 Si vous oubliez votre mot de passe et désirez de l aide contactez notre support 14 2 1 Paramétrage des modes Club 1 ou 2 Aktion Ecran Explication Sélectionnez l adresse de locomotive qui doit être servie par le mode Club 1 ou 2 Pressez la touche M Tournez le curseur jusqu à ce que l option Setu...

Страница 305: ... un numéro à 4 chiffres comme mot de passe Pour conclure pressez le curseur Le LH101 retourne automatiquement au mode Pilotage de locomotive 14 2 2 Paramétrage du mode 0 Si vous désirez renvoyer dans le mode normal un LH101 qui se trouve déjà dans le mode Club 1 ou 2 procédez comme suit Aktion Ecran Explication A partir du mode Pilotage de locomotive l adresse ou le cran de vitesse est affiché pre...

Страница 306: ... de locomotives qui affiche l adresse de locomotive ou le cran de vitesse Suivez encore une fois la procédure décrite ci dessus et encodez le bon mot de passe 14 3 Mode de comptage des bits Dans le chapitre Inscription et effacement de bits dans une CV nous avons décrit la façon de modifier les bits dans les CV Voici maintenant une notion importante pour compter les bits on commence par 1 Avec cer...

Страница 307: ...rage actuel est affiché Tournez le curseur pour établir la sélection entre les deux options et confirmez votre choix par une pression Vous revenez au Setup du LH101 et au menu Pilotage de locomotive 14 4 Luminosité de l écran Avec cette option vous pouvez régler la luminosité de l écran rétroéclairé Aktion Ecran Explication En sortant du menu Pilotage de locomotive pressez la touche M ...

Страница 308: ...Pressez le curseur pour sélectionner cette option Tournez le curseur pour faire apparaître l option Luminosité écran Une pression sur le curseur sélectionne cette option Tournez le curseur pour régler la luminosité de l écran Vous jugez aussitôt du résultat Confirmez le réglage en pressant le curseur ...

Страница 309: ...e curseur pour afficher l option Setup LH101 Pressez le curseur pour sélectionner cette option Tournez le curseur pour afficher l option Contraste écran Une pression sur le curseur sélectionne cette option Tournez le curseur pour régler le contraste de l écran Le résultat est aussitôt visible Confirmez le réglage par une pression sur le curseur ...

Страница 310: ...ez la touche M Tournez le curseur pour afficher l option Setup LH101 Pressez le curseur pour sélectionner cette option Tournez le curseur pour afficher l option Afficher numéro de version Une pression sur le curseur affiche la version Chaque pression sur le touche Esc vous fait remonter dans le menu jusqu à revenir au menu Pilotage de locomotive ...

Страница 311: ...n peut procéder à la distribution des adresses 1 à 31 Chaque régulateur LH101 est en usine réglé sur l adresse 01 Si vous désirez mettre en service deux ou plusieurs régulateurs vous devrez attribuer à chaque régulateur une adresse propre Aktion Ecran Explication Pour sortir du menu Pilotage de locomotive pressez la touche M Tournez le curseur pour afficher l option Setup LH101 Pressez le curseur ...

Страница 312: ... Ecran Explication Pour sortir du menu Pilotage de locomotive pressez la touche M Tournez le curseur pour afficher l option Setup LH101 Pressez le curseur pour sélectionner cette option Tournez le curseur pour afficher l option Réinitialiser les réglages d usine Une question de sécurité apparaît mais vous pouvez l annuler au moyen de la touche Esc Une autre pression sur le curseur confirme le reto...

Страница 313: ...d un itinéraire sont envoyés à la centrale Le domaine va de 250ms 0 25s à 1500ms 1 5s Le réglage d usine est 500ms Si vous ne devez pas commuter d aiguillage dans un itinéraire augmentez l intervalle par pas de 100 ms Aktion Ecran Explication Pour sortir du menu Pilotage de locomotive pressez la touche M Tournez le curseur pour afficher l option Setup LH101 Pressez le curseur pour sélectionner cet...

Страница 314: ...s effectuées vous passez à un niveau supérieur dans le menu jusqu à ce que vous arriviez au menu Pilotage de locomotive 14 10 Choix de langue Cette option de menu est disponible à partir de la version 1 02 Dans le réglage d usine la langue par défaut est Deutsch Dans le menu Choix de langue vous pouvez changer la langue en Français Ce réglage restera mémorisé jusqu à ce que le LH101 soit réinitial...

Страница 315: ...ce que l option Sprachauswahl s affiche Choisissez cette option en appuyant sur le bouton rotatif Tournez le bouton rotatif jusqu à ce que la langue Français s affiche Appuyer sur le bouton rotatif pour sélectionner la langue Vous verrez cet affichage pendant quelques secondes après quoi le LH101 reviendra automatiquement à la commande de la locomotive ...

Страница 316: ... semaine les heures et les minutes et le facteur temps Si le facteur temps 0 le temps est désactivé le facteur 1 est la vitesse normale le facteur 2 est la double vitesse etc jusqu au facteur 31 La montre modèle ne fonctionne que lorsque votre LZV200 est en marche Si le LZV200 est éteint l horloge du modèle est également arrêtée La dernière heure du modèle reste enregistrée dans le LZV200 Si la mo...

Страница 317: ...l unité de commande Appuyez sur le bouton rotatif pour sélectionner le jour de la semaine Le curseur clignote derrière l affichage du jour A l aide du bouton rotatif sélectionnez le jour de la semaine souhaité confirmer la sélection en appuyant sur le bouton rotatif Sélectionner le réglage des heures à l aide du bouton rotatif et confirmer la sélection en appuyant sur le bouton rotatif Réglez l he...

Страница 318: ...cteur de temps Appuyer sur le bouton rotatif régler le facteur de temps souhaité et confirmer en appuyant sur le bouton rotatif En appuyant sur la touche M les réglages sont mémorisés dans la centrale LZV200 A la fin de l opération d écriture le LH101 revient au menu regler l horloge Appuyez sur Esc pour revenir au système de configuration une autre pression puis retour à la commande de la locomot...

Страница 319: ...che M pour passer au menu général Tournez le curseur pour afficher l option Installation du système et sélectionnez le mode AUTO Pressez le curseur pour sélectionner cette option Le cas échéant tournez le curseur jusqu à ce que l option AUTO soit visible L écran affiche la statut actuel du mode AUTO à la sortie d usine le mode est désactivé Tournez le curseur pour modifier le réglage que vous conf...

Страница 320: ...ans la centrale LZ100 LZV100 LZV200 En revanche les informations relatives au sens de marche et aux fonctions restent inchangées 15 3 Affichage du numéro de version du système Aktion Ecran Explication Pour sortir du menu Pilotage de locomotive pressez la touche M Tournez le curseur pour faire apparaître l option Installation du système Pressez le curseur pour sélectionner cette option Tournez le c...

Страница 321: ...esses qu il ne faut dans le but d optimiser le temps de réaction vous pouvez effacer dans la mémoire les adresses non nécessaires pour les besoins de l exploitation Pour effacer une adresse de locomotive dans la mémoire de la centrale procédez comme suit Aktion Ecran Explication Pour sortir du menu Pilotage de locomotive pressez la touche M Tournez le curseur pour faire apparaître l option Install...

Страница 322: ...e de locomotive que vous désirez supprimer en tournant le curseur et confirmez votre choix par une pression sur le curseur En pressant plusieurs fois la touche Esc vous revenez au menu Pilotage de locomotive Annonces d erreur possibles Aucune adresse de locomotive n est encore enregistrée dans la mémoire de la centrale Après un court moment le message disparaît automatiquement et vous êtes de reto...

Страница 323: ...nterface intégrée dans le LZV200 peut être réglée Les variables de service disponibles et leur utilisation sont décrites dans la notice d utilisation du LZV200 Aktion Ecran Explication Pour sortir du menu Pilotage de locomotive pressez la touche M Tournez le curseur pour faire apparaître l option Système d instal Pressez le curseur pour sélectionner l option Tourner le bouton jusqu à ce que l opti...

Страница 324: ...a touche Loco Le réglage actuel de la VS est affiché Vous pouvez maintenant supprimer la valeur affichée et saisissez une nouvelle valeur Complétez la saisie avec la touche Loco Avec Esc vous pouvez revenir à l entrée d un autre SV ou pas à pas revenir à la commande des locomotives ...

Страница 325: ...de la lecture d un décodeur aucune information n est trouvée c est à dire que le décodeur est éventuellement mal raccordé à la sortie programmation de la centrale LZ100 LZV100 par exemple la locomotive digitale ne se trouve pas sur la voie de programmation Error 24 DTR MTR La locomotive n a pas été appelée ou il s agit de l adresse de locomotive 0 Error 25 DTR MTR La locomotive a été appelée par u...

Страница 326: ...le Voyez dans ce cas votre revendeur ou la firme Lenz Elektronik pour un remplacement de pile Error 98 L ordre transmis du régulateur vers la centrale n est pas disponible dans le stock d ordres La raison est généralement une version du logiciel de la centrale qui ne soutient pas cet ordre Error 99 Erreur générale du système Le régulateur n a pas reçu la réponse attendue suite à une demande ou à u...

Страница 327: ...106 Mode d emploi LH101 16 2 Itinéraires Formulaire Itinéraire n ____ Itinéraire n ____ Etape Adresse Etape Adresse 1 2 3 4 5 6 7 8 9 10 11 12 13 14 15 16 ...

Страница 328: ... page 26 ou réglez le décodeur sur 28 crans de vitesse CV 29 bit 2 inscrit Les feux de la locomotive F0 ne réagissent pas si on presse la touche Le mode de pilotage est réglé sur 28 crans de vitesse mais dans votre système l adresse concernée est réglée sur 14 crans de vitesse Modifiez le mode de pilotage du décodeur dans le système sur 28 crans de vitesse page 28 ou réglez le décodeur sur 14 cran...

Страница 329: ...r Un amplificateur a déclenché l arrêt à cause d un court circuit ou d une surcharge Éliminez le court circuit En cas de surcharge de courant divisez votre réseau en plusieurs zones alimentées séparément Voyez à ce sujet le chapitre Alimentation en courant d un réseau miniature dans le mode d emploi accompagnant la centrale LZV100 ou l amplificateur LV102 16 4 Structure arborescente des options du...

Страница 330: ... loco Programmer CV Setup LH101 Régler mode pilotage Mode Club Mode de comptage par bits Luminosité écran Contraste écran Afficher numéro de version Régler adresse XpressNet Retour aux réglages d usine Durée itinéraires Setup système Mode AUTO Afficher numéro de version du système Supprimer adresse loco dans la mémoire de centrale ...

Страница 331: ...lité pour des dommages et conséquences de dommages suite à un emploi des produits non conforme à la destination à un non respect du mode d emploi à une exploitation autre que dans un chemin de fer miniature avec des transformateurs de courant modifiés ou détériorés ou bien d autres appareils électriques à une intervention autoritaire à une action violente à une surchauffe à une action humide entre...

Отзывы: